NOISE FILTER REMOVAL

-
REMOVE REAR SEATBACK ASSEMBLY
-
REMOVE REAR DOOR SCUFF PLATE LH
-
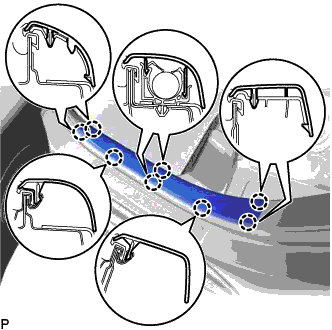
Disengage the 8 claws and remove the rear door scuff plate LH.
-
-
REMOVE REAR SEAT SIDE GARNISH LH
-
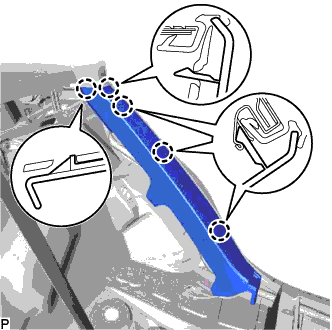
Disengage the 5 claws and remove the rear seat side garnish LH.
-
-
REMOVE RADIO SETTING CONDENSER (for High Mounted Stop Light)
Note
When the terminal cover is removed, the radio setting condenser must be replaced because the terminal cover and condenser are supplied as a set.
-
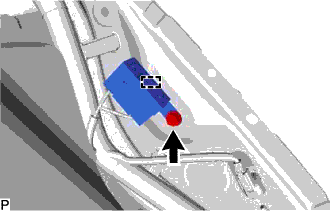
Remove the bolt.
-
Disengage the clamp and disconnect the radio setting condenser with wire harness from the vehicle body.
-
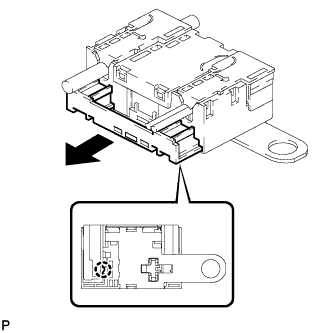
Disengage the claw and pull out the cover as shown in the illustration.
-
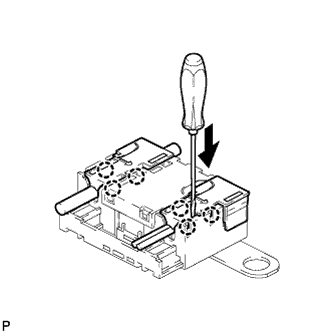
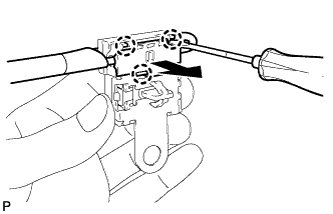
Using a screwdriver, disengage the 6 claws and remove the 2 terminal covers with wire harness from the condenser.
-
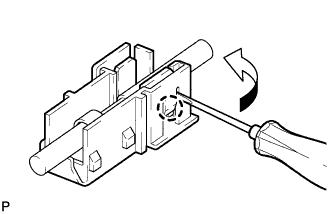
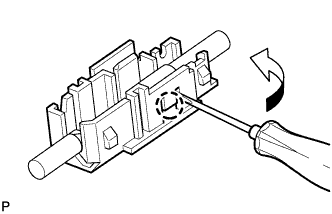
Using a screwdriver, bend back and break off the claw as shown in the illustration.
-
Remove the terminal cover from the wire harness.
Note
-
Make sure to hold the crimping side of the terminal when disconnecting the wire harness from the terminal cover.
-
Make sure not to bend the exposed wire when disconnecting the wire harness from the terminal cover.
-
Check for deformation of the terminal after the wire harness has been removed from the terminal cover.
-
-
-
REMOVE ROOF SIDE INNER GARNISH ASSEMBLY LH (for Window Defogger)
-
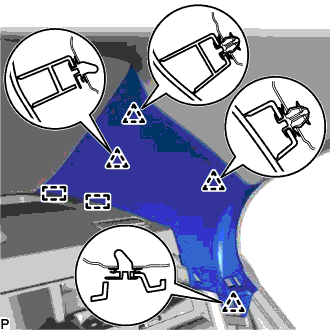
Disengage the 4 clips.
-
Disengage the 2 guides and remove the roof side inner garnish assembly LH.
-
-
REMOVE RADIO SETTING CONDENSER (for Window Defogger)
Note
When the terminal cover is removed, the radio setting condenser must be replaced because the terminal cover and condenser are supplied as a set.
-
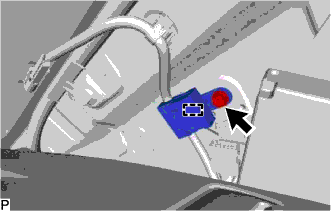
Remove the bolt.
-
Disengage the clamp and disconnect the radio setting condenser with wire harness from the vehicle body.
-
Using a screwdriver, disengage the 3 claws and remove the terminal cover with wire harness from the condenser.
-
Using a screwdriver, bend back and break off the claw as shown in the illustration.
-
Remove the terminal cover from the wire harness.
Note
-
Make sure to hold the crimping side of the terminal when disconnecting the wire harness from the terminal cover.
-
Make sure not to bend the exposed wire when disconnecting the wire harness from the terminal cover.
-
Check for deformation of the terminal after the wire harness has been removed from the terminal cover.
-
-