WATER PUMP REMOVAL

-
REMOVE V-RIBBED BELT
-
DRAIN ENGINE COOLANT
Note
Do not remove the radiator cap sub-assembly, cylinder block drain cock plugs and radiator drain cock plug while the engine and radiator assembly are still hot. Pressurized, hot engine coolant and steam may be released and cause serious burns.
-
Loosen the radiator drain cock plug.
-
Loosen the 2 cylinder block drain cock plugs.
-
Remove the radiator cap sub-assembly.
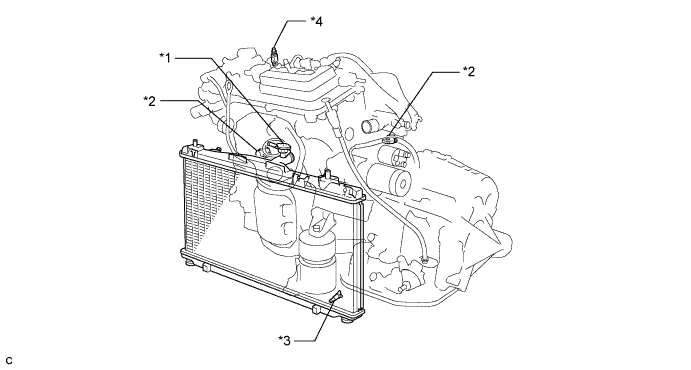
Text in Illustration *1 Radiator Cap Sub-assembly *2 Cylinder Block Drain Cock Plug *3 Radiator Drain Cock Plug *4 Air Drain Cock Plug Tech Tips
Collect the engine coolant in a container and dispose of it according to the regulations in your area.
-
-
DISCONNECT NO. 2 RADIATOR HOSE
-
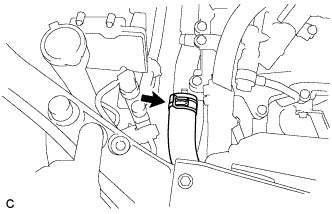
Disconnect the No. 2 radiator hose.
-
-
REMOVE NO. 2 ENGINE MOUNTING STAY RH (for Engine Mounting Stay Side)
-
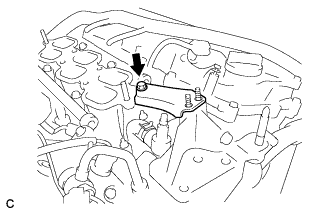
Remove the bolt and No. 2 engine mounting stay RH.
-
-
REMOVE NO. 2 ENGINE MOUNTING STAY RH (for Intake Manifold Side)
-

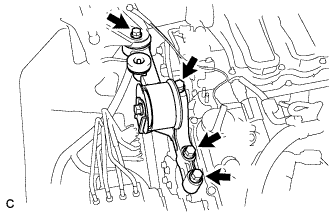
Remove the bolt, 2 nuts and No. 2 engine mounting stay RH.
-
-
REMOVE ENGINE MOVING CONTROL ROD SUB-ASSEMBLY
-
Remove the 4 bolts and engine moving control rod sub-assembly.
-
-
REMOVE NO. 2 TIMING GEAR COVER
-
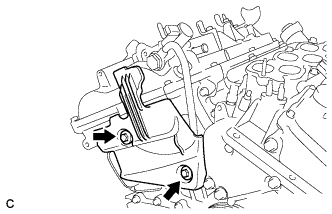
Remove the 2 bolts and No. 2 timing gear cover.
-
-
REMOVE FRONT NO. 1 ENGINE MOUNTING BRACKET LH
-
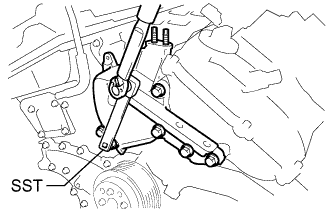
Using SST, remove the bolt.
- SST
- 09961-00950
Tech Tips
There is not enough clearance to completely remove the bolt from the front No. 1 engine mounting bracket LH. Remove the front No. 1 engine mounting bracket LH together with the bolt.
-
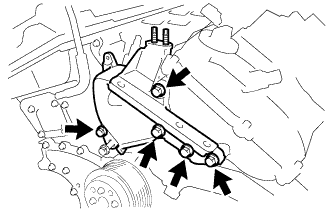
Remove the 5 bolts and front No. 1 engine mounting bracket LH.
-
-
REMOVE NO. 2 IDLER PULLEY SUB-ASSEMBLY
-

Remove the bolt, No. 2 idler pulley cover plate, No. 2 idler pulley sub-assembly and idler pulley cover plate.
-
-
REMOVE V-RIBBED BELT TENSIONER PULLEY
-
Remove a 5 mm bi-hexagon wrench.
-
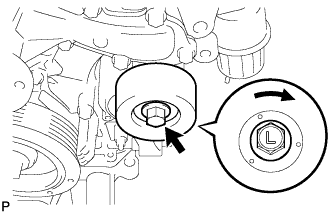
Remove the bolt, V-ribbed belt tensioner pulley and dust shield.
Note
-
Do not turn the bolt labeled "L" counterclockwise.
-
Store the V-ribbed belt tensioner pulley so that the bearing does not get damaged.
-
-
-
REMOVE WATER INLET HOUSING
-
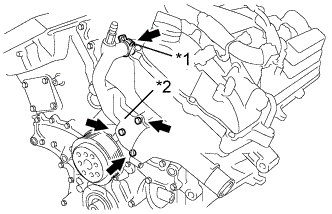
Text in Illustration *1 Water Hose *2 Water Inlet Housing Disconnect the water hose.
-
Remove the 2 bolts, nut and water inlet housing.
-
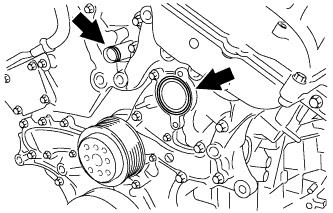
Remove the 2 O-rings.
-
-
SEPARATE WATER PUMP PULLEY
-
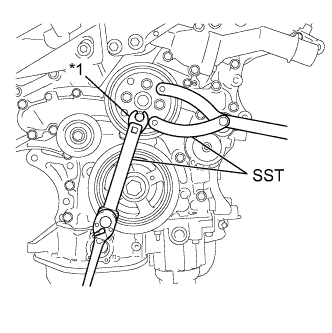
Text in Illustration *1 Union Nut Wrench Using SST, hold the water pump pulley.
- SST
- 09960-10010 ( 09962-01000, 09963-00700 )
-
Using SST and a union nut wrench (12 mm), remove the 4 bolts and separate the water pump pulley from the engine water pump assembly.
- SST
- 09961-00950
Tech Tips
There is not enough clearance to completely remove the water pump pulley from the water pump shaft. Remove the water pump pulley together with the engine water pump assembly.
-
-
REMOVE ENGINE WATER PUMP ASSEMBLY
-

Remove the 16 bolts, engine water pump assembly, water pump pulley and gasket.
-