CANISTER REMOVAL

-
REMOVE FUEL SUCTION TUBE WITH PUMP AND GAUGE ASSEMBLY
-
REMOVE FUEL SENDER GAUGE ASSEMBLY
-
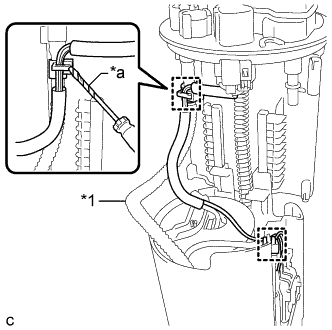
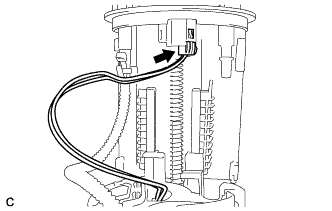
Text in Illustration *1 Tube *a Protective Tape Using a screwdriver with its tip wrapped in protective tape, disconnect the wire harness clamp as shown in the illustration.
Note
Do not damage the tube and wire harness.
-
Disconnect the wire harness clamp.
Note
Do not damage the wire harness.
-
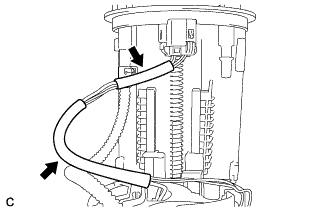
Remove the 2 wire harness protectors from the wire harness.
Note
Do not damage the wire harness.
-
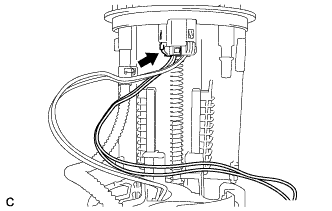
Disconnect the connector of the fuel sender gauge assembly.
-
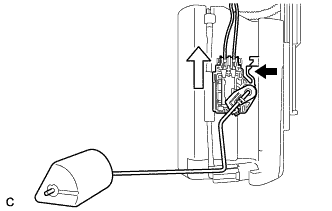
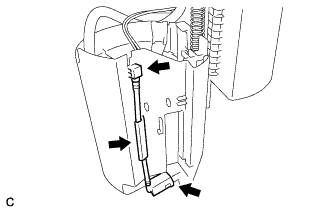
Release the lock as shown in the illustration and slide the fuel sender gauge assembly to remove it.
-
-
REMOVE FUEL PUMP WITH FILTER ASSEMBLY
-
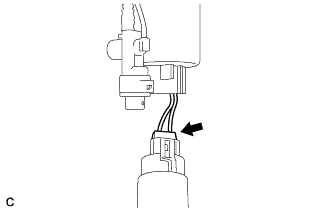
Disconnect the connector of the fuel pump harness.
-
Disconnect the fuel pump filter hose.
-
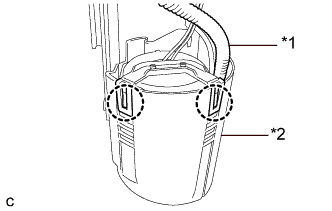
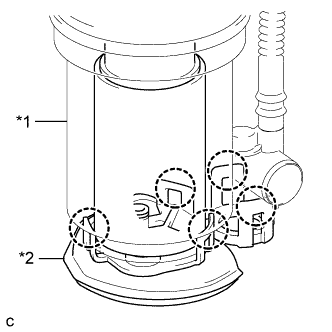
Text in Illustration *1 Tube *2 Fuel Sub-tank Using a screwdriver with its tip wrapped in protective tape, disengage the 2 claws, and remove the fuel filter and fuel pump with filter assembly from the fuel sub-tank.
Note
Do not do anything which may separate the tube from either the fuel suction plate sub-assembly or fuel filter, such as applying excessive force to the tube Click here.
-
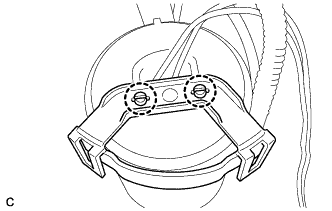
Using a screwdriver with its tip wrapped in protective tape, disengage the 2 claws and remove the No. 1 fuel suction support.
-
Text in Illustration *1 Fuel Filter *2 Suction Filter Using a screwdriver with its tip wrapped in protective tape, disengage the 5 claws, and remove the fuel pump with filter assembly from the fuel filter.
Note
-
Do not damage the fuel filter.
-
Do not remove the suction filter.
-
Do not use either the fuel pump or the suction filter if the suction filter is removed from the fuel pump.
-
-
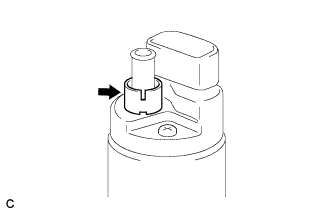
Disconnect the fuel pump harness connector.
-
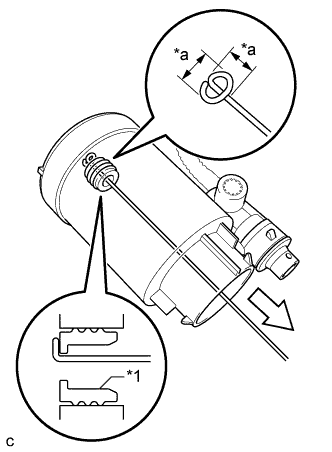
Text in Illustration *1 Fuel Pump Filter Seal *a 5.0 mm (0.197 in.) Remove the fuel pump filter seal from the fuel pump with filter assembly. If the fuel pump filter seal still remains in the fuel filter, remove it using a wire tip (1 mm diameter) that is formed as shown in the illustration.
Note
Be careful not to damage the sealing surface.
-
Remove the fuel pump spacer from the fuel pump with filter assembly.
-
-
REMOVE FUEL PRESSURE REGULATOR ASSEMBLY
-
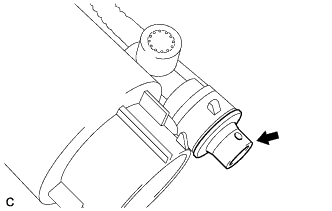
Using a screwdriver with its tip wrapped in protective tape, remove the fuel pressure regulator assembly.
Note
Slowly pull out the fuel pressure regulator assembly because the O-ring is firmly installed between the fuel pressure regulator assembly and the fuel filter.
-
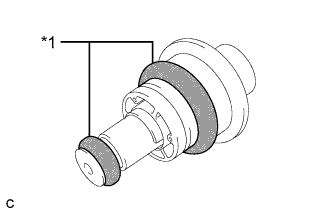
Text in Illustration *1 O-ring Remove the 2 O-rings from the fuel pressure regulator assembly.
-