INTEGRATION RELAY REMOVAL
PROCEDURE
-
PRECAUTION
Note
After turning the power switch off, waiting time may be required before disconnecting the cable from the negative (-) auxiliary battery terminal. Therefore, make sure to read the disconnecting the cable from the negative (-) auxiliary battery terminal notices before proceeding with work Click here.
-
REMOVE LUGGAGE TRIM SERVICE HOLE COVER
-
DISCONNECT CABLE FROM NEGATIVE AUXILIARY BATTERY TERMINAL
Note
When disconnecting the cable, some systems need to be initialized after the cable is reconnected Click here.
-
REMOVE NO. 1 RELAY BLOCK COVER
-
Disengage the 2 claws and remove the No. 1 relay block cover as shown in the illustration.
-
-
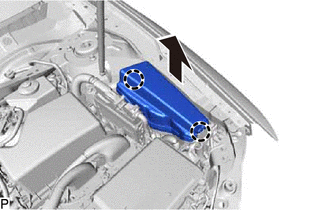
REMOVE ENGINE ROOM JUNCTION BLOCK ASSEMBLY
-
Disengage the 2 claws as shown in the illustration.
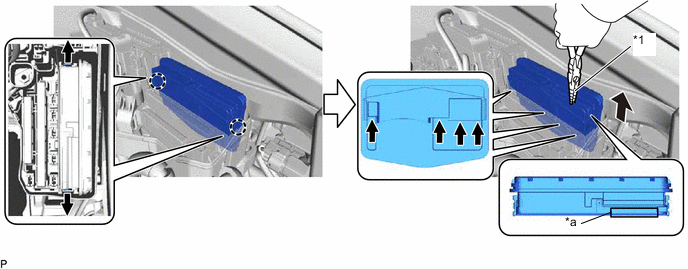
Text in Illustration *1 Protective Tape - - *a Pulled Position - - -
Using pliers, pull up the engine room junction block assembly at the position indicated in the illustration and disconnect the 4 connectors from the engine room junction block assembly.
Note
When pulling the engine room junction block assembly, take care not to damage it.
Tech Tips
Tape the tip of the pliers before use.
-
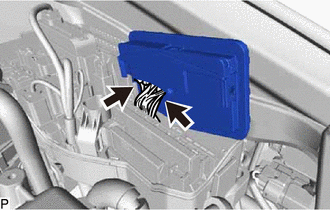
Disconnect the 2 connectors and remove the engine room junction block assembly.
Note
-
Do not drop or allow any impact on parts.
-
Do not touch the connector.
-
-