PROCEDURE
- Click here
REMOVE FRONT SEAT ASSEMBLY LH
- Click here
REMOVE AUDIO AMPLIFIER COVER
-
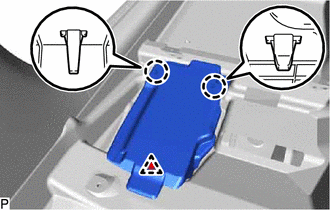
Using a clip remover, remove the clip.
-
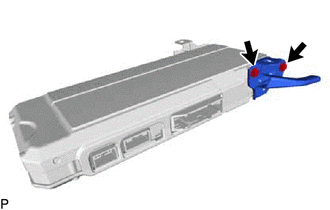
Disengage the 2 claws and remove the audio amplifier cover.
-
- Click here
REMOVE STEREO COMPONENT AMPLIFIER ASSEMBLY WITH BRACKET
-
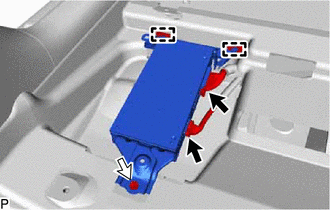
Disconnect each connector.
-
Remove the bolt.
-
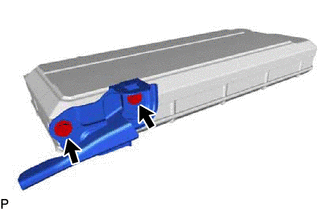
Disengage the 2 guides and remove the stereo component amplifier assembly with bracket.
-
- Click here
REMOVE NO. 2 AMPLIFIER BRACKET (for 8 Speakers)
-
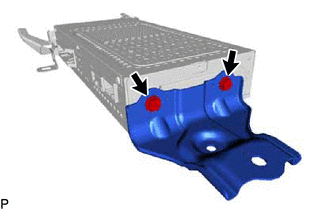
Remove the 2 screws and No. 2 amplifier bracket.
-
- Click here
REMOVE NO. 1 AMPLIFIER BRACKET (for 8 Speakers)
-
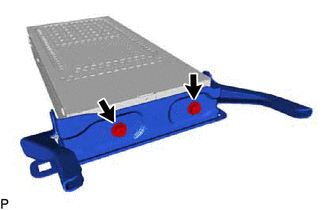
Remove the 2 screws and No. 1 amplifier bracket.
-
- Click here
REMOVE NO. 2 AMPLIFIER BRACKET (for 15 Speakers)
-

Remove the 2 screws and No. 2 amplifier bracket.
-
- Click here
REMOVE NO. 1 AMPLIFIER BRACKET (for 15 Speakers)
-
Remove the 2 screws and No. 1 amplifier bracket.
-
- Click here
REMOVE NO. 1 AMPLIFIER BRACKET (for 15 Speakers)
-
Remove the 2 screws and No. 1 amplifier bracket.
-
- Click here
REMOVE STEREO COMPONENT AMPLIFIER ASSEMBLY