- Click here
REMOVE FRONT AXLE ASSEMBLY LH
- Click here
REMOVE FRONT AXLE ASSEMBLY RH
Tip:Use the same procedure described for the LH side.
- Click here
REMOVE NO. 1 ENGINE UNDER COVER
-
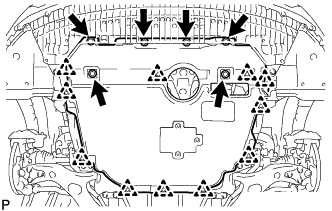
Выверните 6 болтов и снимите 11 фиксаторов.
-
Снимите нижнюю крышку двигателя № 1.
-
- Click here
DRAIN MANUAL TRANSAXLE OIL
-
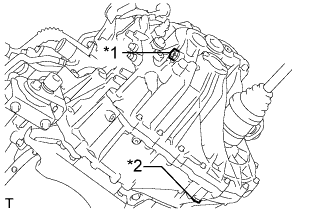
Remove the filler plug and gasket.
Table 1. Text in Illustration *1 Filler Plug *2 Drain Plug -
Remove the drain plug and gasket to drain the manual transaxle oil.
-
Install a new gasket and the drain plug.
39 N*m 400 kgf*cm 29 ft.*lbf
-
- Click here
REMOVE FRONT DRIVE SHAFT ASSEMBLY LH
-
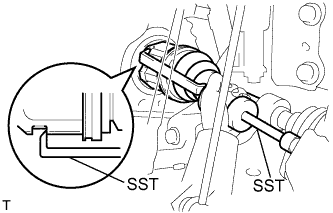
Using SST, remove the front drive shaft assembly LH.
09520-01010 09520-24010 09520-32040 Note:
-
Be careful not to damage the transaxle case oil seal LH, front axle inboard joint boot and front drive shaft dust cover LH.
-
Be careful not to drop the front drive shaft assembly LH.
-
-
- Click here
REMOVE FRONT DRIVE SHAFT ASSEMBLY RH
-
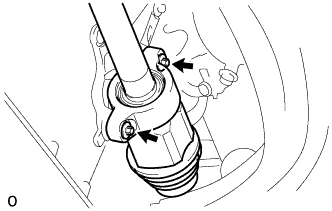
Using an E12 ''TORX'' socket wrench, remove the 2 bolts and pull out the front drive shaft assembly RH.
Note:
-
Be careful not to damage the transaxle case oil seal RH, front axle inboard joint boot and front drive shaft dust cover RH.
-
Be careful not to drop the front drive shaft assembly RH.
-
-
- Click here
REMOVE FRONT DRIVE SHAFT HOLE SNAP RING LH
-
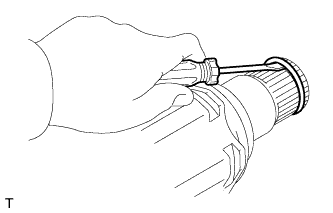
Using a screwdriver, remove the front drive shaft hole snap ring LH.
Note:Be careful not to damage the spline of the front drive inboard joint LH.
-