ТРОС МЕХАНИЗМА ПЕРЕКЛЮЧЕНИЯ ПЕРЕДАЧ СНЯТИЕ
-
REMOVE NO. 1 ENGINE COVER
-
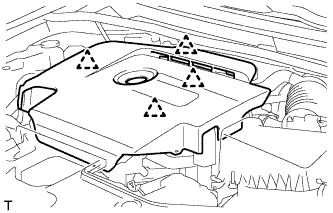
Возьмитесь сзади за крышку и медленно поднимите ее, чтобы разъединить задний фиксатор крышки. Продолжайте поднимать крышку так, чтобы освободить 3 передних и боковых фиксатора крышки, после чего снимите крышку.
Note
Попытка освободить задний и передние фиксаторы за один прием может привести к поломке крышки.
-
-
REMOVE AIR CLEANER CAP AND HOSE
-
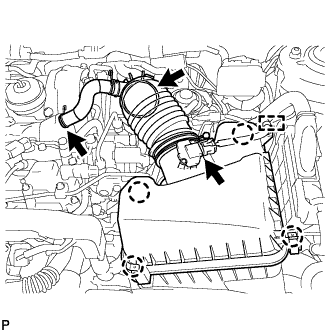
Открепите зажим и отсоедините разъем датчика массового расхода воздуха.
-
Отсоедините шланг системы принудительной вентиляции картера.
-
Отсоедините шланг воздушного фильтра.
-
Освободите 4 зажима и снимите крышку воздушного фильтра.
-
-
REMOVE AIR CLEANER CASE SUB-ASSEMBLY
-

Выверните 3 болта и снимите корпус воздушного фильтра.
-
-
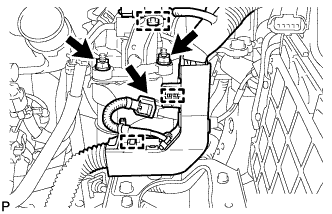
REMOVE FUEL FILTER SUPPORT
-
Disconnect the connector and detach the 2 wire harness clamps and connector clamp, and then disconnect the engine wire from the fuel filter support.
-
Remove 2 nuts and disconnect the fuel filter assembly.
-

Detach the connector clamp from the fuel filter support.
-
Remove the 4 bolts and fuel filter support.
-
-
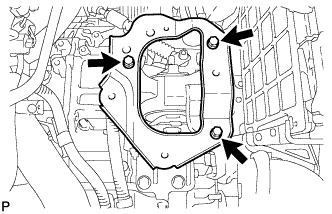
REMOVE AIR CLEANER BRACKET
-
Remove the 3 bolts and air cleaner bracket.
-
-
REMOVE NO. 2 ENGINE UNDER COVER
-
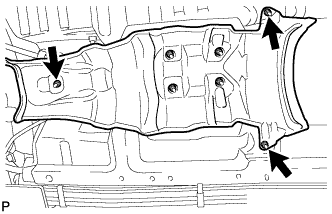
Освободите 4 фиксатора и снимите защиту картера двигателя № 2.
-
-
DISCONNECT AIR FUEL RATIO SENSOR CONNECTOR
-
REMOVE FRONT EXHAUST PIPE ASSEMBLY
-
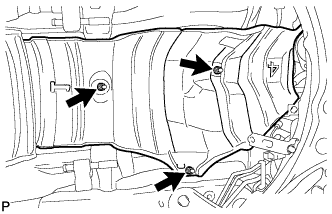
Выверните 2 болта и снимите 2 пружины сжатия.
-
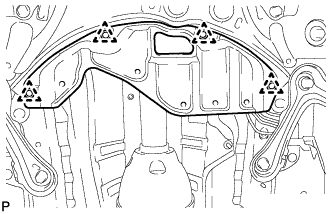
Снимите приемную трубу с 3 опор выпускной трубы.
-
Снимите прокладку.
-
-
REMOVE FRONT FLOOR NO. 2 HEAT INSULATOR
-
Remove the 3 nuts and heat insulator.
-
-
REMOVE FRONT FLOOR NO. 1 HEAT INSULATOR
-
Remove the 3 nuts and heat insulator.
-
-
REMOVE LOWER NO. 1 INSTRUMENT PANEL FINISH PANEL
-
Remove the lower No. 1 instrument panel finish panel Click here.
-
-
REMOVE TRANSMISSION CONTROL CABLE ASSEMBLY
-
Move the shift lever to N.
-
Disconnect the end of the transmission control cable from the shift lever.
-
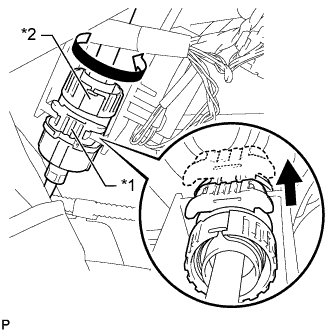
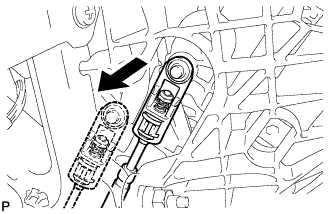
Text in Illustration *1 Stopper *2 Nut Pull out the stopper of the transmission control cable.
Note
Do not remove the stopper. If the stopper is removed, reinstall it to its original position.
-
Rotate the nut counterclockwise approximately 180° and, while holding the nut in that position, disconnect the transmission control cable from the shift lever retainer.
Note
Do not over-rotate the nut as it will come off the internal spring and the transmission control cable will not be reusable.
-
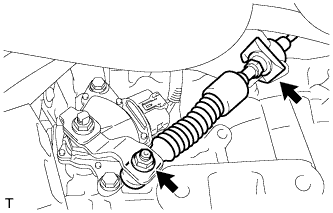
Remove the nut and disconnect the control cable from the control shaft lever.
-
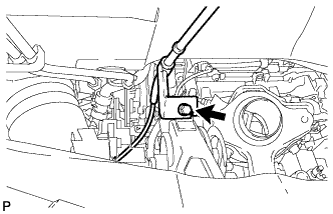
Remove the clip and disconnect the transmission control cable from the control cable bracket.
-
Remove the bolt and disconnect the transmission control cable support.
-
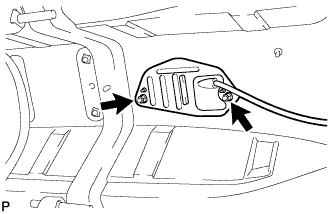
Remove the 2 nuts and disconnect the transmission control cable assembly.
-
Pull out the transmission control cable assembly to remove it.
-