КОНТРОЛЛЕР СВЕЧЕЙ НАКАЛИВАНИЯ СНЯТИЕ
-
PRECAUTION
Note
After turning the ignition switch off, waiting time may be required before disconnecting the cable from the battery terminal. Therefore, make sure to read the disconnecting the cable from the battery terminal notice before proceeding with work Click here.
-
DISCONNECT CABLE FROM NEGATIVE BATTERY TERMINAL
Note
When disconnecting the cable, some systems need to be initialized after the cable is reconnected Click here.
-
DISCONNECT CABLE FROM POSITIVE BATTERY TERMINAL
-
REMOVE BATTERY CLAMP SUB-ASSEMBLY
-
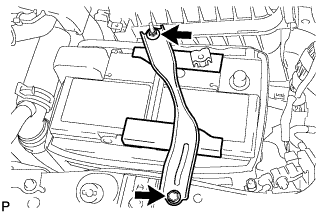
Remove the bolt and loosen the nut.
-
Detach the hook of the battery clamp sub-assembly from the battery carrier, and then remove the battery clamp sub-assembly.
-
-
REMOVE BATTERY INSULATOR
-
REMOVE BATTERY
-
REMOVE AIR CLEANER CAP SUB-ASSEMBLY
-
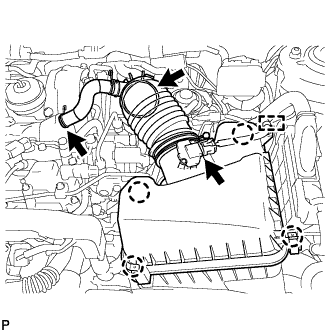
Открепите зажим и отсоедините разъем датчика массового расхода воздуха.
-
Сдвиньте хомут и отсоедините шланг системы принудительной вентиляции картера от крышки головки блока цилиндров.
-
Сдвиньте хомут и отсоедините шланг воздушного фильтра в сборе от турбонагнетателя.
-
Освободите 4 зажима и снимите крышку воздушного фильтра в сборе.
-
-
REMOVE AIR CLEANER FILTER ELEMENT SUB-ASSEMBLY
-
REMOVE AIR CLEANER CASE SUB-ASSEMBLY
-

Выверните 3 болта и снимите корпус воздушного фильтра.
-
-
REMOVE NO. 1 AIR CLEANER INLET
-
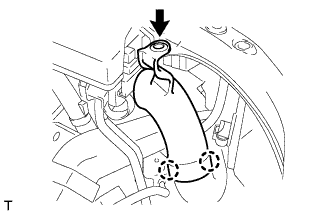
Remove the clip.
-
Detach the 2 claws and remove the No. 1 air cleaner inlet.
-
-
REMOVE NO. 2 AIR CLEANER INLET
-
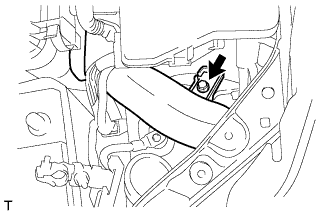
Remove the bolt and No. 2 air cleaner inlet
-
-
REMOVE GLOW PLUG CONTROLLER ASSEMBLY
-
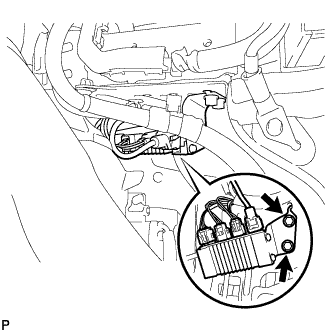
Remove the 2 bolts and glow plug controller assembly.
-
Disconnect the 4 connectors.
-
-
REMOVE NO. 1 GLOW PLUG CONTROLLER BRACKET
-
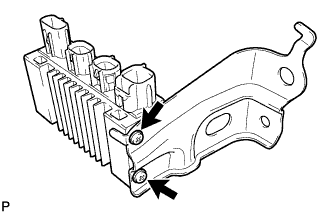
Remove the 2 screws and No. 1 glow plug controller bracket from the glow plug controller.
-