КОНТАКТНЫЙ ДАТЧИК ДАВЛЕНИЯ МАСЛА УСТАНОВКА
-
INSTALL ENGINE OIL PRESSURE SWITCH ASSEMBLY
-
Remove the adhesive from the threads of the oil pressure switch assembly and the bolt hole of the oil filter bracket.
-
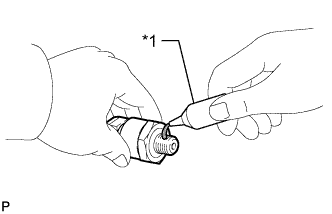
Text in Illustration *1 Adhesive Apply adhesive to 2 or 3 threads of the oil pressure switch assembly.
Adhesive Toyota Genuine Adhesive 1344, Three Bond 1344 or equivalent Note
Do not apply adhesive to the oil inlet port of the sensor.
-
Using a 24 mm deep socket wrench, install the engine oil pressure switch assembly.
- Torque:
- 13 N*m { 133 kgf*cm, 10 ft.*lbf }
Note
Do not start the engine for at least 1 hour after installation.
-
Connect the engine oil pressure switch connector.
-
-
ADD ENGINE OIL
-
Add new engine oil.
Standard Oil Grade Oil Grade Oil Viscosity (SAE) ACEA C2 - 0W-30
- 5W-30
Standard Capacity Item Specified Condition Drain and refill without oil filter change 5.5 liters (5.8 US qts, 4.8 Imp. qts) Drain and refill with oil filter change 5.9 liters (6.2 US qts, 5.2 Imp. qts) Dry fill 6.3 liters (6.7 US qts, 5.5 Imp. qts)
-
-
INSPECT FOR OIL LEAK
-
Warm up the engine and check for an engine oil leak.
-
-
INSPECT ENGINE OIL LEVEL
-
Warm up the engine, stop the engine and wait 5 minutes. The engine oil level should be between the dipstick low level mark and full level mark.
If low, check for leakage and add oil up to the full level mark.
Note
Do not fill engine oil above the full level mark.
-
-
INSTALL RADIATOR SUPPORT OPENING COVER
-
Attach the 4 hooks to install the radiator support opening cover.
-
Install the 3 clips.
-
-
INSTALL NO. 1 ENGINE COVER
-
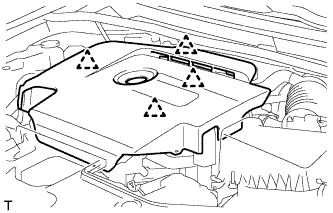
Attach the 4 clips to install the No. 1 engine cover.
-
-
INSTALL NO. 1 ENGINE UNDER COVER
-
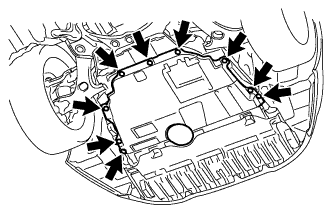
Install the No. 1 engine under cover with the 9 clips.
-