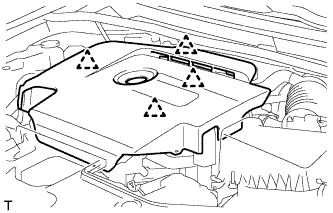
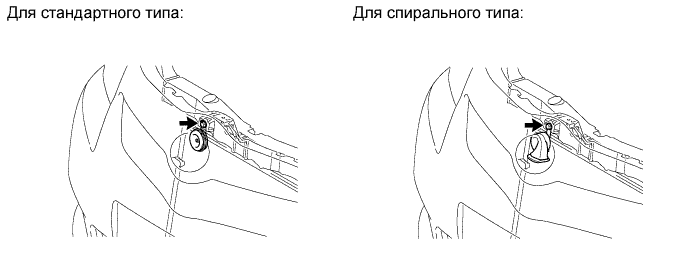
ПРОМЕЖУТОЧНЫЙ ОХЛАДИТЕЛЬ СНЯТИЕ
-
REMOVE FRONT BUMPER REINFORCEMENT SUB-ASSEMBLY
-
RECOVER REFRIGERANT FROM REFRIGERATION SYSTEM
-
Запустите двигатель.
-
Установите выключатель системы кондиционирования в положение ON (ВКЛ).
-
Включите компрессор системы кондиционирования при частоте вращения коленчатого вала двигателя около 1000 об/мин на 5-6 мин, чтобы прокачать хладагент и собрать оставшееся в узлах компрессорное масло в компрессоре.
-
Выключите двигатель.
-
Соберите хладагент из системы кондиционирования с помощью установки регенерации хладагента.
-
-
PRECAUTION
Note
After turning the ignition switch off, waiting time may be required before disconnecting the cable from the battery terminal. Therefore, make sure to read the disconnecting the cable from the battery terminal notice before proceeding with work Click here.
-
DISCONNECT CABLE FROM NEGATIVE BATTERY TERMINAL
Note
When disconnecting the cable, some systems need to be initialized after the cable is reconnected Click here.
-
DISCONNECT CABLE FROM POSITIVE BATTERY TERMINAL
-
REMOVE OIL COOLER ASSEMBLY (for Automatic Transaxle)
-
Detach the 2 clips and disconnect the 2 oil cooler hoses from the oil cooler.
-
Remove the 3 bolts, nut and oil cooler assembly.
-
-
REMOVE NO. 1 ENGINE UNDER COVER
-
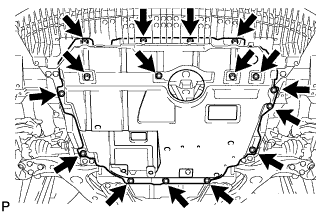
Remove the 6 bolts and 10 clips.
-
Remove the No. 1 engine under cover.
-
-
REMOVE FRONT LOWER BUMPER ABSORBER
-
Remove the 2 clips.
-
Remove the 4 bolts.
-
Detach the 2 hooks of the front lower bumper absorber from the installation holes in the body and remove the front lower bumper absorber.
-
-
DRAIN ENGINE COOLANT
-
Ослабьте пробку сливного крана радиатора.
Tech Tips
Слейте охлаждающую жидкость в контейнер и утилизируйте ее в соответствии с местными требованиями.
-
Снимите пробку расширительного бачка радиатора.
CAUTION:
Не снимайте пробку расширительного бачка радиатора и пробку выпуска воздуха, пока двигатель и радиатор не остынут. Выброс горячей охлаждающей жидкости и пара под давлением может стать причиной серьезных ожогов.
-
Ослабьте пробку сливного крана блока цилиндров. Затем слейте охлаждающую жидкость из двигателя.
Tech Tips
Пробка находится сзади генератора со стороны охладителя РОГ.

Обозначения на рисунке *1 Пробка бачка радиатора *2 Пробка выпуска воздуха *3 Пробка сливного крана блока цилиндров (тип А) *4 Пробка сливного крана блока цилиндров (тип В) *5 Пробка сливного крана радиатора - -
-
-
REMOVE NO. 1 ENGINE COVER
-
Возьмитесь сзади за крышку и медленно поднимите ее, чтобы разъединить задний фиксатор крышки. Продолжайте поднимать крышку так, чтобы освободить 3 передних и боковых фиксатора крышки, после чего снимите крышку.
Note
Попытка освободить задний и передние фиксаторы за один прием может привести к поломке крышки.
-
-
REMOVE BATTERY CLAMP SUB-ASSEMBLY
-
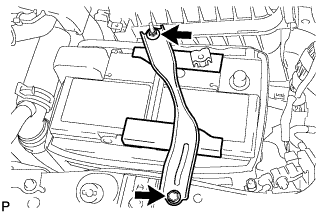
Remove the bolt and loosen the nut.
-
Detach the hook of the battery clamp from the battery carrier, and then remove the battery clamp.
-
-
REMOVE BATTERY INSULATOR
-
REMOVE BATTERY
-
REMOVE BATTERY TRAY
-
REMOVE BATTERY CARRIER
-
Detach the 2 clamps and disconnect the wire harness.
-
Remove the 4 bolts and battery carrier.
-
-
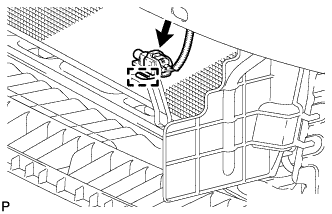
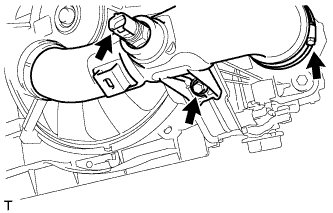
DISCONNECT AMBIENT TEMPERATURE SENSOR
-
Отсоедините разъем.
-
С помощью отвертки освободите зажим и снимите датчик.
Tech Tips
Конец отвертки перед использованием следует изолировать защитной клейкой лентой.
-
-
REMOVE LOW PITCHED HORN ASSEMBLY
-
Отсоедините разъем звукового сигнала.
-
Выверните болт и снимите низкочастотный звуковой сигнал.
-
-
REMOVE NO. 1 RADIATOR SIDE AIR SEAL
-
Remove the radiator side deflector RH.
-
-
REMOVE NO. 2 RADIATOR SIDE AIR SEAL
-
Remove the radiator side deflector LH.
-
-
REMOVE NO. 3 WATER BY-PASS HOSE
-
Detach the clamp and remove the No. 3 water by-pass hose.
-
Disconnect the 3 connectors and detach the clamp.
-
-
DISCONNECT NO. 1 WATER HOSE CLAMP BRACKET
-
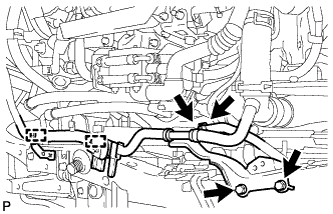
Disconnect the No. 1 radiator hose from the No. 1 water hose clamp bracket.
-
Detach the 2 hose clamps from the No. 2 by-pass water hose.
-
Remove the 2 bolts and disconnect the No. 1 water hose clamp bracket from the radiator support.
-
-
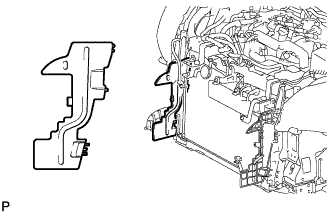
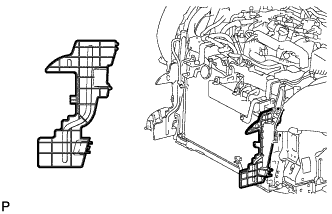
REMOVE INJECTOR DRIVER
-
Detach the clamp and disconnect the 4 injector driver connectors.
-
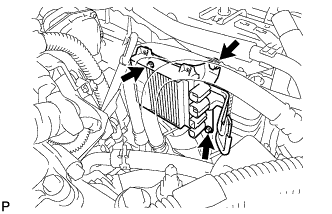
Remove the 3 bolts and injector driver.
-
Remove the 4 screws and injector driver bracket.
-
-
REMOVE NO. 1 RADIATOR HOSE
-
Detach the hose clamp and remove the No. 1 radiator hose.
-
-
DISCONNECT NO. 2 RADIATOR HOSE
-
Disconnect the No. 2 radiator hose.
-
-
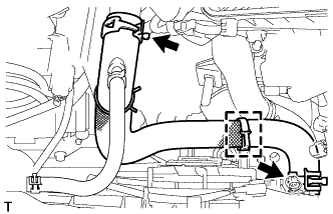
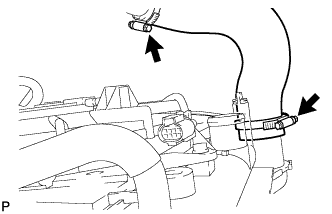
REMOVE INTERCOOLER AIR HOSE (for Manual Transaxle)
-
Text in Illustration *1 Retainer Disconnect the intercooler air hose from the No. 1 air tube.
-
Pull out the retainer and remove the intercooler air hose from the intercooler.
-
-
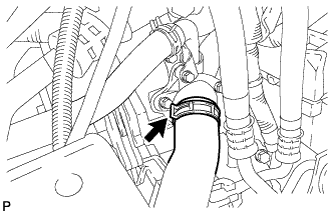
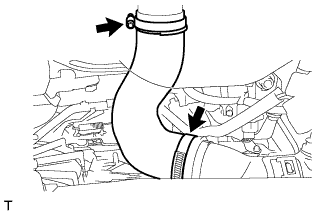
REMOVE INTERCOOLER AIR HOSE (for Automatic Transaxle)
-

Detach the clamp.
-
Remove the bolt and wire harness bracket.
-
Loosen the 2 hose clamps.
-
Remove the intercooler air hose from the No. 1 air tube and intercooler.
-
-
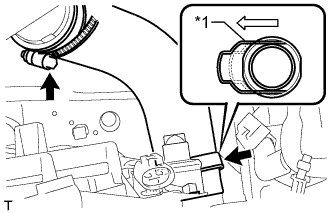
REMOVE NO. 3 AIR HOSE
-
Loosen the 2 clamps.
-
Remove the No. 3 air hose from the No. 2 air tube and throttle body.
-
-
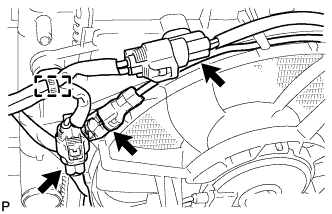
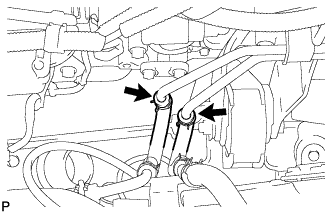
DISCONNECT DISCHARGE HOSE SUB-ASSEMBLY
-

Выверните болт и отсоедините трубопровод высокого давления в сборе от конденсатора.
-
Снимите с трубопровода высокого давления кольцевое уплотнение.
Note
Для предотвращения проникновения влаги и загрязняющих веществ герметизируйте отверстия отсоединенных деталей с помощью виниловой ленты.
-
-
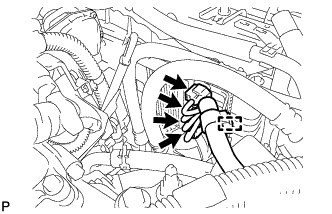
DISCONNECT AIR CONDITIONING TUBE AND ACCESSORY ASSEMBLY
-
Выверните болт и отсоедините трубку и обвязку системы кондиционирования в сборе от конденсатора.
-
Снимите кольцевое уплотнение с трубки и обвязки системы кондиционирования в сборе.
Note
Для предотвращения проникновения влаги и загрязняющих веществ герметизируйте отверстия отсоединенных деталей с помощью виниловой ленты.
-
-
REMOVE UPPER RADIATOR SUPPORT (for Manual Transaxle)
-
Remove the 2 bolts and 2 upper radiator supports.
-
-
REMOVE UPPER RADIATOR SUPPORT (for Automatic Transaxle)
-

Remove the 2 bolts and 2 upper radiator supports.
-
-
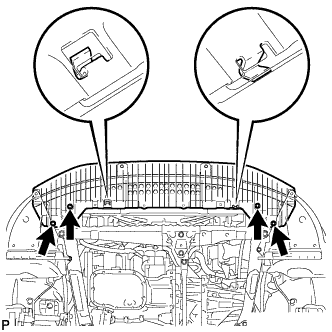
REMOVE UPPER RADIATOR SUPPORT SUB-ASSEMBLY
-
Remove the 2 radiator support cushions.
-
Remove the 4 bolts and 2 upper radiator supports.
-
-
REMOVE HOOD LOCK ASSEMBLY
-
Для моделей с левосторонним рулевым управлением:
-
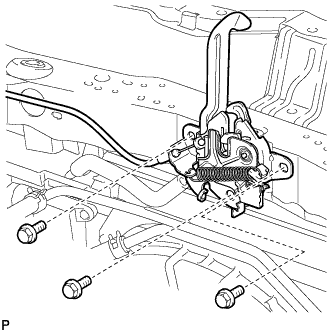
Выверните 3 болта и снимите замок капота.
-
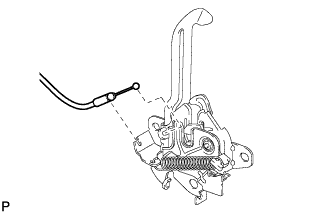
Отсоедините трос управления замком капота.
-
-
Для моделей с правосторонним рулевым управлением:
-
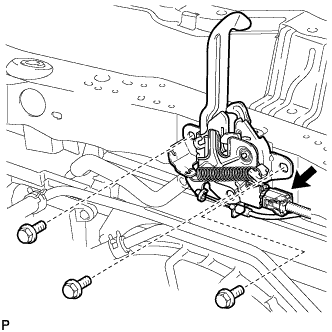
Выверните 3 болта и снимите замок капота.
-
Отсоедините разъем.
-
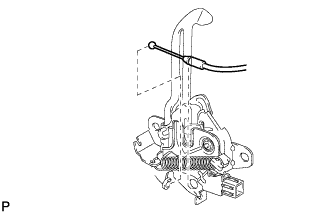
Отсоедините трос управления замком капота.
-
-
-
REMOVE HOOD LOCK SUPPORT SUB-ASSEMBLY
-
Remove the 4 bolts and hood lock support sub-assembly.
-
-
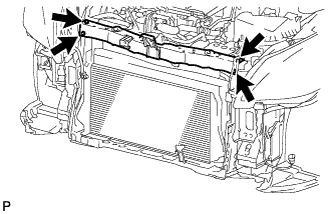
REMOVE CONDENSER ASSEMBLY WITH RECEIVER
-
Снимите конденсатор в сборе с приемником, как показано на рисунке.
-
-
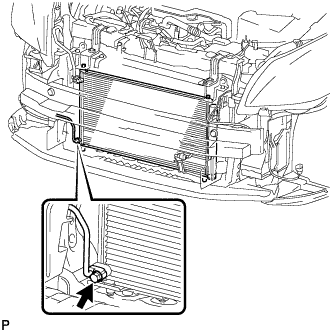
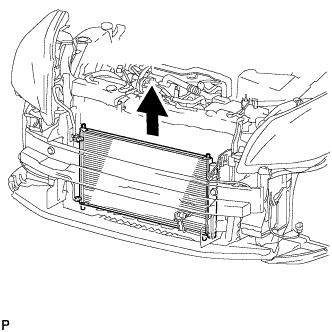
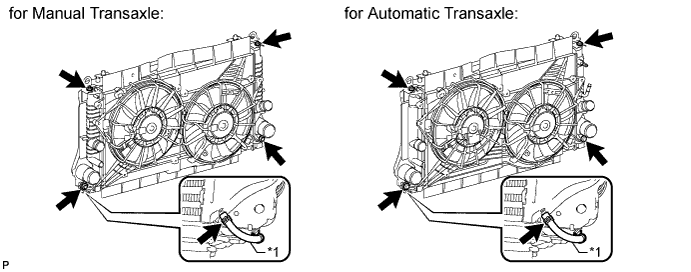
REMOVE RADIATOR ASSEMBLY
-
Disconnect the No. 2 vacuum transmitting hose.
-
for Automatic Transaxle:
Detach the 2 hose clips, and then disconnect the 2 oil cooler hoses.
-
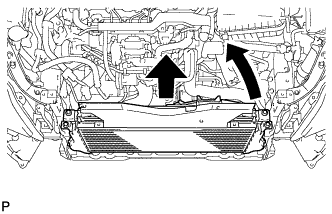
Push the side of the radiator with intercooler towards the transaxle as shown in the illustration, and lift the radiator with intercooler upward out of the vehicle to remove it.
Note
Do not apply any excessive force to the cooler condenser pipe when removing the radiator assembly.
-
Remove the 2 radiator lower support cushions.
-
-
REMOVE NO. 2 AIR TUBE
-
Disconnect the air temperature sensor connector.
-
Loosen the hose clamp.
-
Remove the bolt and No. 2 air tube.
-
-
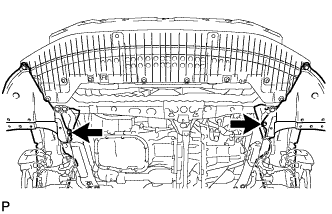
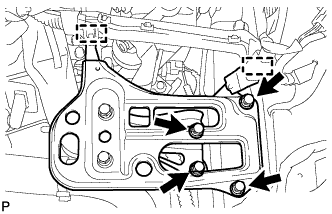
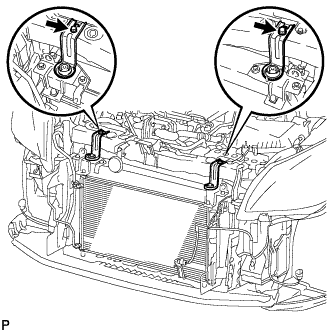
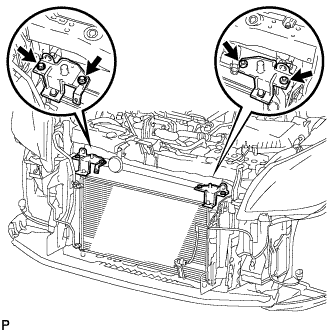
REMOVE LOWER RADIATOR SUPPORT SUB-ASSEMBLY
Text in Illustration *1 Lower Radiator Support LH *2 Lower Radiator Support RH
-
Remove the 2 bolts, detach the clamp from the vacuum transmitting pipe, and then remove the lower radiator support LH.
-
Remove the 2 bolts and lower radiator support RH.
-
-
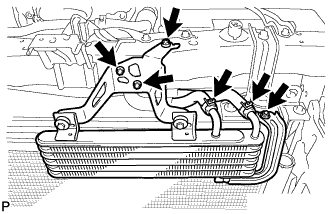
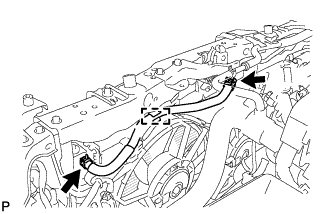
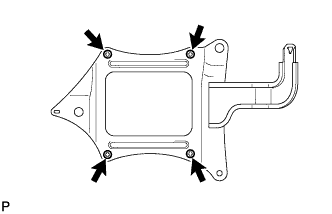
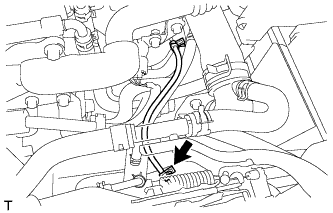
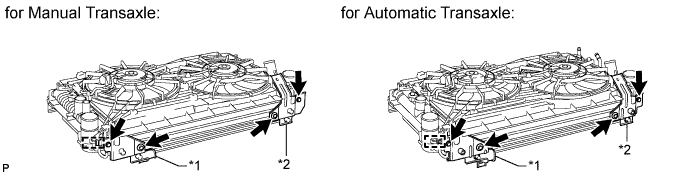
REMOVE INTERCOOLER ASSEMBLY
Text in Illustration *1 No. 1 Vacuum Transmitting Hose - -
-
Disconnect the No. 1 vacuum transmitting hose from the intercooler.
-
Remove the 4 bolts and intercooler.
-