- Click here
REMOVE NO. 1 ENGINE COVER
-
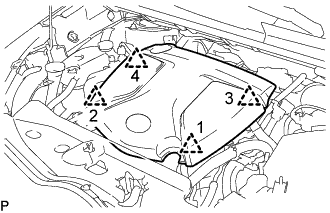
Поднимите крышку двигателя № 1, чтобы освободить 4 фиксатора в порядке, показанном на рисунке, и снимите крышку двигателя № 1.
Note:Попытка одновременно освободить задние и передние фиксаторы может привести к повреждению крышки двигателя № 1.
-
- Click here
DISCONNECT VACUUM CONTROL VALVE BRACKET
-

Disconnect the exhaust gas temperature sensor connector.
-
Detach the wire harness clamp.
-
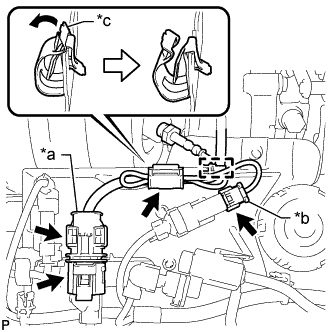
Disconnect the exhaust gas temperature sensor connector.
Table 1. Text in Illustration *a Air Fuel Ratio Sensor Connector *b Exhaust Gas Temperature Sensor Connector *c Clamp -
Disconnect the air fuel ratio sensor connector.
-
Raise the air fuel ratio sensor connector from the vacuum control valve bracket.
-
Move the clamp as shown in the illustration, and disconnect the air fuel ratio sensor and exhaust gas temperature sensor.
Note:Disconnect the sensors while opening the clamp.
-
Detach the air fuel ratio sensor clamp from the vacuum control valve bracket.
-

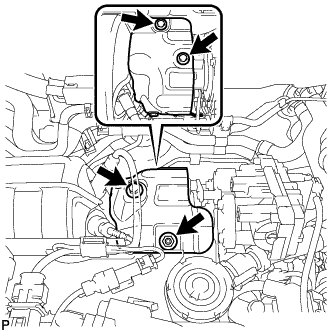
Using a T20 "TORX" socket wrench, remove the 3 screws and disconnect the vacuum control valve bracket.
-
- Click here
REMOVE NO. 1 TURBO INSULATOR
-
Remove the 3 bolts, nut and No. 1 turbo insulator.
-
- Click here
REMOVE EXHAUST GAS TEMPERATURE SENSOR (for Sensor 1)
Note:If the exhaust gas temperature sensor is dropped, replace it with a new one.
-
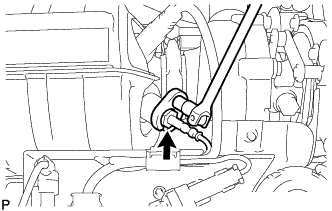
Using a 14 mm union nut wrench, remove the exhaust gas temperature sensor.
-