КЛАПАН РОГ СНЯТИЕ
-
REMOVE NO. 1 ENGINE UNDER COVER
-
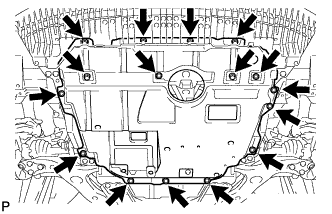
Remove the 6 bolts and 10 clips.
-
Remove the No. 1 engine under cover.
-
-
DRAIN ENGINE COOLANT
-
Ослабьте пробку сливного крана радиатора.
Tech Tips
Слейте охлаждающую жидкость в контейнер и утилизируйте ее в соответствии с местными требованиями.
-
Снимите пробку расширительного бачка радиатора.
CAUTION:
Не снимайте пробку расширительного бачка радиатора и пробку выпуска воздуха, пока двигатель и радиатор не остынут. Выброс горячей охлаждающей жидкости и пара под давлением может стать причиной серьезных ожогов.
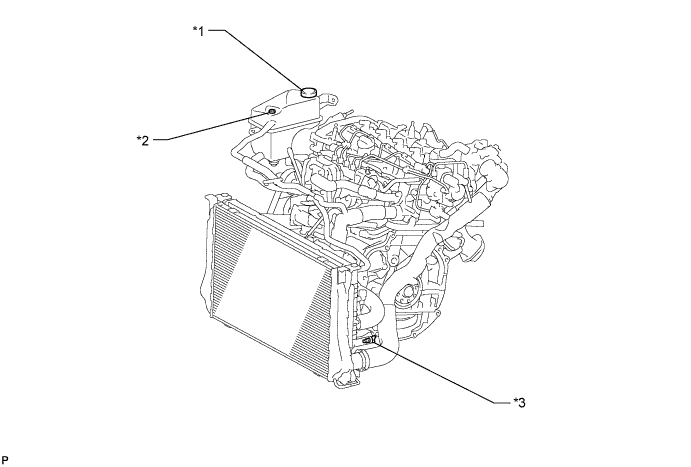
Обозначения на рисунке *1 Пробка бачка радиатора *2 Пробка выпуска воздуха *3 Пробка сливного крана радиатора - -
-
-
REMOVE NO. 1 ENGINE COVER
-
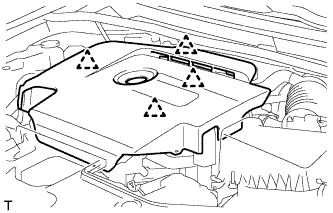
Hold the rear of the No. 1 engine cover and slowly raise it to detach the clip on the rear of the No. 1 engine cover. Continue to raise the No. 1 engine cover to detach the 3 clips on the front and side of the No. 1 engine cover and remove the No. 1 engine cover.
Note
Attempting to disengage both front and rear clips at the same time may cause the No. 1 engine cover to break.
-
-
REMOVE RADIATOR SUPPORT OPENING COVER
-
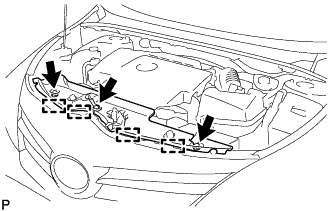
Remove the 3 clips.
-
Detach the 4 hooks and remove the radiator support opening cover.
-
-
REMOVE EGR VALVE BRACKET
-

Disconnect the 2 connectors and detach the 2 wire harness clamps.
-
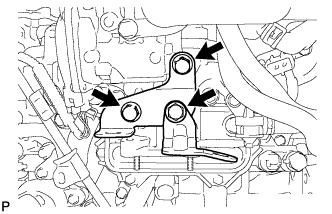
Remove the 3 bolts and 2 EGR valve brackets.
-
-
DISCONNECT NO. 7 WATER BY-PASS HOSE
-
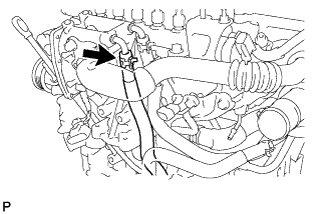
Slide the clamp and disconnect the No. 7 water by-pass hose from the electric EGR control valve assembly.
-
-
DISCONNECT NO. 8 WATER BY-PASS HOSE
-
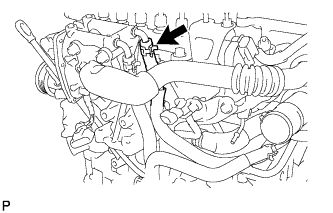
Slide the clamp and disconnect the No. 8 water by-pass hose from the electric EGR control valve assembly.
-
-
REMOVE NO. 2 EGR PIPE SUB-ASSEMBLY
-
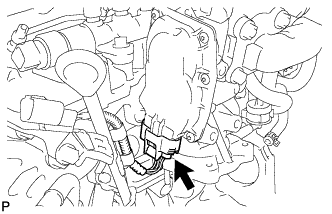
Disconnect the electric EGR control valve connector.
-
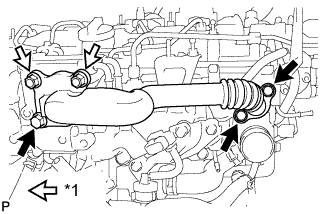
Text in Illustration *1 Nut Remove the 3 bolts, 2 nuts, No. 2 EGR pipe sub-assembly and 2 gaskets.
-
-
REMOVE ELECTRIC EGR CONTROL VALVE ASSEMBLY
-
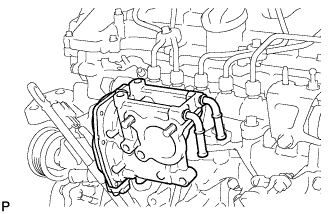
Remove the electric EGR control valve assembly and gasket.
-