TRANSMISSION CONTROL CABLE ADJUSTMENT
PROCEDURE
-
INSPECT SHIFT LEVER POSITION
-
While moving the shift lever from N to each position, check that the lever moves smoothly and that the shift position indicator comes on properly according to the shift lever position.
-
Put the vehicle into the READY-on state and check the following:
-
When the shift lever is moved to D, the vehicle moves forward.
-
When the shift lever is moved to R, the vehicle moves in reverse.
Note
The vehicle should not move when the shift position indicator is off.
-
-
-
ADJUST SHIFT LEVER POSITION
-
Move the shift lever to N.
-
Remove the rear console box assembly Click here.
-
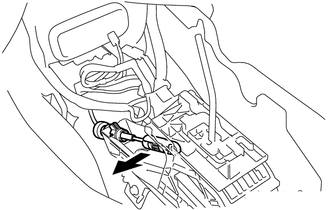
Disconnect the end of the transmission control cable assembly from the lower shift lever assembly.
-
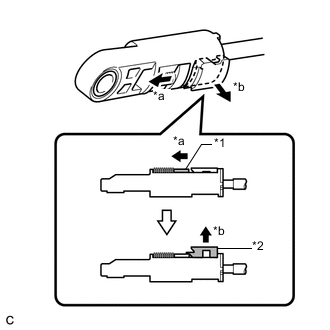
Text in Illustration *1 Slider *2 Lock Piece *a Slide *b Pull Slide the slider of the transmission control cable assembly in the direction indicated by the arrow and pull the lock piece outward.
-
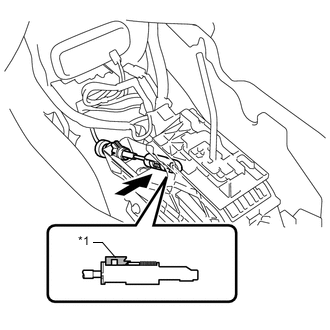
Text in Illustration *1 Lock Piece Install the end of the transmission control cable assembly to the lower shift lever assembly.
Note
-
Check that the lock piece is pulled up.
-
Install the cable end all the way to the base of the pin.
-
-
Push the lock piece into the adjuster case.
Note
-
Check that the shift lever position sensor and the shift lever are in neutral.
-
Securely push in the lock piece until the slider lock is engaged.
-
-
After adjusting the shift lever position, check the operation and function of the shift lever. If there is a problem, adjust the position again.
-
Install the rear console box assembly Click here.
-