SHIFT LEVER INSTALLATION
PROCEDURE
-
INSTALL SHIFT LEVER SUPPORT
-
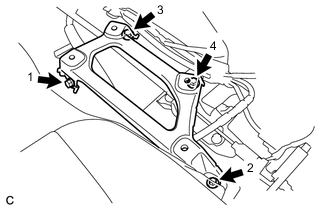
Install the shift lever support to the body with the 4 bolts in the sequence shown in the illustration.
- Torque:
- 12 N*m { 122 kgf*cm, 9 ft.*lbf }
-
-
INSTALL LOWER SHIFT LEVER ASSEMBLY
Note
Check that the shift lever position sensor and the shift lever are in neutral.
-
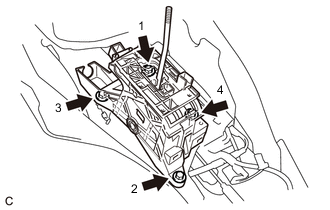
Install the lower shift lever assembly to the shift lever support with the 4 bolts in the sequence shown in the illustration.
- Torque:
- 12 N*m { 122 kgf*cm, 9 ft.*lbf }
-
Connect the 4 clamps and 2 connectors to the lower shift lever assembly.
-
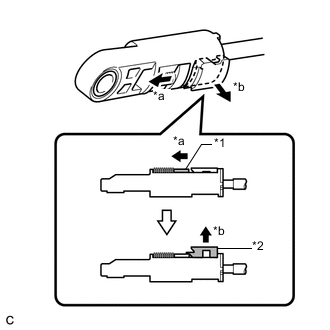
Text in Illustration *1 Slider *2 Lock Piece *a Slide *b Pull Slide the slider of the transmission control cable assembly in the direction indicated by the arrow and pull the lock piece outward.
-
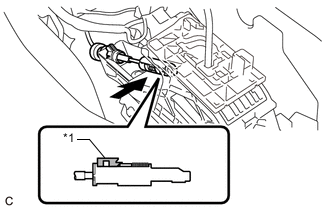
Text in Illustration *1 Lock Piece Install the end of the transmission control cable assembly to the lower shift lever assembly.
Note
-
Check that the lock piece is pulled up.
-
Install the cable end all the way to the base of the pin.
-
-
Push the lock piece into the adjuster case.
Note
-
Check that the shift lever position sensor and the shift lever are in neutral.
-
Securely push in the lock piece until the slider lock is engaged.
-
-
-
INSTALL NO. 1 INDOOR ELECTRICAL KEY ANTENNA ASSEMBLY
-
INSTALL NO. 1 CONSOLE BOX DUCT
-
INSTALL NO. 1 CONSOLE BOX MOUNTING BRACKET
-
Install the No. 1 console box mounting bracket to the lower shift lever assembly with the screw.
-
-
INSTALL FLOOR CARPET BRACKET LH
-
INSTALL REAR CONSOLE BOX ASSEMBLY
-
INSPECT SHIFT LEVER POSITION