REAR CRANKSHAFT OIL SEAL REMOVAL

PROCEDURE
-
REMOVE HYBRID VEHICLE TRANSAXLE ASSEMBLY
-
REMOVE TRANSMISSION INPUT DAMPER ASSEMBLY
-
Using a height adjustable attachment and plate lift attachment, place the engine assembly on a flat level surface.
Note
-
Using a height adjustable attachment and plate lift attachment, place the engine assembly horizontally.
-
To prevent the oil pan sub-assembly from deforming, do not place any attachments onto the oil pan sub-assembly of the engine assembly.
-
Using an engine sling device and engine lift, secure the engine assembly before service.
-
-
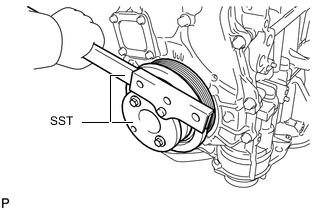
Using SST, hold the crankshaft pulley.
- SST
- 09213-54015
- 09330-00021
Tech Tips
SST (Crankshaft pulley holding tool) Fixing bolt part No. : 91551-80650(2 pcs)
-
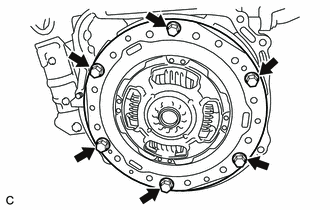
Remove the 6 bolts and transmission input damper assembly.
-
-
REMOVE FLYWHEEL SUB-ASSEMBLY
-
Using SST, hold the crankshaft pulley.
- SST
- 09213-54015
- 09330-00021
Tech Tips
SST (Crankshaft pulley holding tool) Fixing bolt part No. : 91551-80650(2 pcs)
-
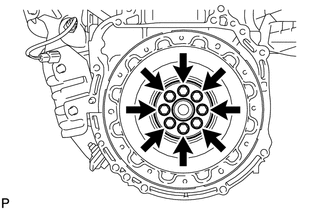
Remove the 8 bolts and flywheel sub-assembly.
-
-
REMOVE REAR ENGINE OIL SEAL
-
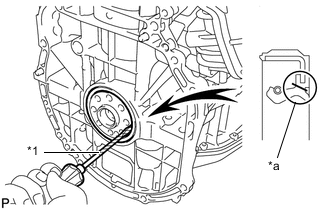
Text in Illustration *1 Protective Tape *a Cut Position Using a knife, cut off the lip of the rear engine oil seal.
-
Using a screwdriver, pry out the rear engine oil seal.
Tech Tips
Tape the screwdriver tip before use.
Note
After removing, check the crankshaft for damage. If damaged, smooth the surface with 400-grit sandpaper.
-