BATTERY SMART UNIT REMOVAL
PROCEDURE
-
PRECAUTION
-
REMOVE SERVICE PLUG GRIP
-
REMOVE CONNECTOR COVER ASSEMBLY
-
CHECK TERMINAL VOLTAGE
-
INSTALL CONNECTOR COVER ASSEMBLY
-
REMOVE REAR SEAT ASSEMBLY
-
REMOVE REAR DOOR SCUFF PLATE LH
-
REMOVE REAR SEAT SIDE GARNISH LH
-
REMOVE ROOM PARTITION PANEL INSULATOR
-
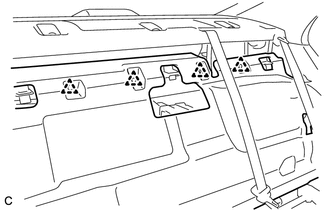
Remove the 4 clips and room partition panel insulator.
-
-
REMOVE NO. 1 HYBRID BATTERY INTAKE DUCT
-
REMOVE NO. 2 HYBRID VEHICLE BATTERY UPPER COVER BRACKET
-
SEPARATE NO. 2 HYBRID BATTERY INTAKE DUCT
-
REMOVE BATTERY COOLING BLOWER ASSEMBLY
-
REMOVE BATTERY SMART UNIT
CAUTION:
Wear insulated gloves.
-
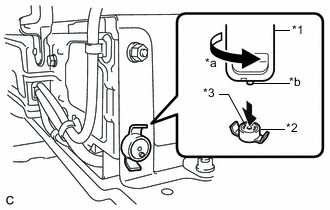
Text in Illustration *1 Service Plug Grip *2 Battery Cover Lock Striker *3 Button *a Turn *b Projection Using the service plug grip, remove the battery cover lock striker.
Tech Tips
Insert the projection part of the service plug grip, turn the button of the battery cover lock striker counterclockwise, and release the lock.
-

Disconnect the 2 connectors from the battery smart unit.
-
Remove the 2 bolts, nut and No. 2 hybrid vehicle battery shield panel from the HV battery.
-
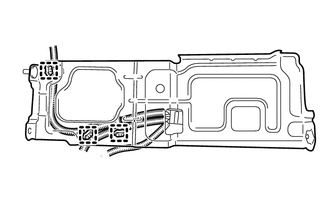
Disconnect the 3 wire harness clamps from the No. 2 hybrid vehicle battery shield panel.
-
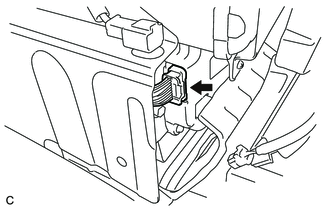
Disconnect the connector from the battery smart unit.
Note
Insulate the removed connector with insulating tape.
-
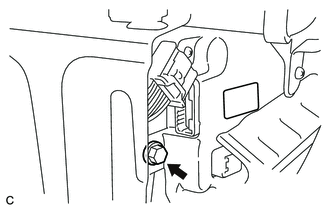
Remove the bolt from the battery smart unit.
-
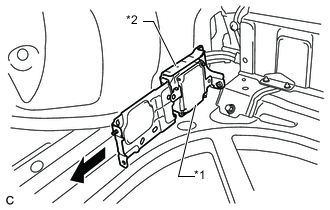
Text in Illustration *1 Battery Smart Unit *2 No. 2 Hybrid Vehicle Battery Shield Panel Remove the battery smart unit together with the No. 2 hybrid vehicle battery shield panel toward the rear of the vehicle.
Tech Tips
When removing the battery smart unit and No. 2 hybrid vehicle battery shield panel from the vehicle, they can only be removed as a unit.
-