OUTER REAR VIEW MIRROR GLASS REMOVAL
Info Added 2017-10-06 ![]()
CAUTION / NOTICE / HINT
Tech Tips
-
Use the same procedure for the RH side and LH side.
-
The following procedure is for the LH side.
PROCEDURE
-
REMOVE OUTER MIRROR (for LED Type Turn Signal Light)
-
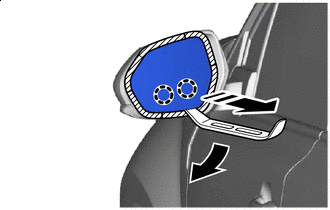

Protective Tape 
Remove in this Direction Apply protective tape to the area as shown in the illustration.
-
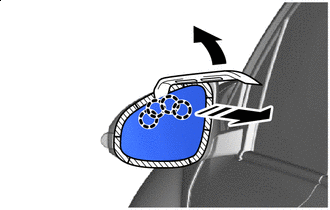
Push the upper part of the mirror surface and tilt it.
-
Using a moulding remover A, disengage the claws on the lower part of the outer mirror as shown in the illustration.
Note
Do not push the outer mirror with excessive force. Doing so may cause the actuator to come off or break the mirror surface.
Tech Tips
If excessive force is used when pressing down the mirror surface, the claws will engage again.
-
Push the lower part of the mirror surface and tilt it.
Tech Tips
If excessive force is used when pressing down the mirror surface, the claws will engage again.
-
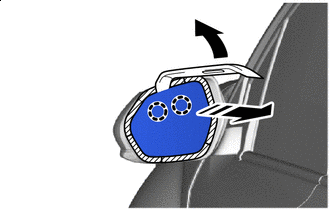
Protective Tape Remove in this Direction Using a moulding remover A, disengage the claws on the upper part of the outer mirror as shown in the illustration.
Note
Do not push the outer mirror with excessive force. Doing so may cause the actuator to come off or break the mirror surface.
Tech Tips
If excessive force is used when pressing down the mirror surface, the claws will engage again.
-
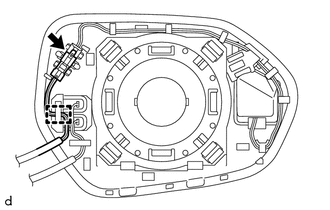
Disengage the guide.
-
Disconnect the connector.
-
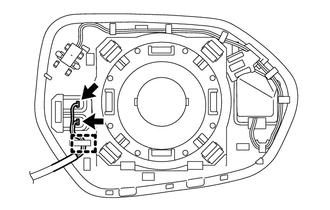
Disengage the guide.
-
Disconnect the 2 connectors to remove the outer mirror.
-
-
REMOVE OUTER MIRROR (for Bulb Type Turn Signal Light)
-

Protective Tape Remove in this Direction Apply protective tape to the area as shown in the illustration.
-
Push the upper part of the mirror surface and tilt it.
-
Using a moulding remover A, disengage the claws on the lower part of the outer mirror as shown in the illustration.
Note
Do not push the outer mirror with excessive force. Doing so may cause the actuator to come off or break the mirror surface.
Tech Tips
If excessive force is used when pressing down the mirror surface, the claws will engage again.
-
Push the lower part of the mirror surface and tilt it.
Tech Tips
If excessive force is used when pressing down the mirror surface, the claws will engage again.
-
Protective Tape Remove in this Direction Using a moulding remover A, disengage the claws on the upper part of the outer mirror as shown in the illustration.
Note
Do not push the outer mirror with excessive force. Doing so may cause the actuator to come off or break the mirror surface.
Tech Tips
If excessive force is used when pressing down the mirror surface, the claws will engage again.
-
w/ Blind Spot Monitor:
-
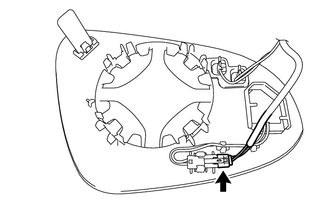
Disconnect the connector.
-
-
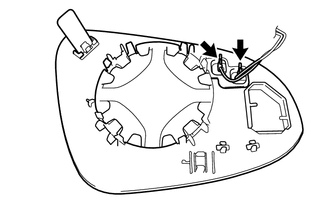
Disconnect the 2 connectors to remove the outer mirror.
-