REAR CONSOLE BOX REMOVAL
Info Added 2017-10-06 ![]()
CAUTION / NOTICE / HINT
Tech Tips
-
Use the same procedure for LHD and RHD vehicles.
-
The procedure listed below is for the LHD vehicles.
PROCEDURE
-
REMOVE FRONT DOOR SCUFF PLATE LH
-
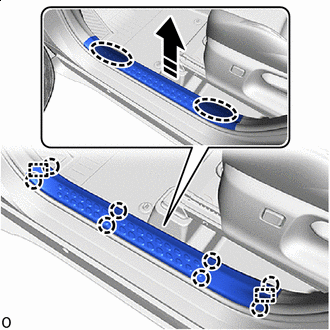

Place Hands Here 
Remove in this Direction Disengage the claws and guides to remove the front door scuff plate LH as shown in the illustration.
-
-
REMOVE COWL SIDE TRIM BOARD LH
-

Place Hands Here Remove in this Direction Remove the clip.
-
Disengage the clips to remove the cowl side trim board LH as shown in the illustration.
-
-
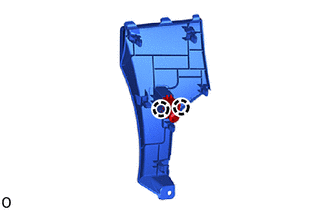
REMOVE NO. 1 INSTRUMENT PANEL UNDER COVER SUB-ASSEMBLY
-
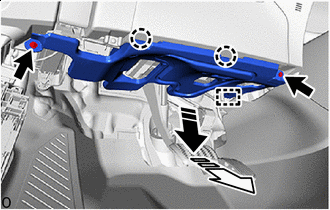
Remove in this Direction (1) 
Remove in this Direction (2) Remove the 2 screws.
-
Disengage the claws and guide to remove the No. 1 instrument panel under cover sub-assembly as shown in the illustration.
-
-
REMOVE INSTRUMENT CLUSTER FINISH PANEL GARNISH ASSEMBLY
-
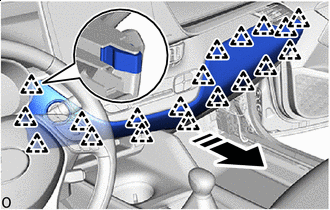
Remove in this Direction Disengage the clips to remove the instrument cluster finish panel garnish assembly as shown in the illustration.
-
-
REMOVE INSTRUMENT PANEL LOWER CENTER FINISH PANEL
-
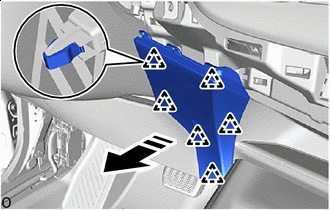
Remove in this Direction Disengage the clips to remove the instrument panel lower center finish panel as shown in the illustration.
-
Disengage the claws to disconnect the cooler thermistor.
-
-
REMOVE INSTRUMENT PANEL BOX ASSEMBLY
-
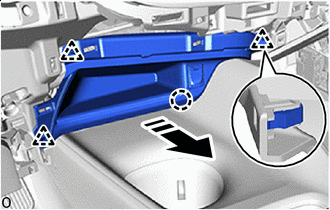
Remove in this Direction Disengage the clips and claw to remove the instrument panel box assembly as shown in the illustration.
-
w/ Stereo Jack Adapter:
-
Disconnect the connector.
-
-
-
REMOVE CONSOLE BOX INSERT
-
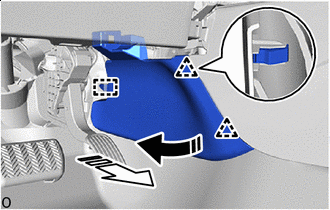
Remove in this Direction (1) Remove in this Direction (2) Disengage the clips and guide to remove the console box insert as shown in the illustration.
-
-
REMOVE NO. 2 FRONT CONSOLE BOX INSERT
-
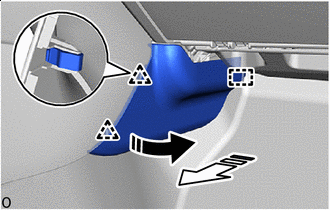
Remove in this Direction (1) Remove in this Direction (2) Disengage the clips and guide to remove the No. 2 front console box insert as shown in the illustration.
-
-
REMOVE SHIFT LEVER KNOB SUB-ASSEMBLY (for CVT)
-
REMOVE SHIFT LEVER KNOB SUB-ASSEMBLY (for Manual Transaxle)
-
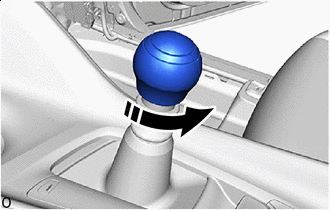
Remove in this Direction Turn the shift lever knob sub-assembly as shown in the illustration and remove it.
-
-
REMOVE CONSOLE UPPER PANEL SUB-ASSEMBLY
-
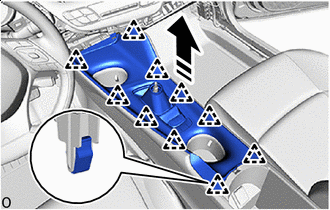
Remove in this Direction Disengage the clips to remove the console upper panel sub-assembly as shown in the illustration.
-
Disconnect each connector.
-
-
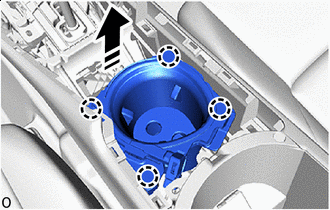
REMOVE CONSOLE BOX CUP HOLDER
-
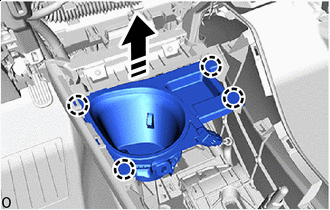
Remove in this Direction Disengage the claws to remove the console box cup holder as shown in the illustration.
-
w/ Illumination:
-
Disconnect the connector.
-
-
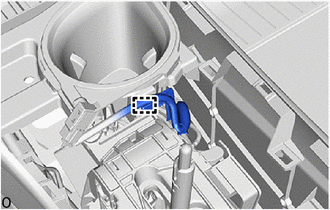
w/ Wire Harness Clamp:
-
Using a clip remover, disengage the wire harness clamp.
-
-
-
REMOVE NO. 2 CONSOLE BOX CUP HOLDER
-
Remove in this Direction Disengage the claws to remove the No. 2 console box cup holder as shown in the illustration.
-
w/ Illumination:
-
Disconnect the connector.
-
-
-
REMOVE CONSOLE BOX CARPET
-
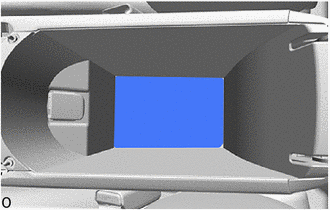
Remove the console box carpet.
-
-
REMOVE REAR CONSOLE BOX ASSEMBLY
-
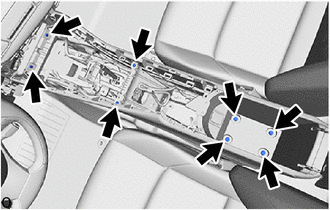
Remove the 4 screws.
-
Remove the 4 bolts.
-
Disconnect the connector.
-

Remove in this Direction Disengage the guides to remove the rear console box assembly as shown in the illustration.
-