STEREO COMPONENT AMPLIFIER INSTALLATION
Info Added 2017-10-06 ![]()
CAUTION / NOTICE / HINT
Tech Tips
-
Use the same procedure for RHD and LHD vehicles.
-
The procedure listed below is for LHD vehicles.
PROCEDURE
-
INSTALL NO. 1 AMPLIFIER BRACKET
-
Install the No. 1 amplifier bracket with the 2 screws to the stereo component amplifier assembly.
-
-
INSTALL NO. 2 AMPLIFIER BRACKET
-
Install the No. 2 amplifier bracket with the 2 screws to the stereo component amplifier assembly.
-
-
INSTALL STEREO COMPONENT AMPLIFIER ASSEMBLY WITH BRACKET
-
Install the stereo component amplifier assembly with bracket with the 2 bolts.
- Torque:
- 10.5 N*m { 107 kgf*cm, 8 ft.*lbf }
-
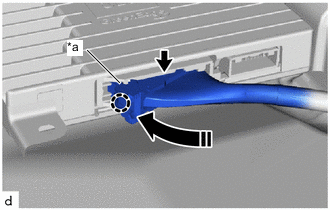
*a Lock Lever 
Install in this Direction Connect the connectors and push the lock lever to engage the claw to lock the connector as shown in the illustration.
Note
Be sure to connect the connector securely.
-
Return the part of the front floor carpet assembly.
-
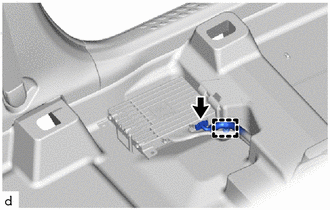
Connect the connector.
-
Engage the clamp.
-
-
INSTALL AUDIO AMPLIFIER COVER
-
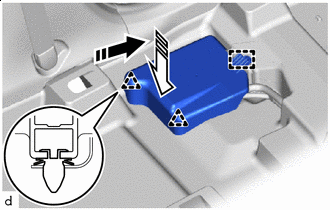
Install in this Direction (1) 
Install in this Direction (2) Push the audio amplifier cover in the direction indicated by the arrow (1) shown in the illustration to engage the guide.
-
Push the audio amplifier cover in the direction indicated by the arrow (2) shown in the illustration to engage the clips to install the audio amplifier cover.
-
-
INSTALL FRONT SEAT ASSEMBLY LH