WHEEL CAP REPLACEMENT
Info Added 2017-10-06 ![]()
PROCEDURE
-
REPLACE WHEEL CAP
-
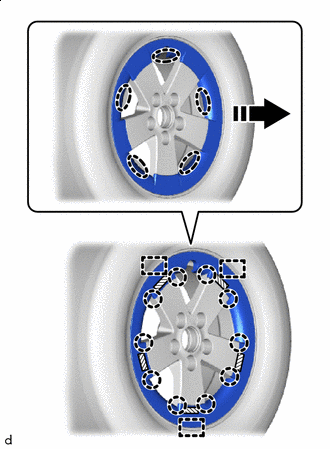

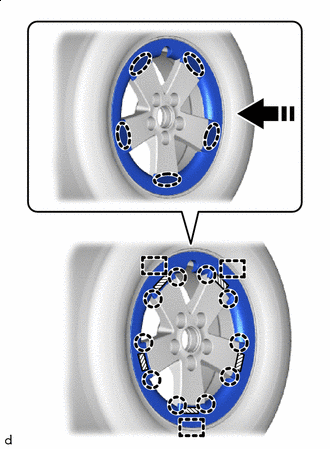
Fastening Tape 
Place Hands Here 
Remove in this Direction Disengage the claws, fastening tapes and pins to remove the wheel cap as shown in the illustration.
Note
When removing the wheel cap, disengage each location where your hands are placed one by one, and do not attempt to disengage everything at once.
-
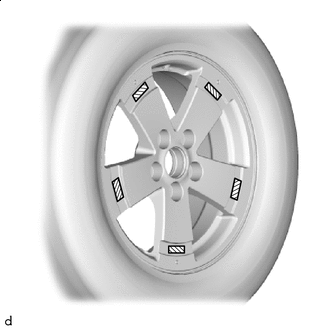
Fastening Tape Remove the 5 fastening tapes from the disc wheel.
-
Wipe off any tape adhesive residue from the disc wheel with a neutral detergent.
-
Using a heat light, heat the disc wheel and a new wheel cap.
Heating Temperature Item Temperature Disc Wheel 20 to 40°C (68 to 104°F) Wheel Cap 20 to 40°C (68 to 104°F) CAUTION:
-
Do not touch the heat light and heated parts, touching the heat light may result in burns.
-
Touching heated parts for a long time may result in burns.
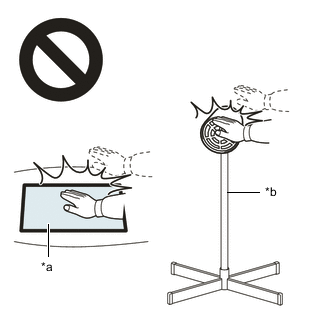
*a Heated Part *b Heat Light Note
Do not heat the disc wheel or wheel cap excessively.
-
-
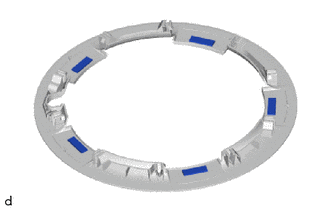
Remove the release paper from the 5 fastening tapes of the wheel cap.
Tech Tips
After removing the release paper, keep the exposed adhesive free from foreign matter.
-
Fastening Tape Place Hands Here Install in this Direction Align the cutout of the valve and the locating pins, and install the wheel cap as shown in the illustration.
-
Press firmly until the claws and fastening tapes engage.
-
Check that the wheel cap is not excessively loose.
-