SHIFT LEVER REMOVAL
Info Added 2017-10-06 ![]()
PROCEDURE
-
SECURE VEHICLE
-
Fully apply the parking brake and chock a wheel.
CAUTION:
-
Make sure to apply the parking brake and chock a wheel before performing this procedure.
-
If the vehicle is not secure and the shift lever is moved to N, the vehicle may suddenly move, possibly resulting in an accident or serious injury.
-
-
-
REMOVE SHIFT LEVER CAP
-
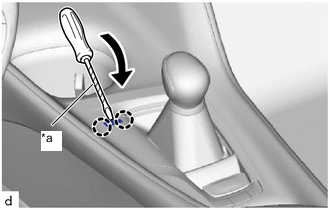
*a Protective Tape Using a screwdriver with its tip wrapped in protective tape, disengage the 2 claws to remove the shift lever cap from the shift position indicator.
Note
Be careful not to damage the shift lever cap and instrument panel ornament.
-
Move the shift lever to N.
-
-
REMOVE SHIFT LEVER KNOB SUB-ASSEMBLY
-
REMOVE REAR CONSOLE BOX ASSEMBLY
-
REMOVE TELEMATICS TRANSCEIVER (w/ Telematics Transceiver)
-
REMOVE NO. 1 CONSOLE BOX MOUNTING BRACKET
-
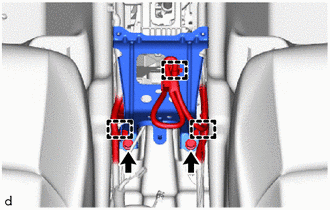
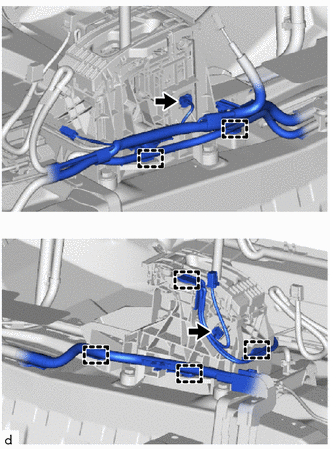
Disengage the 3 clamps to separate the wire harness from the No. 1 console box mounting bracket.
-
Remove the 2 bolts and No. 1 console box mounting bracket from the vehicle body.
-
-
DISCONNECT TRANSMISSION CONTROL CABLE ASSEMBLY
-
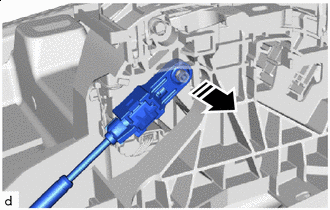

Remove in this Direction Disconnect the end of the transmission control cable assembly from the shift lever assembly.
-
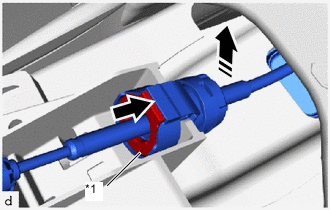
*1 Slider 
Push Remove in this Direction Push in the slider and remove the transmission control cable from the shift lever assembly as shown in the illustration.
-
-
REMOVE FLOOR SHIFT SHIFT LEVER ASSEMBLY
-
Disconnect the 2 connectors from the floor shift shift lever assembly.
-
Disengage the 6 clamps to separate the wire harness from the floor shift shift lever assembly.
-
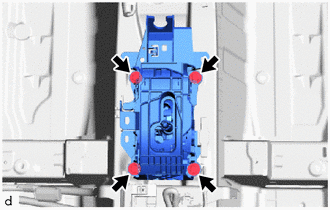
Remove the 4 bolts and floor shift shift lever assembly from the vehicle body.
-