BACK DOOR OUTSIDE GARNISH INSTALLATION
PROCEDURE
-
INSTALL BACK DOOR OUTSIDE GARNISH ASSEMBLY
Tech Tips
When installing the 6 collars, heat the back door panel using a heat light.
Heating Temperature Item Temperature Back Door Panel 20 to 30°C (68 to 86°F) CAUTION:
-
Do not touch the heat light and heated parts, touching the heat light may result in burns.
-
Touching heated parts for a long time may result in burns.
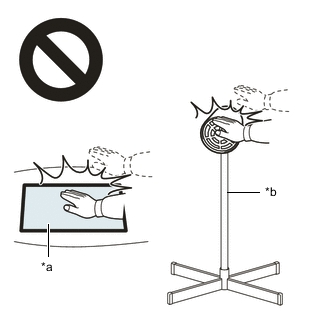
*a Heated Part *b Heat Light Note
Do not heat the back door panel excessively.
-
Clean the back door panel surface.
-
Using a heat light, heat the back door panel surface.
-
Remove any remaining double-sided tape from the back door panel.
-
Wipe off any tape adhesive residue with cleaner.
-
-
Using a heat light, heat the back door panel.
-
Remove the release paper from 6 new collars.
Tech Tips
After removing the release paper, keep the exposed adhesive free from foreign matter.
-


Double-sided Tape Attach the double-sided tape to install the 6 collars.
-
Install 10 new gaskets to the back door outside garnish assembly.
-
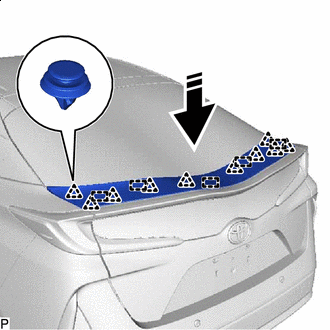

Install in this Direction Engage the 5 guides and 10 clips as shown in the illustration.
-
Install the back door outside garnish assembly with the 6 nuts.
- Torque:
- 7.3 N*m { 74 kgf*cm, 65 in.*lbf }
-
-
INSTALL NO. 2 BACK DOOR OUTSIDE GARNISH
-
Engage the 2 guides and 4 claws to install the No. 2 back door outside garnish.
-
-
INSTALL BACK DOOR OUTSIDE GARNISH
Tech Tips
Use the same procedure as for the No. 2 back door outside garnish.
-
INSTALL BACK DOOR TRIM BOARD
-
INSTALL BACK DOOR TRIM BOARD ASSEMBLY
-
INSTALL DOOR PULL HANDLE