CHARGE LID OPENER UNIT REMOVAL
PROCEDURE
-
REMOVE TONNEAU COVER ASSEMBLY
-
REMOVE REAR NO. 2 FLOOR BOARD
-
REMOVE REAR NO. 4 FLOOR BOARD
-
REMOVE REAR NO. 3 FLOOR BOARD
-
REMOVE REAR NO. 1 FLOOR BOARD
-
REMOVE DECK FLOOR BOX LH
-
REMOVE DECK FLOOR BOX RH
-
REMOVE DECK TRIM SERVICE HOLE COVER
-
REMOVE REAR DECK TRIM COVER
-
REMOVE REAR SEAT HEADREST ASSEMBLY
-
REMOVE REAR SEATBACK HINGE COVER
-
REMOVE REAR SEATBACK ASSEMBLY RH
-
REMOVE REAR SEAT CUSHION ASSEMBLY RH
-
REMOVE REAR SEAT CUSHION LOCK HOOK
-
REMOVE REAR DOOR SCUFF PLATE RH
-
DISCONNECT REAR DOOR OPENING TRIM WEATHERSTRIP RH
-
Disconnect the rear door opening trim weatherstrip RH.
-
-
REMOVE REAR UNDER SIDE COVER RH
-
REMOVE REAR SEATBACK HINGE SUB-ASSEMBLY RH
-
REMOVE REAR SEAT SIDE GARNISH RH
-
REMOVE ROPE HOOK (w/o Toyota Safety Sense)
-
REMOVE NO. 2 ROPE HOOK (w/o Toyota Safety Sense)
-
REMOVE NO. 1 TONNEAU COVER HOLDER CAP (w/ Toyota Safety Sense)
-
REMOVE TONNEAU COVER HOOK A (w/ Toyota Safety Sense)
-
REMOVE NO. 1 LUGGAGE COMPARTMENT LIGHT ASSEMBLY
-
REMOVE DECK TRIM SIDE PANEL ASSEMBLY RH
-
REMOVE NO. 1 HYBRID BATTERY INTAKE DUCT
-
REMOVE NO. 2 HYBRID BATTERY INTAKE DUCT
-
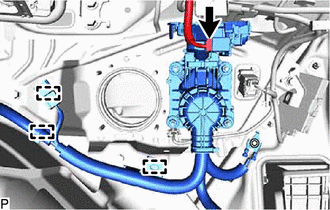
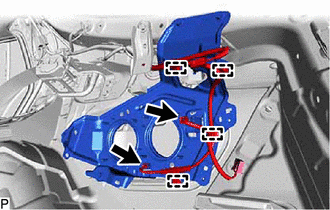
DISCONNECT AC CHARGER INLET CABLE (w/o CABLE EV CHARGER LOCK ASSEMBLY)
-
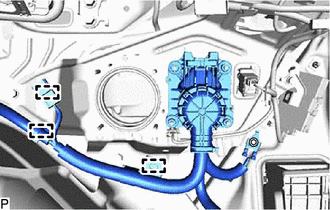
Disengage the 3 clamps.
-

Bolt 
Nut Remove the bolt.
-
Remove the 4 nuts and disconnect the AC charger inlet cable.
-
-
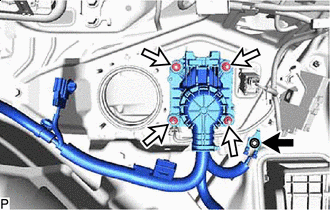
DISCONNECT AC CHARGER INLET CABLE WITH CABLE EV CHARGER LOCK ASSEMBLY (w/ CABLE EV CHARGER LOCK ASSEMBLY)
-
Disconnect the connector.
-
Disengage the 3 clamps.
-
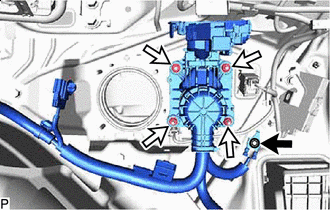
Bolt Nut Remove the bolt.
-
Remove the 4 nuts and disconnect the AC charger inlet cable with cable EV charger lock assembly.
-
-
REMOVE FUEL FILLER OPENING LID LOCK BRACKET
-
Disconnect the 2 connectors.
-
Disengage the 4 clamps.
-
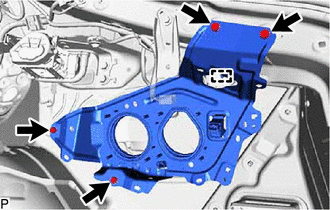
Remove the 4 bolts.
-
Disengage the guide.
-
Disengage the fuel tank drain plug shield to remove the fuel filler opening lid lock bracket.
-
-
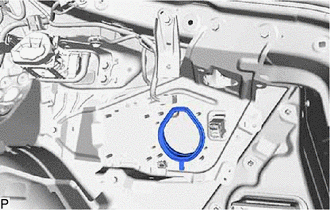
REMOVE CHARGING PORT OPENING LID LOCK RETAINER
-
REMOVE CHARGE LID LOCK WITH MOTOR ASSEMBLY
-
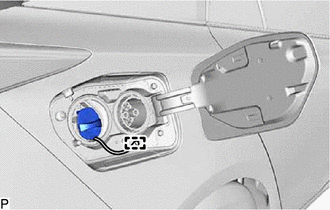
REMOVE EV CHARGER LID SWITCH ASSEMBLY
-
REMOVE CONNECTOR COVER
-
Disengage the clamp to remove the connector cover.
-
-
REMOVE BATTERY SERVICE OPENING LID SUB-ASSEMBLY
-
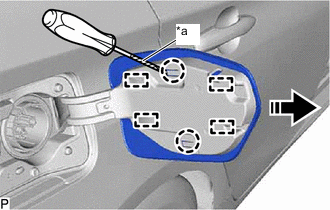
*a Protective Tape 
Remove in this Direction Using a screwdriver with its tip wrapped with protective tape, disengage the 2 claws and 4 guides to remove the battery service opening lid sub-assembly as shown in the illustration.
-
-
REMOVE BATTERY CHARGER CONNECTOR OPENING LID SUB-ASSEMBLY
-
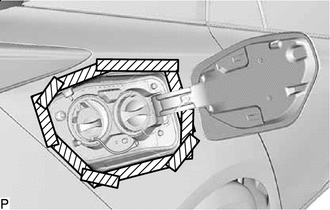

Protective Tape Apply protective tape around the battery charger connector opening lid sub-assembly as shown in the illustration.
-
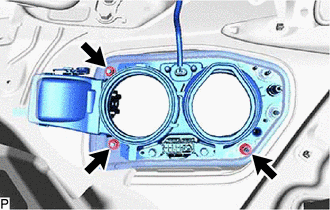
Remove the 3 nuts.
-
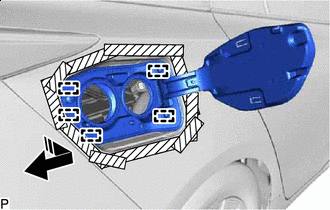
Remove in this Direction Disengage the 5 guides and remove the battery charger connector opening lid sub-assembly as shown in the illustration.
-