BACK DOOR SUPPORT REMOVAL
CAUTION / NOTICE / HINT
Tech Tips
-
Use the same procedure for the RH side and LH side.
-
The following procedure is for the LH side.
PROCEDURE
-
REMOVE BACK DOOR STAY ASSEMBLY
Note
-
Avoid touching the piston rod as much as possible to prevent foreign matter from attaching to it. Be sure to hold the cylinder while servicing.
-
Do not wear cotton gloves or other similar materials when handling the piston rod. Fibers may attach to the rod and result in gas leaks.
-
Do not apply any horizontal load to the door stay in order to prevent the piston rod from deforming.
-
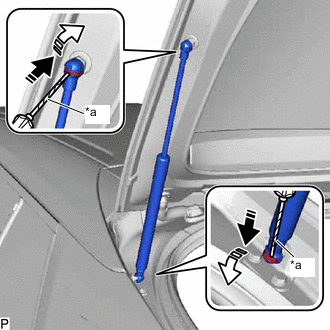
*a Protective Tape 
Remove in this Direction (1) 
Remove in this Direction (2) Using a screwdriver with its tip wrapped with protective tape, slightly raise the 2 stop rings as indicated by the arrows, in the order shown in the illustration.
Note
-
Do not remove the stop rings from the back door stay assembly. Raise the stop rings just enough to allow the ball joints to be disengaged.
-
Do not reuse the back door stay assembly if a stop ring has been removed.
-
-
Disengage the 2 ball joints to remove the back door stay assembly.
Note
Remove the back door stay assembly while supporting the back door by hand.
-
-
REMOVE BACK DOOR DAMPER STAY UPPER BRACKET
-
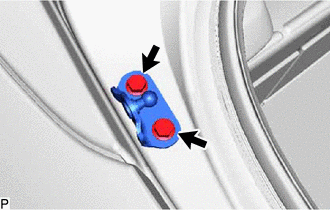
Remove the 2 bolts and back door damper stay upper bracket.
-
-
REMOVE BACK DOOR STAY BOLT
-
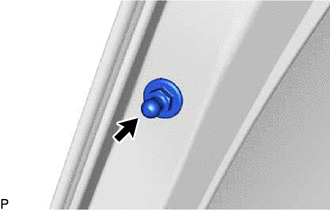
Remove the back door stay bolt.
-