ACCUMULATOR DISASSEMBLY
CAUTION / NOTICE / HINT
Note
As a pipe may deform or its joint may be damaged if force is applied to the pipe, do not carry the accumulator and accessory assembly by a pipe or apply excessive force to a pipe while performing work.
PROCEDURE
-
REMOVE NO. 3 RECEIVER TANK BRACKET
-
Remove the 2 bolts and No. 3 receiver tank bracket.
-
-
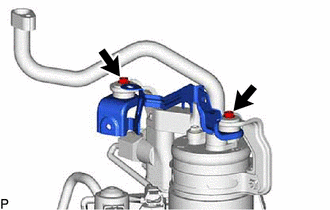
REMOVE NO. 2 RECEIVER TANK BRACKET
-
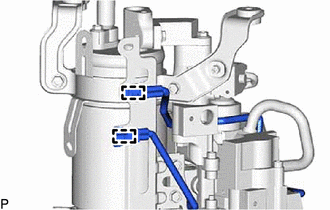
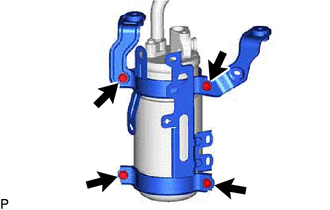
Disengage the 2 clamps.
-
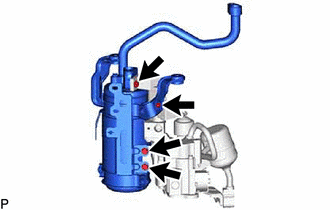
Remove the 4 bolts.
-
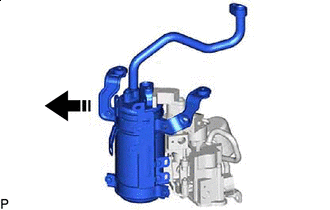

Remove in this Direction Remove the air conditioning receiver tank with bracket as shown in the illustration.
-
Remove the O-ring from the No. 1 connector tube.
Note
Seal the openings of the disconnected parts using vinyl tape to prevent entry of moisture and foreign matter.
-
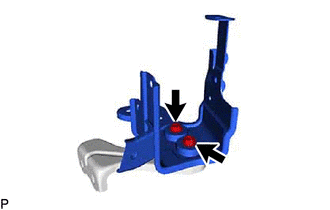
Remove the 4 bolts, No. 2 receiver tank bracket and 2 receiver holders.
-
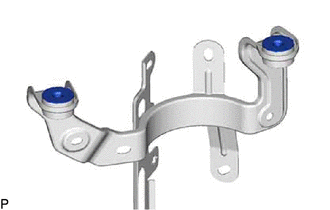
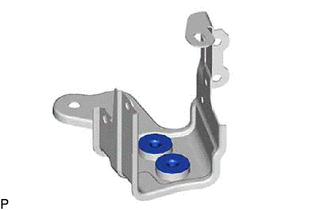
Remove the 2 bushes.
-

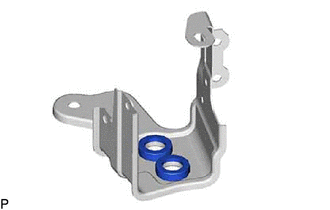
Remove the 2 No. 1 cooler cushions.
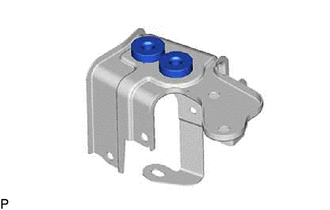
-
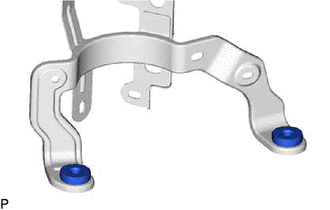
Remove the 2 No. 2 cooler cushions.
-
-
REMOVE NO. 1 COOLER REFRIGERANT SUCTION PIPE
-
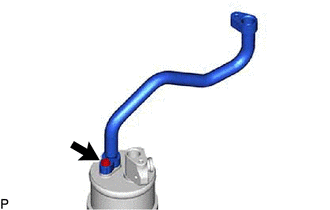
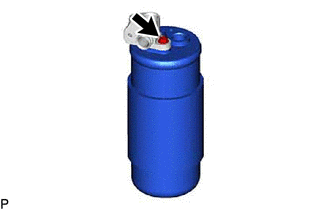
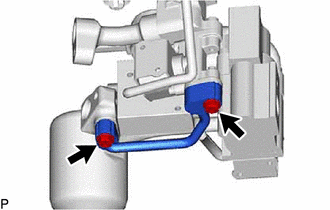
Remove the bolt and No. 1 cooler refrigerant suction pipe.
-
Remove the O-ring from the No. 1 cooler refrigerant suction pipe.
Note
Seal the openings of the disconnected parts using vinyl tape to prevent entry of moisture and foreign matter.
-
-
REMOVE AIR CONDITIONING RECEIVER TANK
-
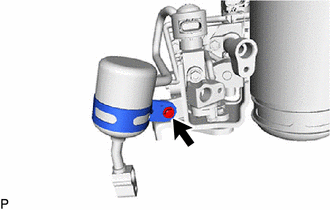
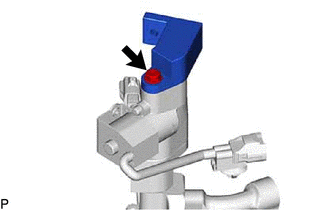
Remove the bolt and air conditioning receiver tank.
-
Remove the O-ring from the No. 1 connector tube.
Note
Seal the openings of the disconnected parts using vinyl tape to prevent entry of moisture and foreign matter.
-
-
REMOVE NO. 6 COOLER BRACKET
-
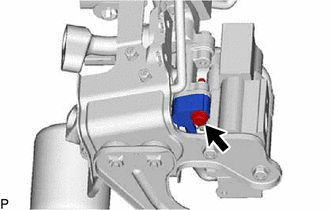
Remove the bolt and No. 6 cooler bracket.
-
-
REMOVE NO. 1 RECEIVER TANK BRACKET
-
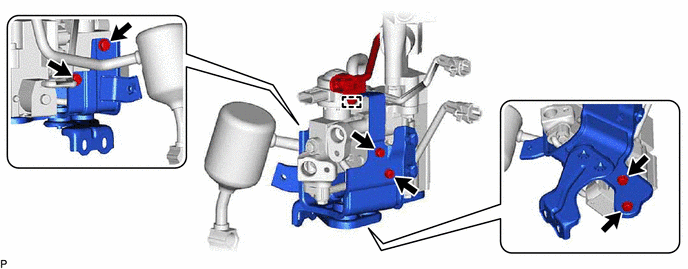
Loosen the bolt.
-
Disengage the clamp.
-
Remove the 6 bolts and No. 1 receiver tank bracket with No. 5 cooler bracket.
-
Remove the 2 bolts and No. 1 receiver tank bracket from the No. 5 cooler bracket.
-
Remove the 2 bushes.
-
Remove the 2 No. 1 cooler cushions.
-
Remove the 2 No. 2 cooler cushions.
-
-
REMOVE COOLER REFRIGERANT LIQUID PIPE A
-
Remove the 2 bolts and cooler refrigerant liquid pipe A.
-
Remove the 2 O-rings from the cooler refrigerant liquid pipe A.
Note
Seal the openings of the disconnected parts using vinyl tape to prevent entry of moisture and foreign matter.
-
-
REMOVE NO. 1 AIR CONDITIONING ACCESSORY ASSEMBLY
-
REMOVE NO. 3 CONNECTOR TUBE
-
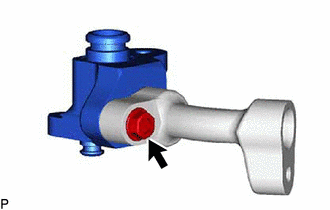
Remove the bolt and No. 3 connector tube.
-
Remove the O-ring from the No. 3 connector tube.
Note
Seal the openings of the disconnected parts using vinyl tape to prevent entry of moisture and foreign matter.
-
-
REMOVE LOW PRESSURE MAGNETIC VALVE
-
REMOVE HIGH PRESSURE MAGNETIC VALVE
-
REMOVE VALVE TO CONNECTOR TUBE
-
Remove the bolt and valve to connector tube.
-
Remove the O-ring from the No. 5 connector tube.
Note
Seal the openings of the disconnected parts using vinyl tape to prevent entry of moisture and foreign matter.
-