AIR CONDITIONING ACCESSORY ASSEMBLY INSTALLATION
PROCEDURE
-
INSTALL NO. 1 AIR CONDITIONING ACCESSORY ASSEMBLY
-
Remove the vinyl tape from the No. 1 air conditioning accessory assembly.
-
Sufficiently apply compressor oil to a new O-ring and the fitting surface of the No. 2 connector tube.
-
Install the O-ring to the No. 2 connector tube.
Note
Keep the O-ring and O-ring fitting surface free of foreign matter.
-
Install the No. 1 air conditioning accessory assembly with the bolt.
- Torque:
- 9.8 N*m { 100 kgf*cm, 87 in.*lbf }
-
-
INSTALL COOLER REFRIGERANT LIQUID PIPE A
-
INSTALL NO. 1 RECEIVER TANK BRACKET WITH NO. 5 COOLER BRACKET
-
Install the No. 1 receiver tank bracket with No. 5 cooler bracket with the 6 bolts.

Bolt (A) 
Bolt (B) - Torque:
- Bolt (A)
- 9.8 N*m { 100 kgf*cm, 87 in.*lbf }
- Bolt (B)
- 3.4 N*m { 35 kgf*cm, 30 in.*lbf }
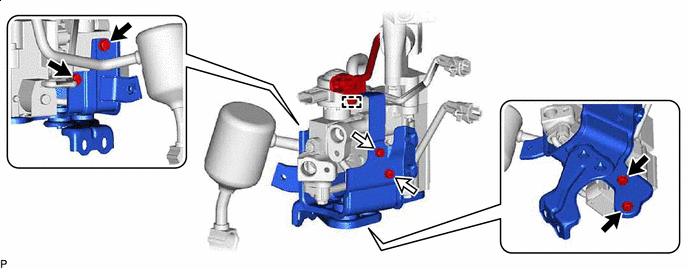
Tech Tips
Make sure that the wire harnesses are routed as shown in the illustration.
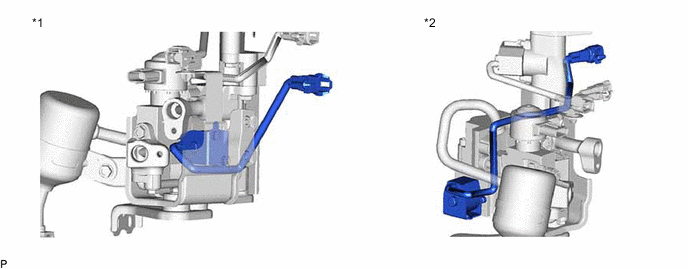
*1 High Pressure Magnetic Valve *2 No. 1 Air Conditioning Accessory Assembly -
Engage the clamp.
-
Tighten the bolt.
- Torque:
- 9.8 N*m { 100 kgf*cm, 87 in.*lbf }
-
-
INSTALL NO. 6 COOLER BRACKET
-
INSTALL AIR CONDITIONING RECEIVER TANK WITH BRACKET
-
Remove the vinyl tape from the air conditioning receiver tank.
-
Sufficiently apply compressor oil to a new O-ring and the fitting surface of the air conditioning receiver tank.
Compressor Oil ND-OIL 11 or equivalent -
Install the O-ring to the No. 1 connector tube.
Note
Keep the O-ring and O-ring fitting surface free of foreign matter.
-
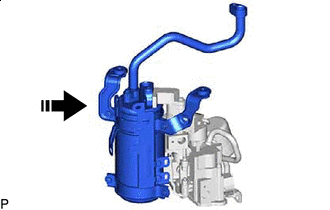

Install in this Direction Temporarily install the air conditioning receiver tank with bracket as shown in the illustration.
-
Temporarily install the 4 bolts.
-
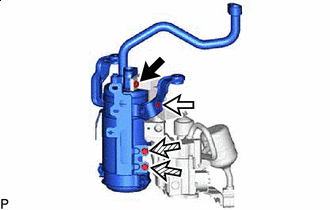
Bolt (A) Bolt (B) 
Bolt (C) Tighten the bolt (A).
- Torque:
- 9.8 N*m { 100 kgf*cm, 87 in.*lbf }
-
Tighten the bolt (B).
- Torque:
- 3.4 N*m { 35 kgf*cm, 30 in.*lbf }
-
Tighten the 2 bolts (C) to install the air conditioning receiver tank with bracket.
- Torque:
- 9.8 N*m { 100 kgf*cm, 87 in.*lbf }
-
Engage the 2 clamps.
-
-
INSTALL NO. 3 RECEIVER TANK BRACKET
-
INSTALL ACCUMULATOR AND ACCESSORY ASSEMBLY