HIGH PRESSURE MAGNETIC VALVE REMOVAL
CAUTION / NOTICE / HINT
The necessary procedures (adjustment, calibration, initialization, or registration) that must be performed after parts are removed and installed, or replaced during high pressure magnetic valve removal/installation are shown below.
| Replaced Part or Performed Procedure | Necessary Procedure | Effect/Inoperative Function when Necessary Procedure not Performed | Link |
|---|---|---|---|
| Front bumper assembly |
|
|
|
| Change grille shutter control mode and/or perform initialization | Grille Shutter system |
Note
As a pipe may deform or its joint may be damaged if force is applied to the pipe, do not carry the accumulator and accessory assembly by a pipe or apply excessive force to a pipe while performing work.
PROCEDURE
-
REMOVE ACCUMULATOR AND ACCESSORY ASSEMBLY
-
REMOVE NO. 3 RECEIVER TANK BRACKET
-
REMOVE AIR CONDITIONING RECEIVER TANK WITH BRACKET
-
REMOVE NO. 6 COOLER BRACKET
-
REMOVE NO. 1 RECEIVER TANK BRACKET WITH NO. 5 COOLER BRACKET
-
REMOVE COOLER REFRIGERANT LIQUID PIPE A
-
REMOVE HIGH PRESSURE MAGNETIC VALVE
-
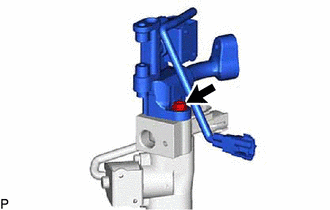
Remove the bolt and high pressure magnetic valve with connector tube.
-
Remove the O-ring from the valve to connector tube.
Note
Seal the openings of the disconnected parts using vinyl tape to prevent entry of moisture and foreign matter.
-
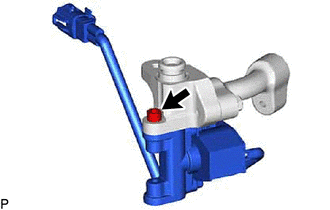
Using a 5 mm hexagon socket wrench, remove the hexagon bolt and high pressure magnetic valve.
-
Remove the O-ring from the valve to connector tube.
Note
Seal the openings of the disconnected parts using vinyl tape to prevent entry of moisture and foreign matter.
-