REAR SEAT ASSEMBLY DISASSEMBLY
CAUTION / NOTICE / HINT
CAUTION:
Wear protective gloves. Sharp areas on the parts may injure your hands.
PROCEDURE
-
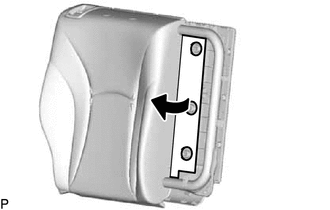
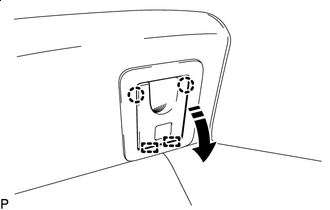
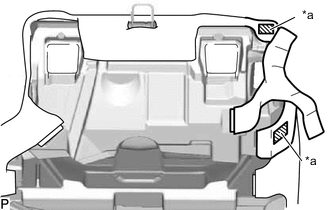
REMOVE REAR SEATBACK UPPER LOCK BEZEL (for LH Side)
-
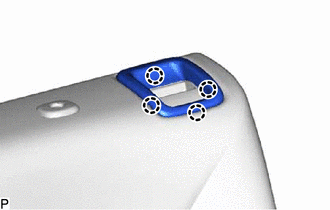
Disengage the 4 claws to remove the rear seatback upper lock bezel.
-
-
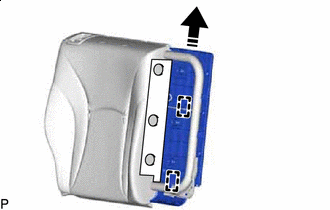
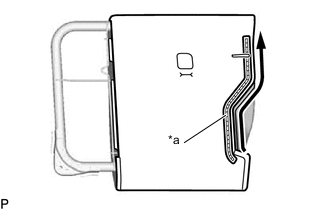
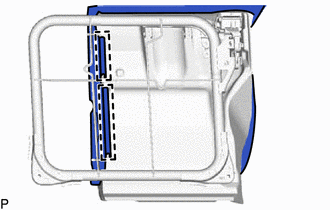
REMOVE REAR SEATBACK BOARD SUB-ASSEMBLY LH (for LH Side)
-
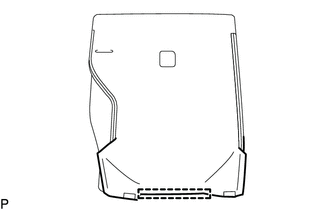
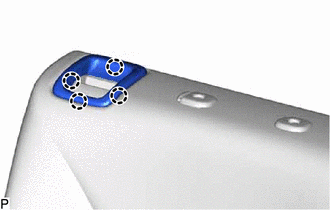
Disengage the hook.
-
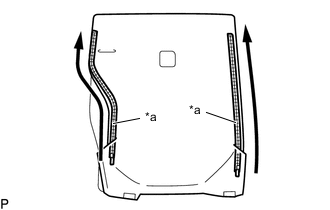
*a Fastener Open the 2 fasteners as shown in the illustration.
-
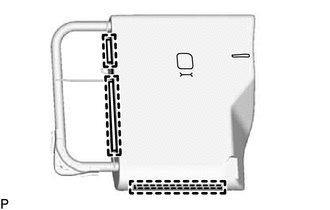
Disengage the 5 claws.
-
Disengage the 2 guides to remove the rear seatback board sub-assembly LH.
-
-
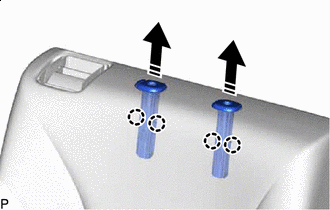
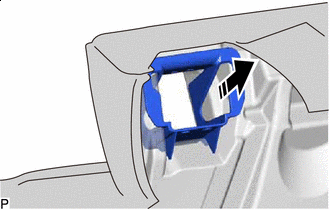
REMOVE REAR SEAT HEADREST SUPPORT (for LH Side)
-
for Type A:
-

Remove in this Direction Disengage the 4 claws and remove the 2 rear seat headrest supports as shown in the illustration.
-
-
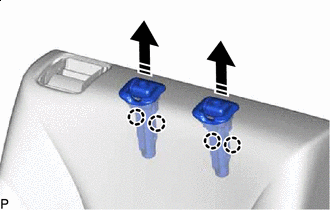
for Type B:
-
Remove in this Direction Disengage the 4 claws and remove the 2 rear seat headrest supports as shown in the illustration.
-
-
-
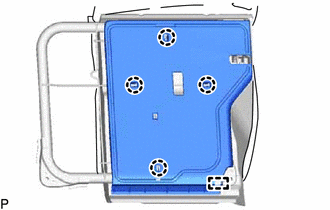
REMOVE SEPARATE TYPE REAR SEATBACK COVER WITH PAD (for LH Side)
-
Remove in this Direction Remove the separate type rear seatback cover with pad from the rear seatback frame sub-assembly LH as shown in the illustration.
-
-
REMOVE SEPARATE TYPE REAR SEATBACK COVER (for LH Side)
-
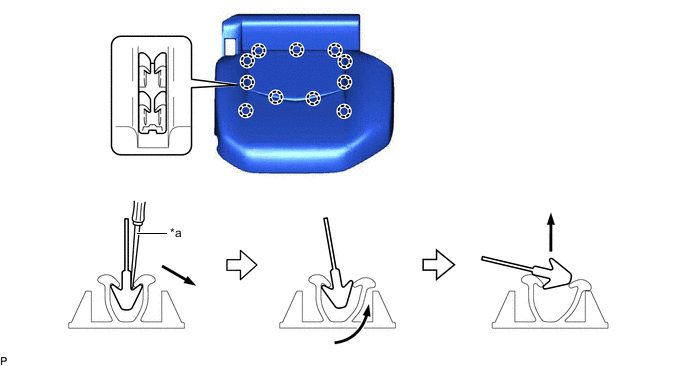
Using a screwdriver, disengage the 14 claws and remove the separate type rear seatback cover from the separate type rear seatback pad LH as shown in the illustration.
*a Screwdriver - -
-
-
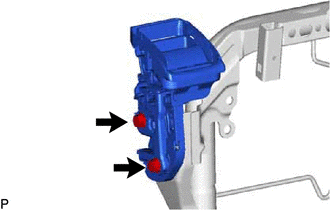
REMOVE REAR SEATBACK LOCK ASSEMBLY LH (for LH Side)
-
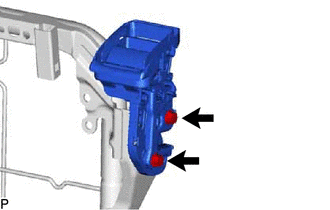
Remove the 2 bolts and rear seatback lock assembly LH.
-
-
REMOVE REAR NO. 1 SEATBACK BOARD CAP (for RH Side)
-
*a Protective Tape Using a screwdriver with its tip wrapped with protective tape, remove the 3 rear No. 1 seatback board caps.
-
-
REMOVE NO. 1 SEAT SIDE NO. 1 PLATE (for RH Side)
-

Remove the 3 screws.
-
Disengage the 8 claws.
-
Disengage the 3 clips to remove the No. 1 seat side No. 1 plate.
-
-
REMOVE NO. 1 SEAT ARMREST ASSEMBLY (for RH Side)
-
Disengage the 5 claws to remove the No. 1 seat armrest assembly.
-
-
REMOVE NO. 2 SEAT SIDE NO. 1 PLATE (for RH Side)
-
Turn back the cover as shown in the illustration.
-
Remove in this Direction Disengage the 2 guides to remove the No. 2 seat side No. 1 plate as shown in the illustration.
-
-
REMOVE REAR SEATBACK UPPER LOCK BEZEL (for RH Side)
-
Disengage the 4 claws to remove the rear seatback upper lock bezel.
-
-
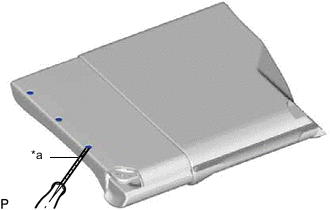
REMOVE REAR SEATBACK BOARD SUB-ASSEMBLY RH (for RH Side)
-
Disengage the 3 hooks.
-
*a Fastener Open the fastener as shown in the illustration.
-
Disengage the 4 claws.
-
Disengage the guide to remove the rear seatback board sub-assembly RH.
-
-
REMOVE REAR SEAT HEADREST SUPPORT (for RH Side)
-
for Type A:
-
Remove in this Direction Disengage the 4 claws and remove the 2 rear seat headrest supports as shown in the illustration.
-
-
for Type B:
-
Remove in this Direction Disengage the 4 claws and remove the 2 rear seat headrest supports as shown in the illustration.
-
-
-
REMOVE SEPARATE TYPE REAR SEATBACK COVER WITH PAD (for RH Side)
-
Disengage the 2 hooks.
-

Remove in this Direction Remove the separate type rear seatback cover with pad from the rear seatback frame sub-assembly RH as shown in the illustration.
-
-
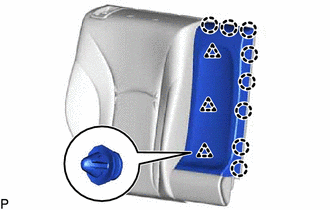
REMOVE SEPARATE TYPE REAR SEATBACK COVER (for RH Side)
-
Using a screwdriver, disengage the 14 claws and remove the separate type rear seatback cover from the separate type rear seatback pad RH as shown in the illustration.

*a Screwdriver - -
-
-
REMOVE REAR SEATBACK LOCK ASSEMBLY RH (for RH Side)
-
Remove the 2 bolts and rear seatback lock assembly RH.
-
-
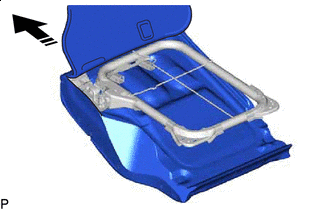
REMOVE CHILD RESTRAINT SEAT COVER
-
Remove in this Direction Disengage the 2 claws and 2 guides to remove the child restraint seat cover as shown in the illustration.
Tech Tips
Use the same procedure for all of the child restraint seat covers.
-
-
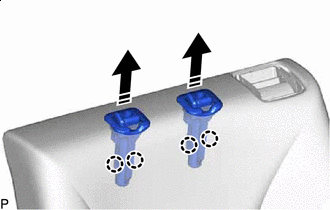
REMOVE NO. 2 CHILD RESTRAINT SEAT COVER
-

Remove in this Direction Disengage the 4 claws to remove the No. 2 child restraint seat cover as shown in the illustration.
Tech Tips
Use the same procedure for all of the No. 2 child restraint seat covers.
-
-
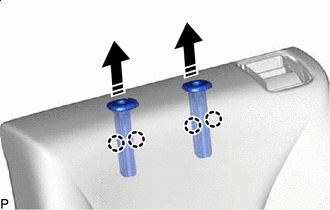
REMOVE CHILD RESTRAINT SEAT GUIDE CUP
-
Remove in this Direction Remove the child restraint seat guide cup as shown in the illustration.
Tech Tips
Use the same procedure for all of the child restraint seat guide cups.
-
-
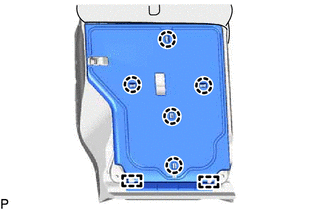
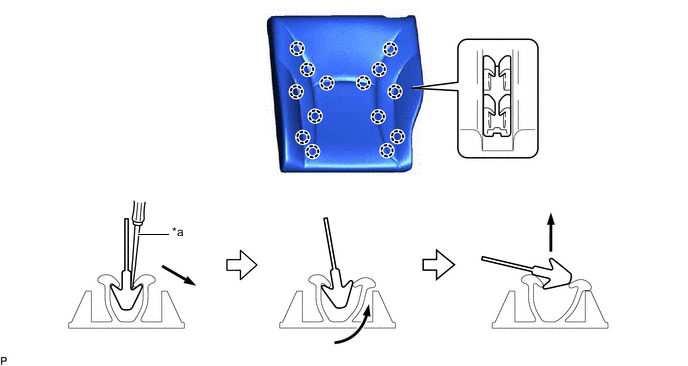
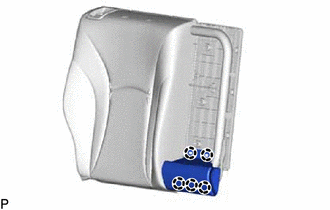
REMOVE REAR SEAT CUSHION COVER SUB-ASSEMBLY LH
-
*a Fastener Disengage the 2 fasteners.
-
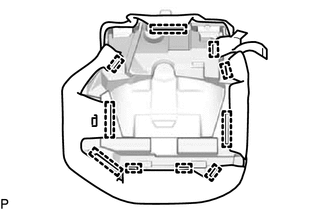
Disengage the 10 hooks.
-
Using a screwdriver, disengage the 11 claws to remove the rear seat cushion cover sub-assembly LH from the rear seat cushion pad LH as shown in the illustration.
*a Screwdriver - -
-
-
REMOVE REAR SEAT CUSHION COVER SUB-ASSEMBLY RH
Tech Tips
Use the same procedure as for the LH side.