SRS SEAT CUSHION AIRBAG ASSEMBLY REMOVAL

CAUTION / NOTICE / HINT
The necessary procedures (adjustment, calibration, initialization, or registration) that must be performed after parts are removed, installed, or replaced during the front seat cushion airbag assembly RH removal/installation are shown below.
| Replacement Part or Procedure | Necessary Procedures | Effects / Inoperative when not performed | Link |
|---|---|---|---|
| Disconnect cable from negative auxiliary battery terminal | Memorize steering angle neutral point | Lane departure alert system (w/ Steering Control) | |
| Intelligent clearance sonar system*1 | |||
| Simple intelligent parking assist system*1 | |||
| Pre-crash safety system | |||
| Adaptive high beam system | |||
| Parking assist monitor system | |||
| Initialize back door lock | Power door lock control system | ||
| Removal/installation of the front passenger seat | Zero point calibration (Occupant classification system) |
|
Click here Click here
CAUTION:
-
Be sure to read Precaution thoroughly before servicing.
-
Wear protective gloves. Sharp areas on the parts may injure your hands.
Note
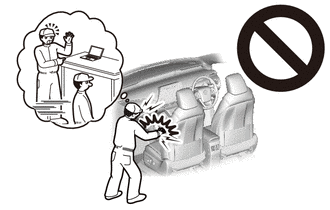
If the front seat cushion airbag assembly RH has been deployed, replace the front seat cushion airbag assembly RH, front seat adjuster assembly RH, separate type front seat cushion pad and separate type front seat cushion cover with the necessary parts in accordance with the extent of the collision damage.
PROCEDURE
-
REMOVE FRONT SEAT ASSEMBLY RH
-
DISCONNECT SEPARATE TYPE FRONT SEATBACK COVER
-
REMOVE RECLINING HINGE COVER RH
-
REMOVE RECLINING ADJUSTER RELEASE HANDLE RH
-
REMOVE FRONT SEAT CUSHION SHIELD RH
-
REMOVE FRONT SEAT INNER CUSHION SHIELD RH
-
REMOVE SEPARATE TYPE FRONT SEATBACK ASSEMBLY RH
-
REMOVE SEPARATE TYPE FRONT SEAT CUSHION COVER WITH PAD RH
-
REMOVE FRONT SEAT CUSHION AIRBAG ASSEMBLY RH
CAUTION:
When storing the front seat cushion airbag assembly RH, keep the airbag deployment side facing upward.
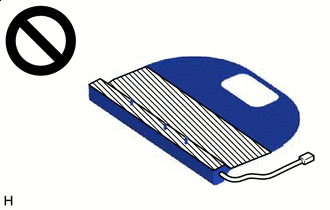

Deployment Side
-

Disengage the 2 clamps and claw.
Tech Tips
Disengage the clamps first.
-
Remove the 3 nuts.
Note
-
The nuts must not be reused.
-
Make sure that the front seat adjuster assembly RH is not deformed. If it is deformed, replace it with a new one.
-
-
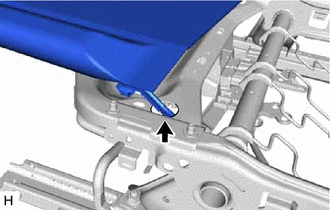
Pass the airbag wire harness through the hole to remove the front seat cushion airbag assembly RH.
-