COMBINATION METER REASSEMBLY
PROCEDURE
-
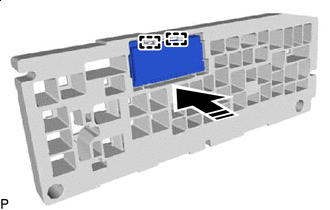
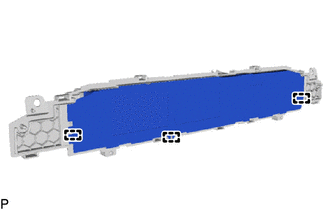
INSTALL METER CIRCUIT PLATE
-
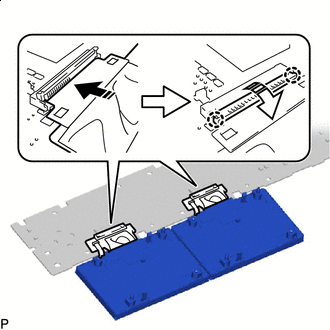

Install in this Direction (1) 
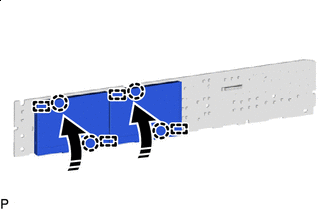
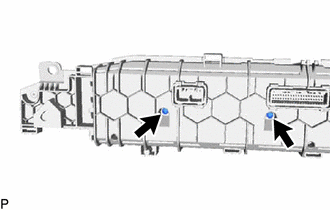
Install in this Direction (2) Connect each connector and push down each holder as indicated by the arrows, in the order shown in the illustration to engage the 4 claws.
Note
-
Be sure to connect the connector securely.
-
Be sure to engage the claws securely.
-
-
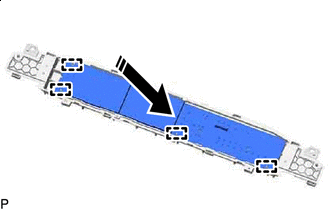
Install in this Direction Engage the 4 guides and 4 claws to install the meter circuit plate as shown in the illustration.
-
-
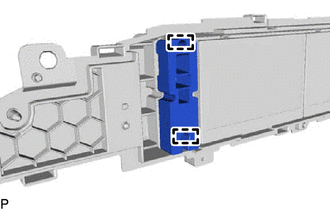
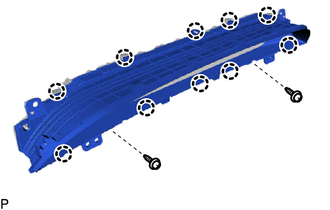
INSTALL NO. 2 METER CIRCUIT PLATE
-
Install in this Direction Engage the 4 guides as shown in the illustration.
-
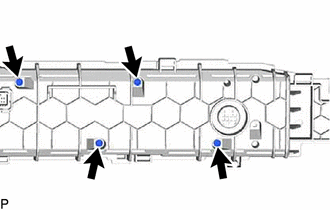
Install the No. 2 meter circuit plate with the 4 screws.
-
-
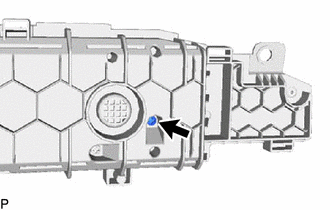
INSTALL NO. 2 COMBINATION METER CASE
-
Install in this Direction Engage the 2 guides to install the combination meter multi-display to the No. 2 combination meter case as shown in the illustration.
-

Install in this Direction Engage the 2 guides and connect the connector to install the No. 2 combination meter case with combination meter multi-display as shown in the illustration.
Note
-
Make sure to push the connector straight down when connecting it as it is easily damaged.
-
Make sure not to push the combination meter multi-display forcibly, or the connector may be damaged.
-
Be sure to connect the connector securely.
-
-
Install the 2 screws.
-
Engage the 2 guides.
-
Install the No. 2 combination meter case with the screw.
-
-
INSTALL NO. 1 COMBINATION METER PLATE
-
Engage the 3 guides to install the No. 1 combination meter plate.
-
-
INSTALL NO. 1 COMBINATION METER COVER
-
Engage the 10 claws.
-
Install the No. 1 combination meter cover with the 2 screws.
-
-
INSTALL COMBINATION METER GLASS
-
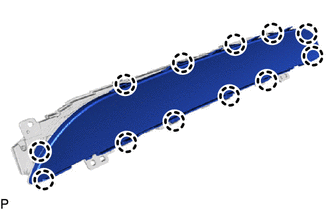
Engage the 12 claws to install the combination meter glass.
-

Install the 9 bushes.
-