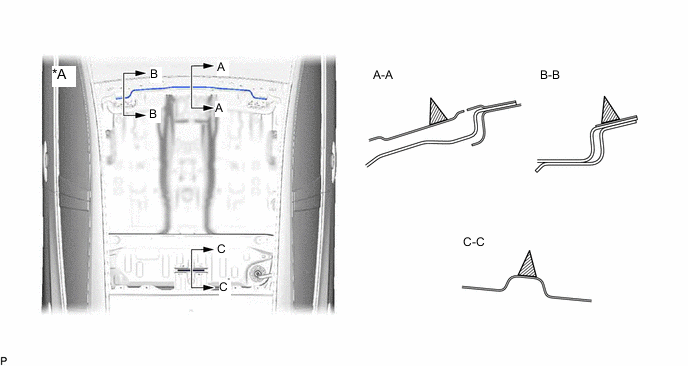
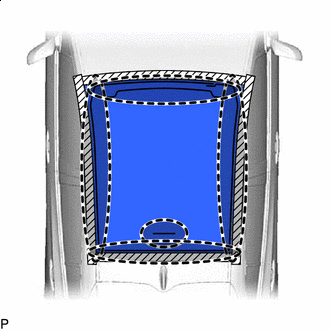
SOLAR ROOF INSTALLATION

PROCEDURE
-
CLEAN ROOF WINDOW GLASS
-
When reusing the roof window glass:
-
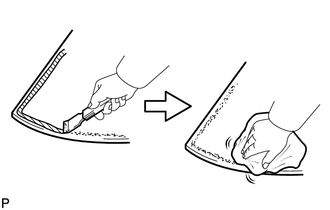
Using a scraper, remove any remaining double-sided tape and adhesive residue from the roof window glass.
Note
Be careful not to damage the roof window glass.
-
-
-
INSTALL UPPER ROOF WINDOW MOULDING
-
Clean the installation area of the upper roof window moulding on the roof window glass with a non-residue solvent.
-
Apply primer G to the installation area of the upper roof window moulding on the roof window glass.
-
Apply new double-sided tape to the installation area of the upper roof window moulding on the roof window glass.
Note
Make sure to apply the double-sided tape only after the primer G has dried.
-
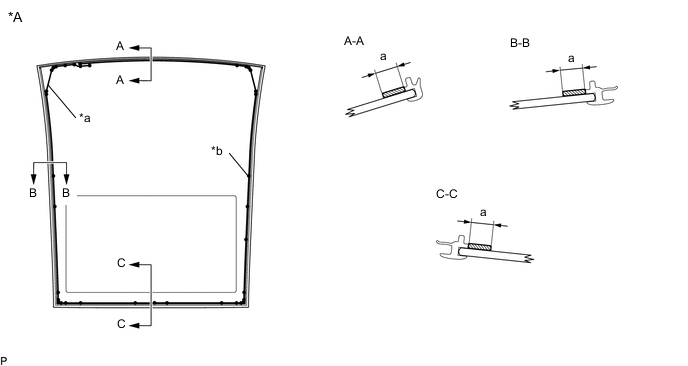
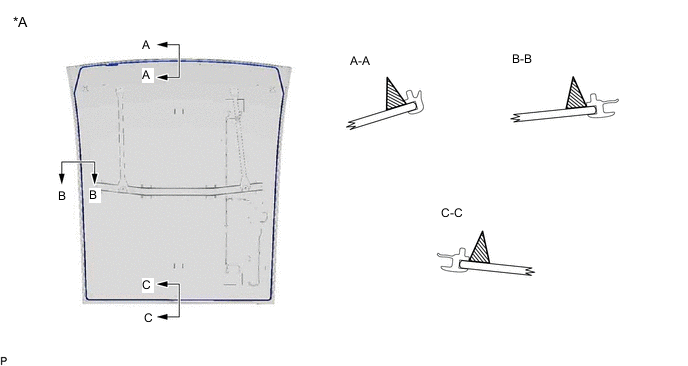
Without touching the contact surface of the double-sided tape, remove the release paper and install a new upper roof window moulding to the roof window glass at the position shown in the illustration.
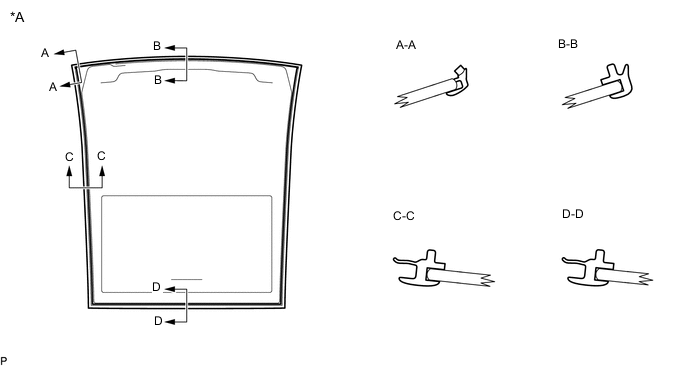
*A Back Side - -
-
-
INSTALL LOWER ROOF WINDOW MOULDING PROTECTOR
-
Clean the installation area of the lower roof window moulding protector on the roof window glass with a non-residue solvent.
-
Apply primer G to the installation area of the lower roof window moulding protector on the roof window glass.
-
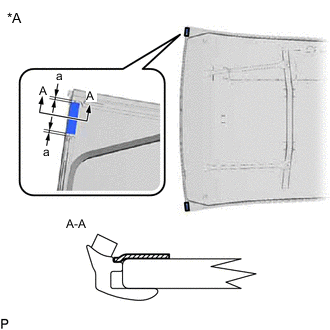
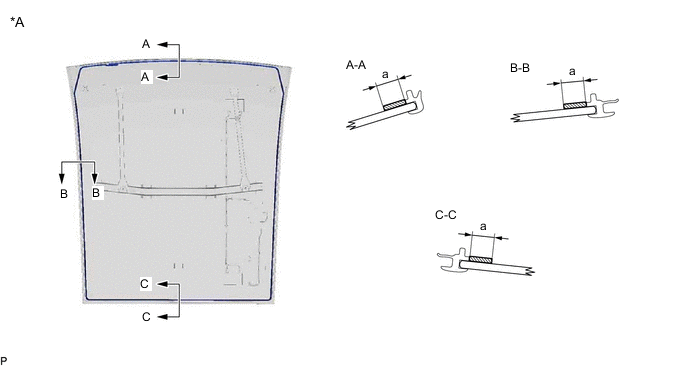
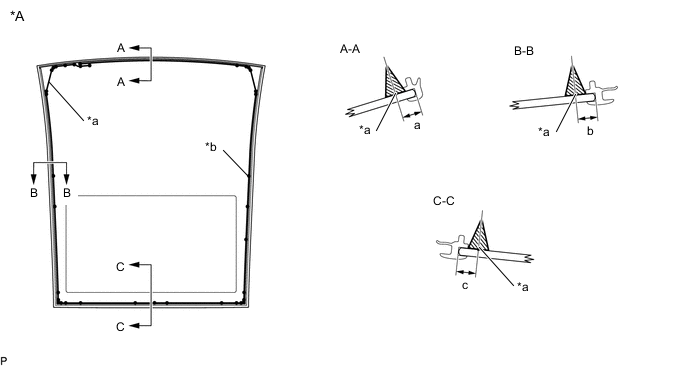
*A Back Side 
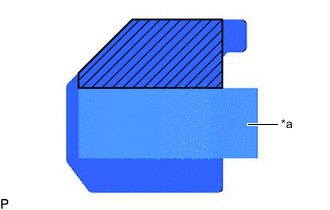
Lower Roof Window Moulding Protector Without touching the contact surface of the double-sided tape, remove the release paper and install 2 new lower roof window moulding protectors to the roof window glass at the position shown in the illustration.
Standard Dimension Area Dimension a 2.0 mm (0.0787 in.) Note
Make sure to install the lower roof window moulding protector only after the primer G has dried.
-
-
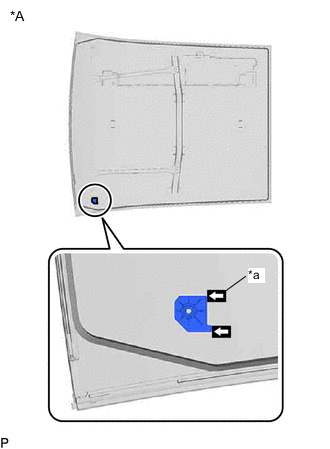
INSTALL ROOF WINDOW CLIP
-
When reusing the roof window glass:
-
*a Release Paper Adhesive Application Area Clean the adhesive application area of the roof window clip with a non-residue solvent.
-
Apply an appropriate primer to the adhesive application area of roof window clip.
-
Apply adhesive to the position shown in the illustration.
Note
Make sure to apply adhesive only after the primer has dried.
-
Clean the installation area of the roof window clip on the roof window glass with a non-residue solvent.
-
Apply primer G to the installation area of the roof window clip on the roof window glass.
-
*A Back Side *a Matchmark Without touching the contact surface of the double-sided tape, remove the release paper and install the roof window clip to the roof window glass at the positions shown in the illustration.
Note
Make sure to install the roof window clip only after the primer G has dried.
-
-
-
INSTALL SIDE ROOF WINDOW CLIP
Tech Tips
Use the same procedure as for the roof window clip.
-
INSTALL NO. 1 ROOF WINDOW GLASS SUB-ASSEMBLY
-
Clean and shape the contact surface of the vehicle body.
-

*a Vehicle Body Adhesive If the adhesive remaining on the vehicle is considerably uneven, smooth it using a knife.
Standard Dimension Area Dimension a 1.0 mm (0.0394 in.) or more Note
Make sure to leave a small amount of adhesive on the vehicle body to protect the vehicle from damage and for reference when applying adhesive again.
-
Clean the contact surface of the vehicle body with a piece of cloth saturated with non-residue solvent.
-
-
Apply Primer M to the exposed parts of the vehicle body (where there is no remaining adhesive).
Note
-
Do not apply primer M to the adhesive.
-
Be careful when applying primer M to the panel joints and spot welds.
-
-
When reusing the roof window glass:
-
Apply primer G to the to the position shown in the illustration on the roof window glass using the remaining adhesive as a guide.
*A Back Side - - Primer G - - Standard Dimension Area Dimension a 15.0 mm (0.591 in.) or more
-
-
When using a new roof window glass:
-
Apply primer G to the No. 1 roof window glass sub-assembly at the position shown in the illustration.
*A Back Side - - *a Adhesive Positioning Center *b Ceramic Notch Primer G - - Standard Dimension Area Dimension a 15.0 mm (0.591 in.) or more
-
-
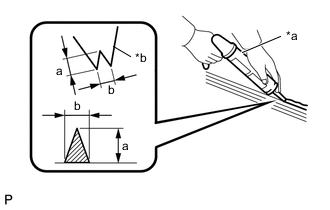
*a Sealer Gun *b Nozzle Cut off the tip of the cartridge nozzle as shown in the illustration.
Standard Dimension Area Dimension a 12.0 to 15.0 mm (0.472 to 0.591 in.) b 8.0 to 11.0 mm (0.315 to 0.433 in.) -
Load the sealer gun with the cartridge.
-
Apply a bead of adhesive to the position shown in the illustration using the remaining adhesive as a guide.
*A Vehicle Body Upper Side - - Adhesive - - Adhesive Toyota Genuine Windshield Glass Adhesive or equivalent Note
Make sure to apply adhesive only after the primer M has dried.
-
When reusing the roof window glass:
-
Apply a bead of adhesive to the position shown in the illustration on the roof window glass using the remaining adhesive as a guide.
*A Back Side - - Adhesive - - Adhesive Toyota Genuine Windshield Glass Adhesive or equivalent Note
Make sure to apply adhesive only after the primer G has dried.
-
-
When using a new roof window glass:
-
Apply a bead of adhesive to the No. 1 roof window glass sub-assembly at the position shown in the illustration.
*A Back Side - - *a Adhesive Positioning Center *b Ceramic Notch Adhesive - - Adhesive Toyota Genuine Windshield Glass Adhesive or equivalent Standard Dimension Area Dimension a 8.4 mm (0.331 in.) b 8.0 mm (0.315 in.) c 8.0 mm (0.315 in.) Note
Make sure to apply adhesive only after the primer G has dried.
-
-
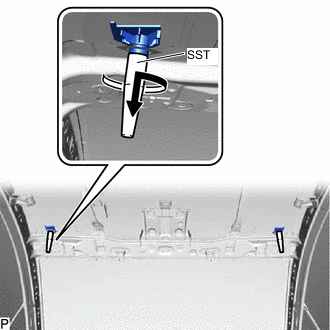
Install the No. 1 roof window glass sub-assembly.
-
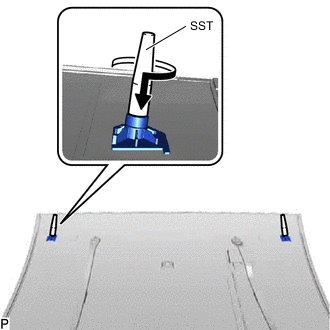
Install 2 SST to the 2 roof window clips of the No. 1 roof window glass sub-assembly by hand as shown in the illustration.
- SST
- 09802-47010
-
Using suction cups, align the end of SST with the insertion hole of the roof window clip and SST as shown in the illustration and engage the 2 roof window clip to install the No. 1 roof window glass sub-assembly.

*a Insertion Hole of Roof Window Clip and SST - - 
Install in this Direction - - Note
Make sure to install the No. 1 roof window glass sub-assembly only after the primer M on the vehicle body has dried.
-

Push here Lightly push the No. 1 roof window glass sub-assembly at the position shown in the illustration from the outside of the vehicle so that it is in full contact with the vehicle body.
-
Remove 2 SST.
-
Using a scraper, remove any excess or protruding adhesive.
Note
Remove any excess or protruding adhesive before it becomes hard.
Minimum Time Temperature Minimum Time Prior to Driving Vehicle 35°C (95°F) 7 hours 20°C (68°F) 12 hours 5°C (41°F) 54 hours
-
-
Install the 4 nuts.
- Torque:
- 5.5 N*m { 56 kgf*cm, 49 in.*lbf }
-
Turn back the curtain shield airbag assembly LH and install the earth wire with the bolt.
- Torque:
- 12.5 N*m { 127 kgf*cm, 9 ft.*lbf }
-
Connect the connector.
-
-
INSPECT FOR LEAK
-
After the adhesive has hardened, apply water from the outside of the vehicle and check that no water leaks into the cabin.
-
If water leaks into the cabin, allow the water to dry and add adhesive.
-
Remove the protective tape and adhesive tape.
-
-
INSTALL ROOF PANEL SUPPORT LH
-
Install the roof panel support LH with the bolt and nut.
- Torque:
- 5.5 N*m { 56 kgf*cm, 49 in.*lbf }
-
-
INSTALL ROOF PANEL SUPPORT RH
Tech Tips
Use the same procedure as for the LH side.
-
INSTALL CENTER ROOF DRIP SIDE FINISH MOULDING LH
-
INSTALL CENTER ROOF DRIP SIDE FINISH MOULDING RH
Tech Tips
Use the same procedure as for the LH side.
-
INSTALL WINDSHIELD OUTSIDE MOULDING LH
-
INSTALL WINDSHIELD OUTSIDE MOULDING RH
Tech Tips
Use the same procedure as for the LH side.
-
INSTALL ROOF HEADLINING ASSEMBLY
-
CONNECT CABLE TO NEGATIVE AUXILIARY BATTERY TERMINAL