SOLAR ROOF REMOVAL

CAUTION / NOTICE / HINT
The necessary procedures (adjustment, calibration, initialization, or registration) that must be performed after parts are removed, installed, or replaced during the No. 1 roof window glass sub-assembly removal/installation are shown below.
| Replacement Part or Procedure | Necessary Procedures | Effects / Inoperative when not performed | Link |
|---|---|---|---|
| Disconnect cable from negative auxiliary battery terminal | Memorize steering angle neutral point | Lane departure alert system (w/ Steering Control) | |
| Intelligent clearance sonar system*1 | |||
| Simple intelligent parking assist system*1 | |||
| Pre-crash safety system | |||
| Adaptive high beam system | |||
| Parking assist monitor system | |||
| Initialize back door lock | Power door lock control system |
*1: When performing learning using the GTS.
PROCEDURE
-
PRECAUTION
Note
After turning the power switch off, waiting time may be required before disconnecting the cable from the negative (-) auxiliary battery terminal. Therefore, make sure to read the disconnecting the cable from the negative (-) auxiliary battery terminal notices before proceeding with work.
-
DISCONNECT CABLE FROM NEGATIVE AUXILIARY BATTERY TERMINAL
-
REMOVE ROOF HEADLINING ASSEMBLY
-
REMOVE WINDSHIELD OUTSIDE MOULDING LH
-
REMOVE WINDSHIELD OUTSIDE MOULDING RH
Tech Tips
Use the same procedure as for the LH side.
-
REMOVE CENTER ROOF DRIP SIDE FINISH MOULDING LH
-
REMOVE CENTER ROOF DRIP SIDE FINISH MOULDING RH
Tech Tips
Use the same procedure as for the LH side.
-
REMOVE UPPER ROOF WINDOW MOULDING
-

Protective Tape Apply protective tape to the area around the installation position of the No. 1 roof window glass sub-assembly on the vehicle body to prevent it from being scratched.
-
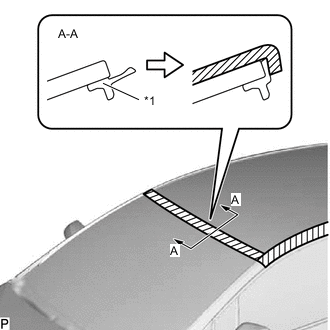
Using a knife or equivalent, cut off the upper roof window moulding at the positions shown in the illustration.
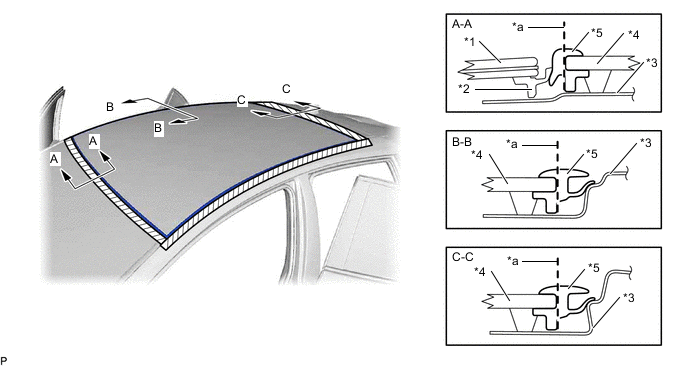
*1 Windshield Glass *2 Windshield Outside Moulding *3 Vehicle Body *4 Roof Window Glass *5 Upper Roof Window Moulding - - *a Cut - - Note
Be careful not to damage the roof window glass, windshield outside moulding or vehicle body.
-
Using a screwdriver with its tip wrapped with protective tape, remove the remaining upper roof window moulding and lower roof window moulding protector from the roof window glass.
-
-
REMOVE ROOF PANEL SUPPORT LH
-
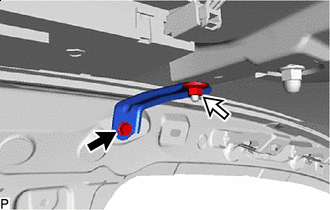

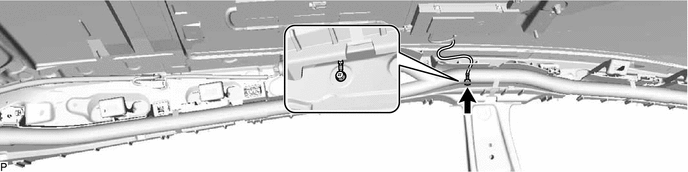
Bolt 
Nut Remove the bolt, nut and roof panel support LH.
-
-
REMOVE ROOF PANEL SUPPORT RH
Tech Tips
Use the same procedure as for the LH side.
-
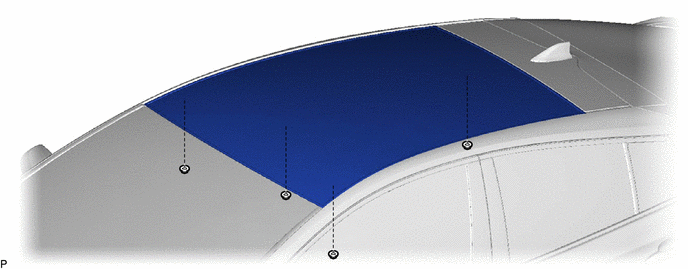
REMOVE NO. 1 ROOF WINDOW GLASS SUB-ASSEMBLY LH
-
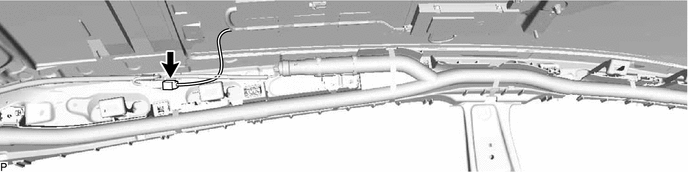
Disconnect the connector.
-
Turn back the curtain shield airbag assembly LH, remove the bolt and disconnect the earth wire.
-
Remove the 4 nuts.
-
*1 Windshield Outside Moulding Protective Tape Pull back the windshield outside moulding and secure it to the windshield glass with protective tape as shown in the illustration.
Note
Be careful not to damage the windshield outside moulding when applying protective tape.
-
Install the suction cups to the No. 1 roof window glass sub-assembly LH.
-
Using a windshield knife, cut the adhesive.
-
Apply a sufficient coat of soapy water to the seal.
-
Insert the windshield knife to the seal.
-
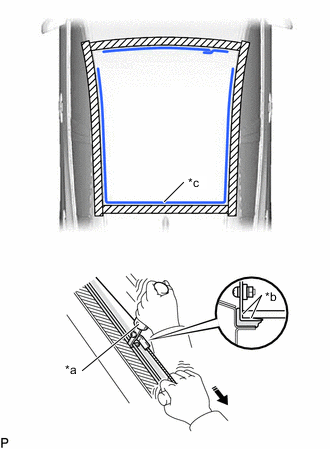
*a Windshield Knife *b Aligned with No. 1 roof window glass sub-assembly LH *c Adhesive 
Pull While keeping the windshield knife perpendicular to the top surface of the No. 1 roof window glass sub-assembly LH, cut the adhesive shown in the illustration by pulling the windshield knife around the No. 1 roof window glass sub-assembly LH.
Note
As the windshield knife may damage the No. 1 roof window glass sub-assembly LH or vehicle body, do not pry with the windshield knife.
-
-
Using a piano wire, cut the adhesive as shown in the illustration.
-
*a Matchmark Apply adhesive tape to the roof window glass and place matchmarks with a pen.
Tech Tips
Matchmarks are not necessary if the roof window glass is not going to be reused.
-
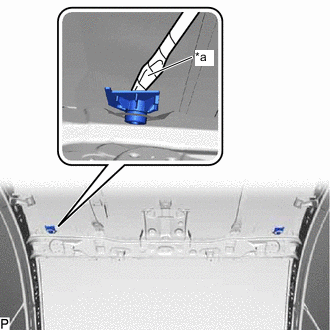
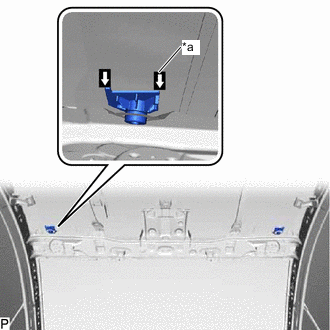
*a Protective Tape Using a screwdriver with its tip wrapped with protective tape, separate the 2 roof window clips from the roof window glass.
-
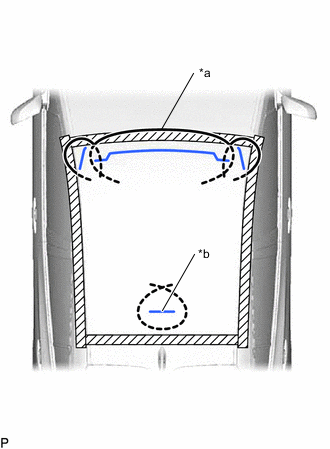
*a Piano Wire *b Adhesive Pass a piano wire between the vehicle body and roof window glass as shown in the illustration and tie both ends of each piano wire to wooden blocks or similar objects that can serve as handles.
-
Pull on the ends of the piano wire alternately to cut off the adhesive shown in the illustration.
Note
-
Do not allow the piano wire to strongly contact the edge of the No. 1 roof window glass sub-assembly LH.
-
Do not pull the piano wire when it is crossed over itself as it may break.
-
-
-
Using suction cups, remove the No. 1 roof window glass sub-assembly LH.
Note
Be careful not to drop the No. 1 roof window glass sub-assembly LH.
-