PARKING BRAKE PEDAL(for RHD) INSTALLATION

PROCEDURE
-
INSTALL PARKING BRAKE PEDAL ASSEMBLY
-
Pass the No. 1 parking brake cable assembly through the parking brake pedal assembly.
-
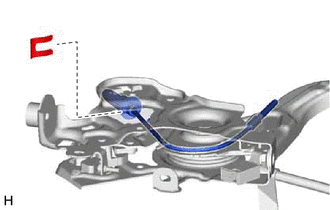
Install a new clip to the No. 1 parking brake cable assembly.
-
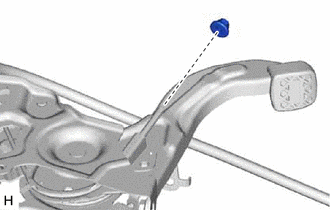
Temporarily install a new No. 1 wire adjusting nut to the No. 1 parking brake cable assembly.
Note
If the No. 1 wire adjusting nut has been removed from the No. 1 parking brake cable assembly, replace the No. 1 wire adjusting nut with a new one.
-
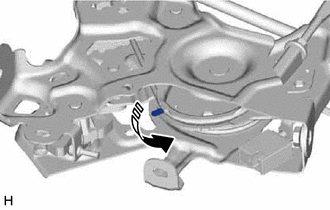
Bend the parking brake pedal assembly claw.
-
-
CONNECT PARKING BRAKE PEDAL ASSEMBLY
-
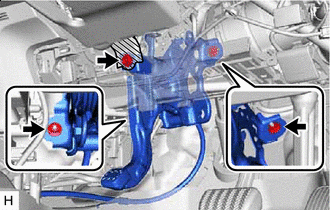

Bracket Install the parking brake pedal assembly to the vehicle body with the bolt and 2 nuts.
Note
Be careful not to deform the bracket of the instrument panel reinforcement assembly shown in the illustration.
- Torque:
- Bolt
- 15 N*m { 153 kgf*cm, 11 ft.*lbf }
- Nut
- 15.5 N*m { 158 kgf*cm, 11 ft.*lbf }
-
Connect the parking brake switch connector.
-
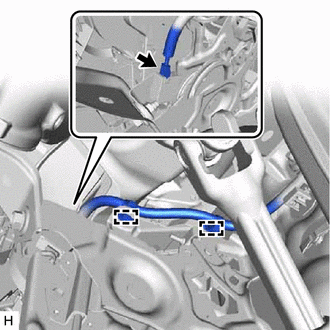
Engage the 2 clamps.
-
-
CONNECT NO. 1 PARKING BRAKE CABLE ASSEMBLY
-
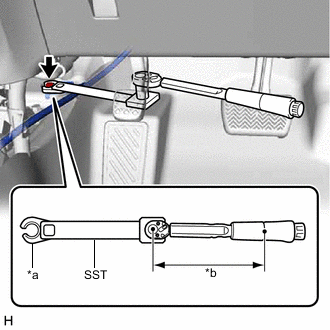
*a Union Nut Wrench *b Torque Wrench Fulcrum Length Using SST and a union nut wrench, install the No. 1 parking brake cable assembly with the bolt.
- SST
- 09961-00950
- Torque:
- Specified tightening torque
- 15.5 N*m { 158 kgf*cm, 11 ft.*lbf }
Note
When using the union nut wrench and SST, make sure that the union nut wrench and SST are parallel to the torque wrench.
Tech Tips
-
Calculate the torque wrench reading when changing the fulcrum length of the torque wrench.
-
When using a union nut wrench (fulcrum length of 20 mm (0.787 in.)) + SST (fulcrum length of 150 mm (5.91 in.)) + torque wrench (fulcrum length of 162 mm (6.38 in.)):
7.6 N*m (77 kgf*cm, 67 in.*lbf)
-
Install the front floor carpet assembly to its original position.
-
-
INSPECT PARKING BRAKE PEDAL TRAVEL
-
ADJUST PARKING BRAKE PEDAL TRAVEL
-
INSPECT BRAKE WARNING LIGHT
-
INSTALL NO. 2 AIR DUCT
-
INSTALL PARKING BRAKE MOUNTING BRACKET
-
INSTALL FRONT NO. 2 CONSOLE BOX INSERT
-
INSTALL LOWER CENTER INSTRUMENT CLUSTER FINISH PANEL SUB-ASSEMBLY
-
INSTALL REAR CONSOLE BOX ASSEMBLY (w/o Solar Charging System)
-
INSTALL REAR CONSOLE BOX ASSEMBLY (w/ Solar Charging System)
-
INSTALL NO. 1 INSTRUMENT PANEL UNDER COVER SUB-ASSEMBLY