BACK-UP LIGHT BULB REMOVAL
CAUTION / NOTICE / HINT
Tech Tips
-
Use the same procedure for the RH side and LH side.
-
The following procedure is for the LH side.
PROCEDURE
-
REMOVE NO. 2 FLOOR UNDER COVER (for LH Side)
-

Separate in this Direction Remove the clip.
-
Disengage the 2 claws to separate the rear bumper assembly as shown in the illustration.
-
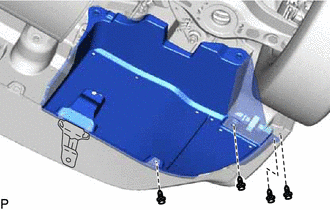
Remove the 4 clips.
-

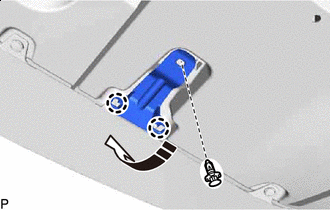
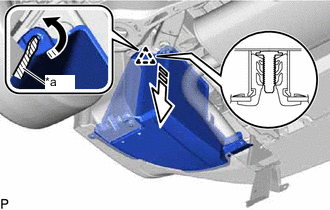
*a Protective Tape Turn in this Direction 
Remove in this Direction Using a screwdriver with its tip wrapped with protective tape, while pulling the No. 2 floor under cover as shown in the illustration, turn the clip to disengage the No. 2 floor under cover.
-

*a Protective Tape Turn in this Direction Remove in this Direction Using a screwdriver with its tip wrapped with protective tape, while pulling the No. 2 floor under cover as shown in the illustration, turn the clip to remove the No. 2 floor under cover.
-
-
REMOVE NO. 1 FLOOR UNDER COVER (for RH Side)
-
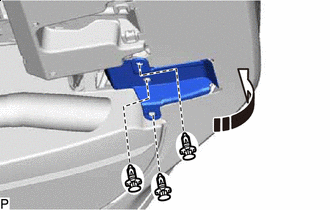
Separate in this Direction Remove the 3 clips.
-
Separate the rear bumper assembly as shown in the illustration.
-
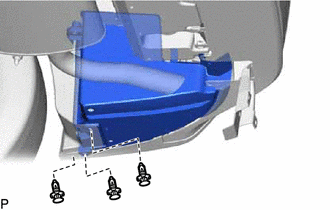
Remove the 3 clips.
-
*a Protective Tape Turn in this Direction Remove in this Direction Using a screwdriver with its tip wrapped with protective tape, while pulling the No. 1 floor under cover as shown in the illustration, turn the clip to remove the No. 1 floor under cover.
-
-
REMOVE BACK-UP LIGHT BULB
-
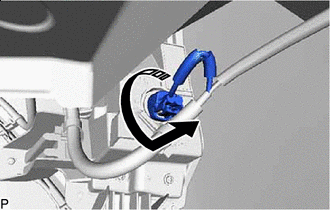
Remove in this Direction Turn the No. 3 luggage room wire with the back-up light bulb as shown in the illustration to disconnect them as a unit.
-
Remove the back-up light bulb from the No. 3 luggage room wire.
-