BLACK OUT TAPE(for Rear Side) INSTALLATION
CAUTION / NOTICE / HINT
Tech Tips
-
Use the same procedure for RHD and LHD vehicles.
-
The procedure listed below is for LHD vehicles.
-
Use the same procedure for the RH side and LH side.
-
The following procedure is for the LH side.
PROCEDURE
-
REPAIR INSTRUCTION
-
INSTALL REAR DOOR UPPER OUTSIDE STRIPE
Tech Tips
When installing the rear door upper outside stripe, heat the rear door panel and rear door upper outside stripe using an infrared light.
CAUTION:
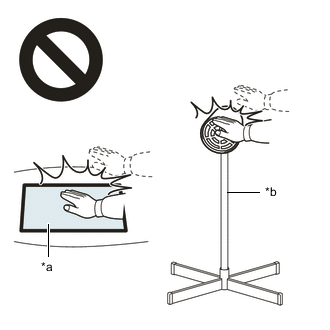
*a Heated Part *b Infrared Light
-
Do not touch the infrared light and heated parts.
-
Touching the infrared light may result in burns.
-
Touching heated parts for a long time may result in burns.
Standard Item Temperature Rear Door Panel 40 to 60°C (104 to 140°F) Rear Door Upper Outside Stripe 20 to 30°C (68 to 86°F)
-
Refer to the illustration to position a new rear door upper outside stripe.
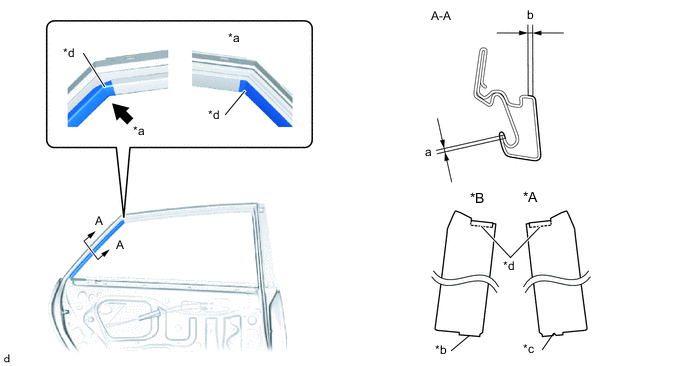
*A for RH Side *B for LH Side *a View B *b Straight Line *c Triangle *d Alignment Point Standard Measurement Dimension Measurement a 0 to 1.0 mm (0 to 0.0394 in.) b 0 to 1.5 mm (0 to 0.0591 in.) Tech Tips
Note that is a difference in the identification mark for the rear door upper outside stripe LH/RH: Round or Square Cutout.
-
-
INSTALL REAR DOOR OUTSIDE STRIPE
Tech Tips
When installing the rear door outside stripe, heat the rear door panel and rear door outside stripe using an infrared light.
CAUTION:
*a Heated Part *b Infrared Light
-
Do not touch the infrared light and heated parts.
-
Touching the infrared light may result in burns.
-
Touching heated parts for a long time may result in burns.
Standard Item Temperature Rear Door Panel 40 to 60°C (104 to 140°F) Rear Door Outside Stripe 20 to 30°C (68 to 86°F)
-
Refer to the illustration to position a new rear door outside stripe.
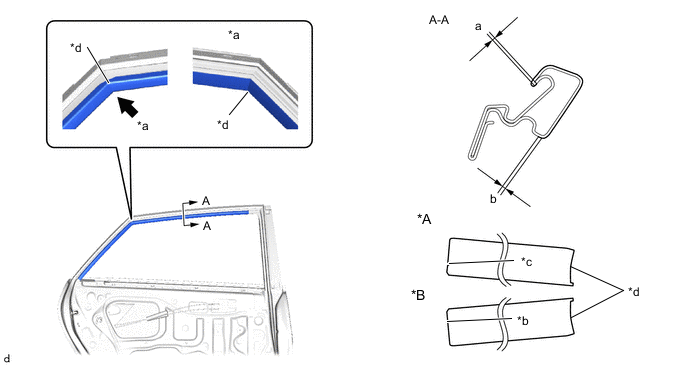
*A for RH Side *B for LH Side *a View B *b Straight Line *c Triangle *d Alignment Point Standard Measurement Dimension Measurement a 0 to 1.0 mm (0 to 0.0394 in.) b 0 to 1.5 mm (0 to 0.0591 in.) Tech Tips
Note that is a difference in the identification mark for the rear door outside stripe LH/RH: Round or Square Cutout.
-
-
INSTALL REAR DOOR LOWER OUTSIDE STRIPE
Tech Tips
When installing the rear door lower outside stripe, heat the rear door panel and rear door lower outside stripe using an infrared light.
CAUTION:
*a Heated Part *b Infrared Light
-
Do not touch the infrared light and heated parts.
-
Touching the infrared light may result in burns.
-
Touching heated parts for a long time may result in burns.
Standard Item Temperature Rear Door Panel 40 to 60°C (104 to 140°F) Rear Door Lower Outside Stripe 20 to 30°C (68 to 86°F)
-
Refer to the illustration to position a new rear door lower outside stripe.
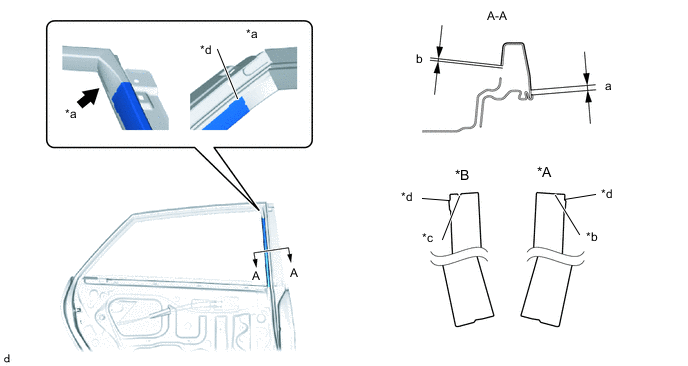
*A for RH Side *B for LH Side *a View B *b Straight Line *c Triangle *d Alignment Point Standard Measurement Dimension Measurement a 1.2 mm (0.0472 in.) b 2.4 mm (0.0945 in.) Tech Tips
Note that is a difference in the identification mark for the rear door lower outside stripe LH/RH: Round or Square Cutout.
-
-
INSTALL REAR DOOR WINDOW FRAME REAR MOULDING
-
INSTALL REAR DOOR WINDOW FRAME UPPER MOULDING
-
INSTALL REAR DOOR WINDOW FRAME FRONT MOULDING
-
INSTALL REAR DOOR WEATHERSTRIP
-
INSTALL REAR DOOR CHECK ASSEMBLY
-
INSTALL REAR DOOR FRAME GARNISH
-
INSTALL REAR SPEAKER ASSEMBLY
-
INSTALL REAR DOOR BELT MOULDING ASSEMBLY
-
CONNECT CABLE TO NEGATIVE AUXILIARY BATTERY TERMINAL
-
INITIALIZE POWER WINDOW CONTROL SYSTEM
-
INSPECT POWER WINDOW OPERATION