BLACK OUT TAPE(for Front Side) REMOVAL
CAUTION / NOTICE / HINT
The necessary procedures (adjustment, calibration, initialization or registration) that must be performed after parts are removed, installed or replaced during the front door outside stripe and front door rear outside stripe removal/installation are shown below.
| Replacement Part or Procedure | Necessary Procedures | Effect/Inoperative Function When Necessary Procedures are not Performed | Link |
|---|---|---|---|
|
Initialize power window control system |
|
Tech Tips
-
Use the same procedure for RHD and LHD vehicles.
-
The procedure listed below is for LHD vehicles.
-
Use the same procedure for the RH side and LH side.
-
The following procedure is for the LH side.
PROCEDURE
-
REMOVE FRONT DOOR BELT MOULDING ASSEMBLY
-
REMOVE DOOR FRAME GARNISH
-
REMOVE FRONT DOOR CHECK ASSEMBLY
-
REMOVE FRONT DOOR WEATHERSTRIP
-
REMOVE FRONT DOOR WINDOW FRAME REAR MOULDING
-
REMOVE FRONT DOOR OUTSIDE MOULDING SUB-ASSEMBLY
-
REMOVE FRONT DOOR OUTSIDE STRIPE
-
Using an infrared light, heat the front door outside stripe.
Heating Temperature Item Temperature Front Door Outside Stripe 40 to 60°C (104 to 140°F) 3 to 5 minutes CAUTION:
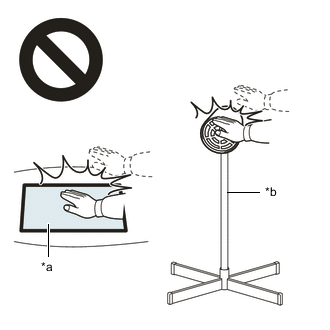
*a Heated Part *b Infrared Light
-
Do not touch the infrared light and heated parts.
-
Touching the infrared light may result in burns.
-
Touching heated parts for a long time may result in burns.
-
-
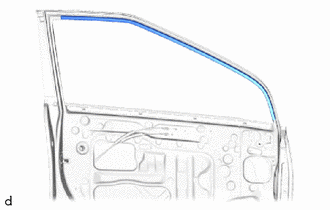
Pull back on one of the ends of the front door outside stripe to remove it.
-
-
REMOVE FRONT DOOR REAR OUTSIDE STRIPE
-
Using an infrared light, heat the front door rear outside stripe.
Heating Temperature Item Temperature Front Door Rear Outside Stripe 40 to 60°C (104 to 140°F) 3 to 5 minutes CAUTION:
*a Heated Part *b Infrared Light
-
Do not touch the infrared light and heated parts.
-
Touching the infrared light may result in burns.
-
Touching heated parts for a long time may result in burns.
-
-
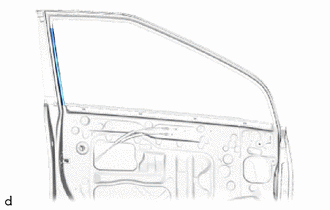
Pull back on one of the ends of the front door rear outside stripe to remove it.
-