WINDSHIELD OUTSIDE MOULDING REMOVAL
CAUTION / NOTICE / HINT
Tech Tips
-
Use the same procedure for the RH side and LH side.
-
The following procedure is for the LH side.
PROCEDURE
-
REMOVE FRONT PILLAR UPPER COVER SUB-ASSEMBLY
-
REMOVE FRONT PILLAR OUTER GARNISH
-
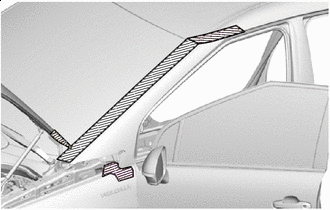

Protective Tape Apply protective tape around the front pillar outer garnish.
-
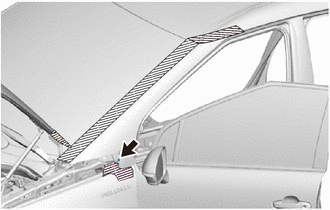
Using a hexagon socket wrench 4, remove the screw.
-
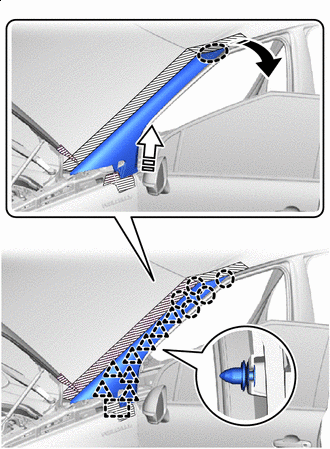

Place Hands Here 
Remove in this Direction (1) 
Remove in this Direction (2) Disengage the claws, clips and guide to remove the front pillar outer garnish as shown in the illustration.
Note
If the front pillar outer garnish contacts the body, it could be damaged.
-
-
REMOVE NO. 2 WINDSHIELD OUTSIDE MOULDING CLIP
-
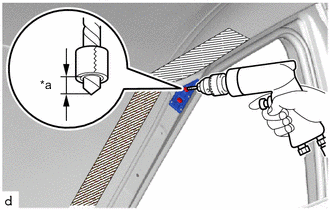
*a 5.0 mm (0.197 in.) Insert a 4.0 mm (0.157 in.) drill bit into a drill.
-
Tape the 4.0 mm (0.157 in.) drill bit 5.0 mm (0.197 in.) from the tip as shown in the illustration.
Tech Tips
Tape the 4.0 mm (0.157 in.) drill bit to prevent the drill bit from going too deep.
-
Lightly press the drill against the rivets to drill off the rivet flanges, and remove the 2 rivets.
Note
-
Pressing the drill too firmly will cause the rivet to turn and result in the rivet not being drilled through.
-
Prying the rivets with the drill may damage the rivet installation holes or drill bit.
-
Be careful of the drilled rivets, as they may be hot.
-
-
Remove the No. 2 windshield outside moulding clip.
-