REAR BUMPER REMOVAL
PROCEDURE
-
REMOVE NO. 1 REAR BUMPER PLATE
-
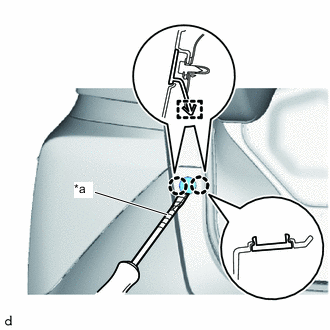
*a Protective Tape Using a screwdriver with its tip wrapped in protective tape, disengage the claws.
-
Disengage the hook to remove the No. 1 rear bumper plate.
Tech Tips
Use the same procedure for the RH side.
-
-
REMOVE REAR BUMPER SIDE SEAL LH
-
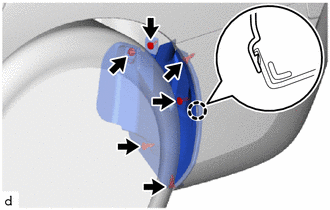
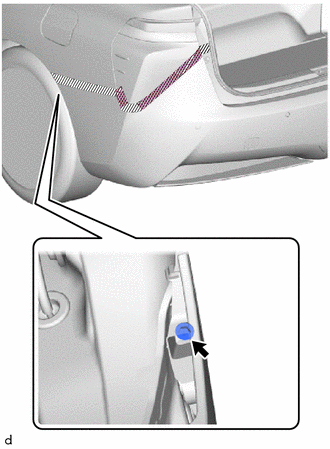
Remove the 6 clips.
-
Disengage the claw to remove the rear bumper side seal LH.
-
-
REMOVE REAR BUMPER SIDE SEAL RH
Tech Tips
Use the same procedure as for the LH side.
-
REMOVE REAR BUMPER ASSEMBLY
-
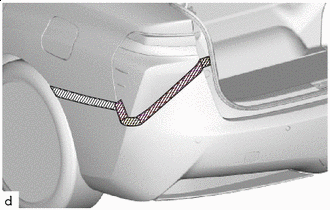

Protective Tape Apply protective tape around the rear bumper assembly.
Tech Tips
Use the same procedure for the RH side.
-
Remove the 2 screws.
-
Remove the screw.
Tech Tips
Use the same procedure for the RH side.
-

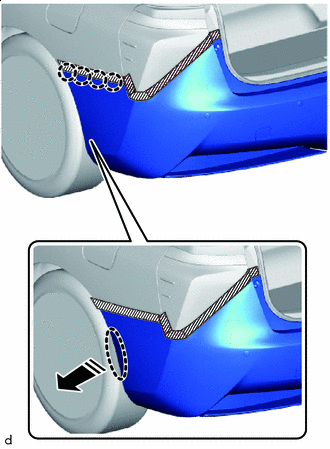
Remove the 4 screws and 2 clips.
-

Place Hands here 
Remove in this Direction Pull the edge of the rear bumper assembly in the direction shown by the arrow in the illustration to disengage the claws.
Tech Tips
Use the same procedure for the RH side.
-
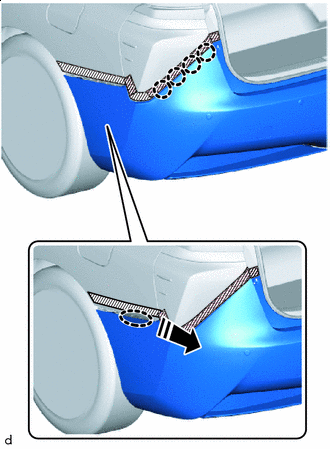
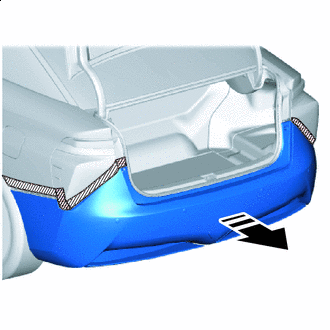
Place Hands here Remove in this Direction Pull the rear bumper assembly in the direction shown by the arrow in the illustration to disengage the claws.
Note
Because the vehicle wire harness is connected to the rear bumper assembly, hold the rear bumper assembly in a position where the connectors can be disconnected.
Tech Tips
Use the same procedure for the RH side.
-
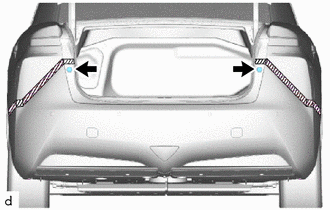
Remove in this Direction Disengage the claws as shown in the illustration.
-
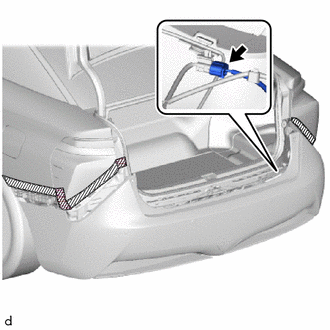
Disconnect the connector.
-
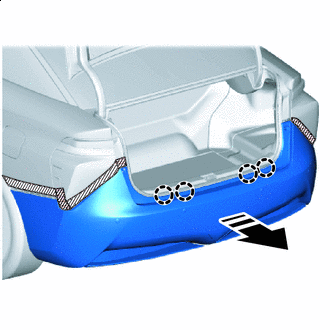
Remove in this Direction Pull the rear bumper assembly in the direction shown by the arrow in the illustration, and remove the rear bumper assembly.
-