HEADLIGHT ASSEMBLY DISASSEMBLY
CAUTION / NOTICE / HINT
The necessary procedures (adjustment, calibration, initialization or registration) that must be performed after parts are removed, installed or replaced during the headlight assembly LH removal/installation are shown below.
| Replacement Part or Procedure | Necessary Procedures | Effect/Inoperative Function When Necessary Procedures are not Performed | Link |
|---|---|---|---|
| Headlight light control ECU sub-assembly LH |
|
Automatic headlight beam level control system |
Note
Even if the headlight light control ECU sub-assembly RH is replaced with a new one, vehicle information registration and initialization are not necessary.
Tech Tips
-
Use the same procedure for the RH side and LH side.
-
The following procedure is for the LH side.
PROCEDURE
-
REMOVE FRONT BUMPER BRACKET
-
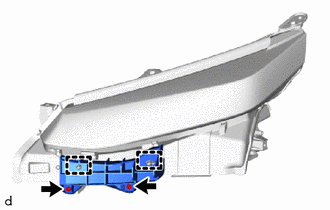
Remove the 2 screws.
-
Disengage the guides to remove the front bumper bracket.
-
-
REMOVE HEADLIGHT LIGHT CONTROL ECU SUB-ASSEMBLY
-
REMOVE HEADLIGHT LEVELING MOTOR
-
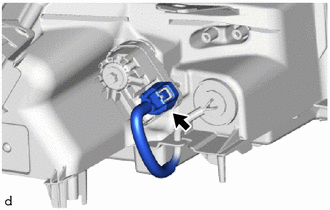
Disconnect the connector.
-
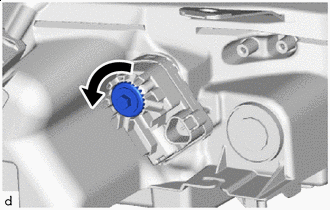

Loosen Loosen the aiming screw 20 rotations.
-
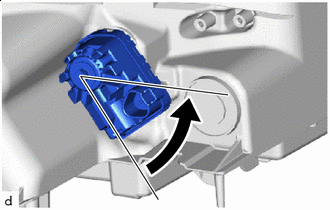
Turn Turn the headlight leveling motor counterclockwise and remove it.
Note
-
Do not pull excessively as the headlight unit assembly and headlight leveling motor are connected at this time.
-
Turn while holding with one hand as the headlight leveling motor may jump out.
-
If the headlight leveling motor is removed, make sure to replace the headlight leveling motor base packing with a new one.
Tech Tips
For the headlight assembly RH, turn the headlight leveling motor RH clockwise to remove it.
-
-
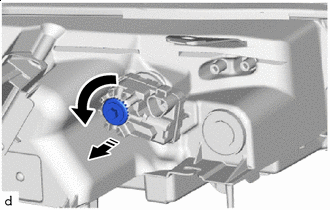
Turn 
Remove in this Direction Loosen the aiming screw of the headlight leveling motor until the headlight unit assembly is disconnected.
Tech Tips
Count and record the number of rotations before the headlight unit assembly and headlight leveling motor are disconnected.
-
-
REMOVE HEADLIGHT LEVELING MOTOR BASE PACKING
-
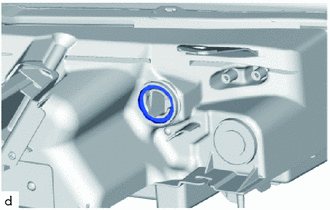
Remove the headlight leveling motor base packing from the headlight unit assembly.
Note
If the headlight leveling motor base packing is removed, replace it with a new one.
-