HEADLIGHT ASSEMBLY REMOVAL
CAUTION / NOTICE / HINT
The necessary procedures (adjustment, calibration, initialization or registration) that must be performed after parts are removed, installed or replaced during the headlight assembly LH removal/installation are shown below.
| Replacement Part or Procedure | Necessary Procedures | Effect/Inoperative Function When Necessary Procedures are not Performed | Link |
|---|---|---|---|
| Headlight assembly LH |
|
Automatic headlight beam level control system |
Note
Even if the headlight assembly RH is replaced with a new one, vehicle information registration and initialization are not necessary.
Tech Tips
-
Use the same procedure for the RH side and LH side.
-
The following procedure is for the LH side.
PROCEDURE
-
REMOVE FRONT BUMPER ASSEMBLY
-
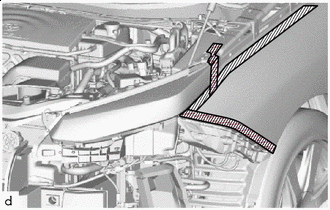
REMOVE FRONT FENDER TOP REINFORCEMENT SUB-ASSEMBLY
-
REMOVE FRONT PILLAR UPPER COVER SUB-ASSEMBLY
-
REMOVE RADIATOR GRILLE BRACKET
-
REMOVE HEADLIGHT ASSEMBLY
-

Protective Tape Apply protective tape around the headlight assembly.
-
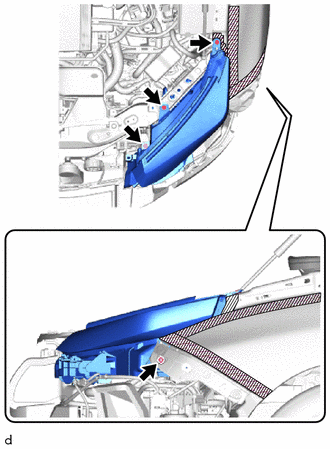
Remove the 3 screws.
-
Remove the bolt.
-
Release the lock lever and disconnect the connector to remove the headlight assembly as shown in the illustration.
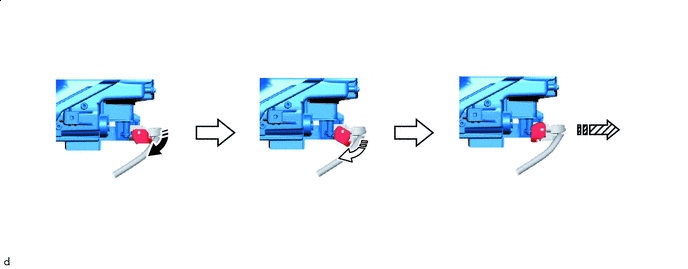

Remove in this Direction (1) 
Remove in this Direction (2) 
Remove in this Direction (3) - -
-