AUTOMATIC HIGH BEAM SYSTEM OPERATION CHECK
-
AUTOMATIC HIGH BEAM SYSTEM OPERATION CHECK
-

*a Automatic High Beam Indicator Light Check the operation of the automatic high beam indicator light.
Note
If the lane departure warning camera cannot correctly recognize the front due to bad weather (dense fog, etc.) or obstructions, the automatic high beam indicator in the combination meter assembly may not illuminate, and the automatic high beam system may not operate.
-
Turn the power switch on (IG).
-
Turn the headlight dimmer switch to the AUTO position and the low beam headlights are on.
-
Turn the dimmer switch to the high position.
-
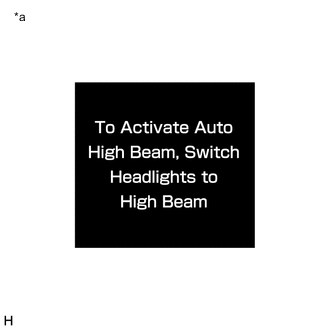
*a Multi-information Display Press the automatic high beam main switch.
Tech Tips
If the automatic high beam main switch is turned on when the light control switch is not in the AUTO or head position, or the dimmer switch is not in the high position, the message shown in the illustration will be displayed on the multi-information display.
-
The shift lever is in any position other than R.
-
Check that the automatic high beam indicator comes on.
-
-
Check the operation of the automatic high beam function.
-
At night, when driving the vehicle with the automatic high beam system in standby mode, check that the high beams automatically turn on after a short delay when all of the following conditions are met:
-
Vehicle speed is more than 40 km/h (25 mph). (for European Models)
-
Vehicle speed is more than 30 km/h (19 mph). (except European Models)
-
The area in front of the vehicle is dark.
-
There are no oncoming vehicles with headlights on.
-
There are no preceding vehicles with taillights on.
-
There are few streetlights along the street ahead.
Note
The low beams may not change to high beams due to illumination from city lighting, signals, or billboards or due to reflective surfaces, such as signs or signboards.
-
-
At night, when driving the vehicle with the high beams turned on by the automatic high beam system, check that the automatic high beam system turns off the high beams and returns to standby mode when any of the following conditions are met:
-
Vehicle speed is less than 30 km/h (19 mph). (for European Models)
-
Vehicle speed is less than 25 km/h (16 mph). (except European Models)
-
The level of ambient light is higher than a specified threshold.
-
There are oncoming vehicles with headlights on.
-
There are preceding vehicles with taillights on.
-
Light from streetlights ahead is higher than a specified threshold.
Note
-
Under the following conditions, the high beams may change to the low beams.
-
There is interference from other illumination, such as city lighting, signals or billboards, or reflective
-
There is interference from the fog lights of an oncoming vehicle
-
A biycle, etc. is detected
-
Under the following conditions, the high beams may not change to the low beams.
-
Passing an oncoming vehicle on a curve
-
Preceding or oncoming vehicle appears and disappears on a continuous curve
-
Preceding or oncoming vehicle appears and disappears due to the median, roadside trees or other
-
Another vehicle cuts in front of the vehicle
-
Preceding or oncoming vehicle has no lights, has lights with unusual colors, or has very dim lights
-
-
When any of the following conditions are met, the automatic high beam system will be canceled and the indicator light will turn off:
-
The power switch is turned off.
-
The light control switch is turned to any position except the AUTO or head position.
-
The dimmer switch is moved to the low position.
-
The automatic high beam main switch is off.
-
-
-
-
General Description
The automatic high beam system is a system that helps ensure visibility by automatically turning the high beams on and off. In addition, due to control limitations of the automatic high beam system, it may be necessary to manually turn the high beams on and off. For safety reasons, make sure to turn the high beams on and off manually according to the driving conditions.
-
Conditions Unsuitable for Using Automatic High Beam System
Under the following conditions, the automatic high beam system might not detect other vehicles or lights correctly, or the high beams might cause glare or flash pedestrians or the occupants of other vehicles. Manual operation should be considered.
Factor Condition Weather/Climate When driving in bad weather (rain, snow, fog, sandstorms, etc.). Front windshield
-
When the front windshield is not clear (ice, snow or frost on the glass).
-
When the front windshield is dirty (sand, mud, water stains or bugs on the glass).
-
When the front windshield is cracked.
-
When the front windshield is fogged-up.
-
When the front windshield has a film attached.
-
When an object on the instrument panel reflects off of the front glass.
-
When any other abnormal conditions exist with the front glass.
Lane departure warning camera
-
When the lane departure warning camera is deformed.
-
When the lane departure warning camera is dirty.
-
When any other abnormal conditions exist with the lane departure warning camera.
Nearby vehicles or lights
-
When lights similar to headlights or taillights are in the vicinity of the vehicle.
-
When a nearby vehicle has no lights or its lights are off.
-
When a vehicle in front has misaligned lights, or its lights are changing color.
-
When a vehicle in front has extremely dirty headlights or taillights.
Road conditions
-
When driving in areas where the conditions often change between bright and dark.
-
When driving on hilly roads.
-
When driving on winding roads or around sharp curves.
-
When driving on bumpy roads (cobblestone paving, gravel roads, rough unpaved roads, etc.).
-
When highly reflective objects are in front of the vehicle (mirrors, road signs, etc.).
Own vehicle
-
When the headlights are damaged, deformed or dirty.
-
When the vehicle posture is abnormal (posture has changed due to the vehicle being fully loaded, a trailer being towed, road conditions, etc.).
-
When the vehicle has other malfunctions or has been modified.
Automatic high beam system Malfunction
When the indicator light on the combination meter assembly is off and Check Headlight System is displayed on the multi-information display.
Others
-
When the automatic high beam system does not seem to be turning the high beams on and off properly.
-
When the automatic high beam system is frequently turning the high beams on and off.
-
When the glare from the high beams would disturb pedestrians or the drivers of other vehicles.
-
-
Windshield Replacement Precautions
The timing of the high beams turning on and off differs depending on the light transmission rate of the glass. For this reason, when replacing the windshield, replace it with an original equipment part.
-
Lane departure warning camera Handling Precautions
Failure to observe the following precautions may result in a malfunction:
-
Do not touch the lens of the lane departure warning camera with bare hands.
-
Do not allow anything to adhere to the lane departure warning camera lens.
-
Do not apply strong impacts to the lane departure warning camera.
-
Do not allow any liquid to contact the lane departure warning camera.
-
Do not apply excessive force when installing, removing, or replacing the lane departure warning camera. Doing so may deform the lane departure warning camera or bracket.
-
Do not use a deformed lane departure warning camera.
-
Replace the windshield glass when the bracket is deformed or damaged.
-
Do not use a lane departure warning camera that has been dropped.
-
Make sure to wear clean cotton gloves or equivalent when installing or removing the lane departure warning camera as it will not function properly if oil adheres to the parts.
-
Do not pull on the wire harness when disconnecting the lane departure warning camera connector.
-