OUTER REAR VIEW MIRROR GLASS REMOVAL
CAUTION / NOTICE / HINT
Tech Tips
-
Use the same procedure for the RH and LH sides.
-
The procedure listed below is for the LH side.
PROCEDURE
-
REMOVE OUTER MIRROR
-

Protective Tape 
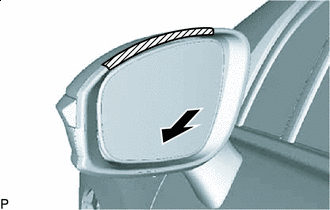
Push Push the lower part of the mirror surface and tilt it.
-
Apply protective tape to the area shown in the illustration.
-
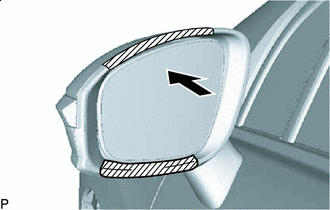
Protective Tape Push Push the upper part of the mirror surface and tilt it.
-
Apply protective tape to the area shown in the illustration.
-
Push 
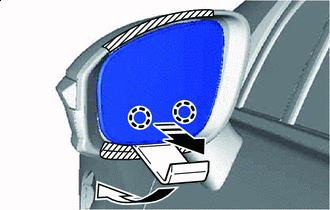
Remove in this Direction Using a moulding remover D, disengage the claws on the lower part of the outer mirror.
-
Push Remove in this Direction Push the lower part of the mirror surface.
Tech Tips
If excessive force is used when pressing down the mirror surface, the claws will engage again.
-
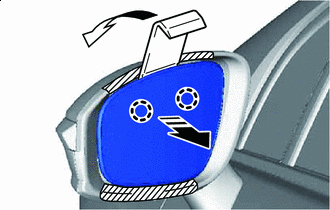
Using a moulding remover D, disengage the claws on the upper part of the outer mirror.
-
Remove the protective tape.
-
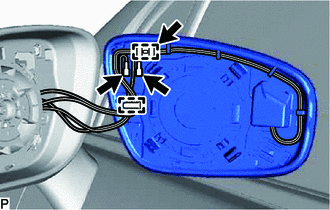
Disengage the clamps.
-
Disconnect the 3 connectors.
Note
-
Do not bend the tabs excessively to prevent them from being damaged.
-
If the tabs are damaged, replace the outer mirror LH with a new one.
-
If the wire harness is damaged or any of the wires are broken, replace the outer mirror actuator assembly LH with a new one.
-
-
Remove the outer mirror.
-