FRONT WIPER MOTOR INSTALLATION
CAUTION / NOTICE / HINT
Tech Tips
-
Use the same procedure for RHD and LHD vehicles.
-
The procedure listed below is for LHD vehicles.
PROCEDURE
-
INSTALL WINDSHIELD WIPER MOTOR ASSEMBLY
-
Install the windshield wiper motor assembly with the 3 bolts.
- Torque:
- 5.4 N*m { 55 kgf*cm, 48 in.*lbf }
-
-
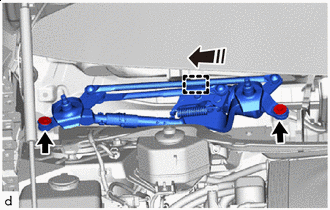
INSTALL FRONT WIPER CRANK SUB-ASSEMBLY (for LHD)
-
Connect the windshield wiper motor assembly connector.
-
Turn the power switch on (IG).
-
Operate the wiper switch and stop the windshield wiper motor assembly at the automatic stop (park) position.
-
Turn the power switch off.
-
Disconnect the windshield wiper motor assembly connector.
-
Temporarily install the front wiper crank sub-assembly on the windshield wiper motor assembly with the nut.
-
Temporarily install the No. 1 windshield wiper link rod on the crank arm pivot of the front wiper crank sub-assembly.
-
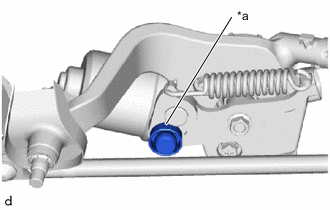
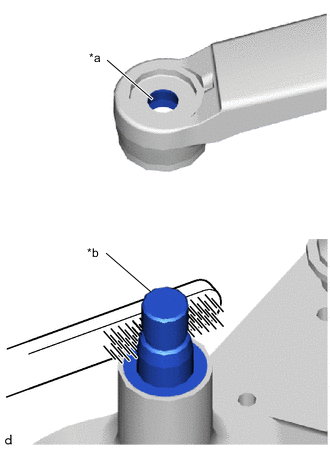
Align the nut and crank arm pivot of the front wiper crank sub-assembly with the No. 1 windshield wiper link rod as shown in the illustration.
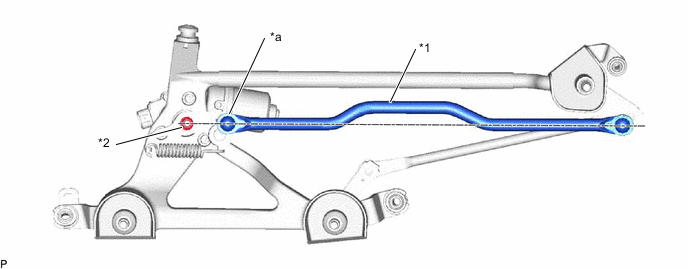
*1 No. 1 Windshield Wiper Link Rod *2 Nut *a Crank Arm Pivot - - -
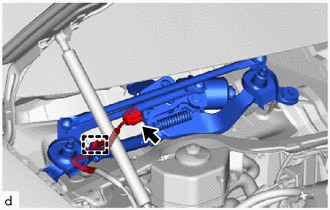
Tighten the nut.
Torque 17.2 N*m (174 kgf*cm, 13 ft.*lbf) -
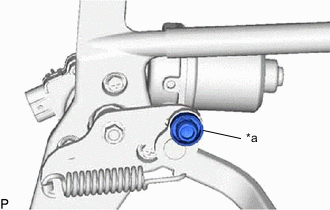
*a Crank Arm Pivot Apply MP grease to the crank arm pivot of the front wiper crank sub-assembly.
-
Connect the No. 1 windshield wiper link rod to the crank arm pivot of the front wiper crank sub-assembly.
-
-
INSTALL FRONT WIPER CRANK SUB-ASSEMBLY (for RHD)
-
Connect the windshield wiper motor assembly connector.
-
Turn the power switch (IG).
-
Operate the wiper switch and stop the windshield wiper motor assembly at the automatic stop (park) position.
-
Turn the power switch off.
-
Disconnect the windshield wiper motor assembly connector.
-
Temporarily install the front wiper crank sub-assembly on the windshield wiper motor assembly with the nut.
-
Temporarily install the No. 1 windshield wiper link rod on the crank arm pivot of the front wiper crank sub-assembly.
-
Align the nut and crank arm pivot of the front wiper crank sub-assembly with the No. 1 windshield wiper link rod as shown in the illustration.
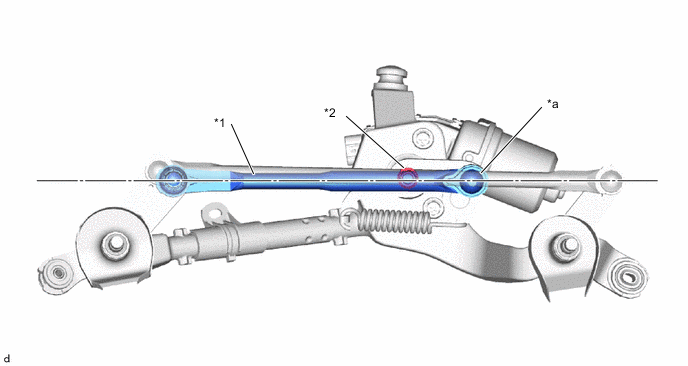
*1 No. 1 Windshield Wiper Link Rod *2 Nut *a Crank Arm Pivot - - -
Tighten the nut.
Torque 17.2 N*m (174 kgf*cm, 13 ft.*lbf) -
*a Crank Arm Pivot Apply MP grease to the crank arm pivot of the front wiper crank sub-assembly.
-
Connect the No. 1 windshield wiper link rod to the crank arm pivot of the front wiper crank sub-assembly.
-
-
INSTALL WINDSHIELD WIPER MOTOR AND LINK (for LHD)
-

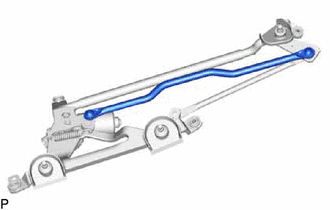
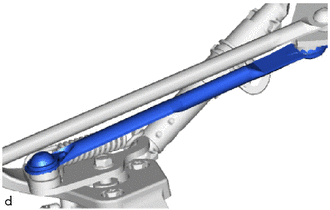
Install in this Direction Engage the motor grommet and temporarily install the windshield wiper motor and link as shown in the illustration.
-
Install the windshield wiper motor and link with the 3 bolts.
- Torque:
- 5.5 N*m { 56 kgf*cm, 49 in.*lbf }
-
Connect the connector.
-
Engage the clamp.
-
-
INSTALL WINDSHIELD WIPER MOTOR AND LINK (for RHD)
-
Install in this Direction Engage the motor grommet and temporarily install the windshield wiper motor and link as shown in the illustration.
-
Install the windshield wiper motor and link with the 2 bolts.
- Torque:
- 5.5 N*m { 56 kgf*cm, 49 in.*lbf }
-
Connect the connector.
-
Engage the clamp.
-
-
INSTALL COWL TOP VENTILATOR LOUVER SUB-ASSEMBLY
-
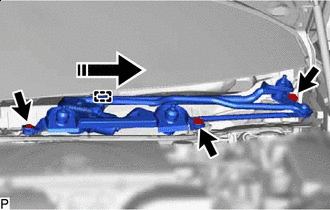
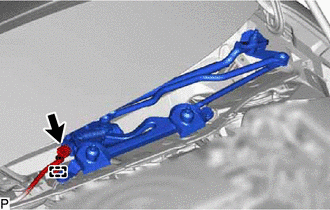
Engage the guides as shown in the illustration.
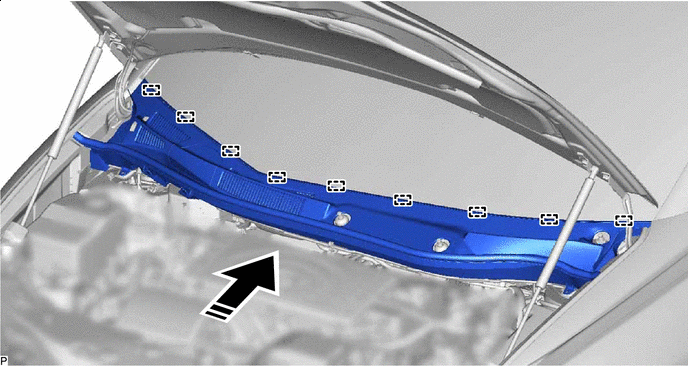
Install in this Direction - - -
Engage the guides and claws to install the cowl top ventilator louver sub-assembly as shown in the illustration.
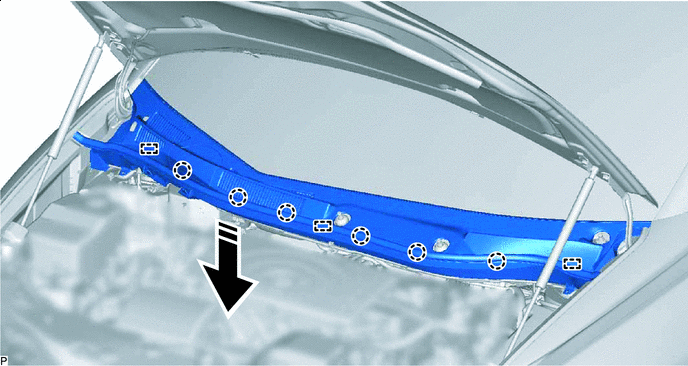
Install in this Direction - - -
Install the 2 clips.
-
-
INSTALL FRONT FENDER TOP REINFORCEMENT SUB-ASSEMBLY LH
-
INSTALL FRONT FENDER TOP REINFORCEMENT SUB-ASSEMBLY RH
Tech Tips
Use the same procedure as for the LH side.
-
INSTALL WINDSHIELD WIPER ARM AND BLADE ASSEMBLY RH (for LHD)
-
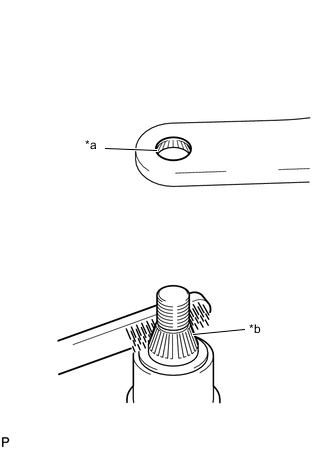
*a Wiper Arm Serration *b Wiper Pivot Serration When reusing the windshield wiper arm and blade assembly RH:
-
Clean the wiper arm serrations to remove any burrs, dirt, etc.
Note
Do not grind down the wiper arm serrations.
-
Clean the wiper pivot serrations with a wire brush.
-
-
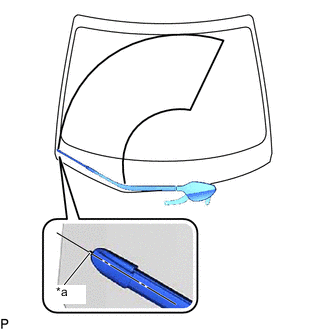
*a Matchmark Temporarily install the windshield wiper arm and blade assembly RH to the position shown in the illustration.
-
Install the 2 nuts.
- Torque:
- 26 N*m { 265 kgf*cm, 19 ft.*lbf }
Tech Tips
Hold the wiper arm by hand while tightening the nut.
-
-
INSTALL WINDSHIELD WIPER ARM AND BLADE ASSEMBLY RH (for RHD)
-

*a Wiper Arm Serration *b Wiper Pivot Serration When reusing the windshield wiper arm and blade assembly RH:
-
Clean the wiper arm serrations to remove any burrs, dirt, etc.
Note
Do not grind the wiper arm serrations.
-
Clean the wiper pivot serrations with a wire brush.
-
-
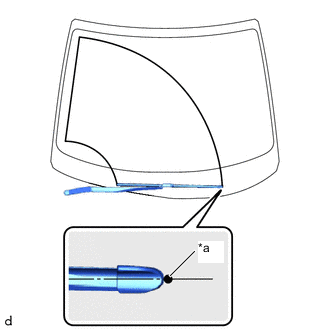
*a Matchmark Temporarily install the windshield wiper arm and blade assembly RH to the position shown in the illustration.
-
Install the nut.
- Torque:
- 26 N*m { 265 kgf*cm, 19 ft.*lbf }
Tech Tips
Hold the wiper arm by hand while tightening the nut.
-
Operate the front wipers while spraying washer fluid on the windshield glass. Make sure that the front wipers function properly and there is no interference with the vehicle body.
-
Check the automatic stop position after lifting the wiper blade 2 times as shown in the illustration.
-
-
INSTALL WINDSHIELD WIPER ARM AND BLADE ASSEMBLY LH (for LHD)
-

*a Wiper Arm Serration *b Wiper Pivot Serration When reusing the windshield wiper arm and blade assembly LH:
-
Clean the wiper arm serrations to remove any burrs, dirt, etc.
Note
Do not grind down the wiper arm serrations.
-
Clean the wiper pivot serrations with a wire brush.
-
-
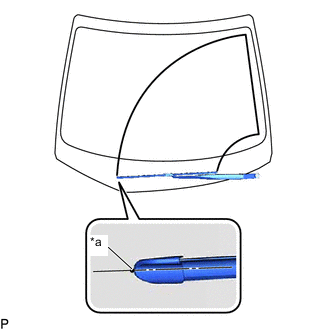
*a Matchmark Temporarily install the windshield wiper arm and blade assembly LH to the position shown in the illustration.
-
Install the nut.
- Torque:
- 26 N*m { 265 kgf*cm, 19 ft.*lbf }
Tech Tips
Hold the wiper arm by hand while tightening the nuts.
-
Operate the front wipers while spraying washer fluid on the windshield glass. Make sure that the front wipers function properly and there is no interference with the vehicle body.
-
Check the automatic stop position after lifting the wiper blade 2 times as shown in the illustration.
-
-
INSTALL WINDSHIELD WIPER ARM AND BLADE ASSEMBLY LH (for RHD)
-
*a Wiper Arm Serration *b Wiper Pivot Serration When reusing the windshield wiper arm and blade assembly LH:
-
Clean the wiper arm serrations to remove any burrs, dirt, etc.
Note
Do not grind the wiper arm serrations.
-
Clean the wiper pivot serrations with a wire brush.
-
-
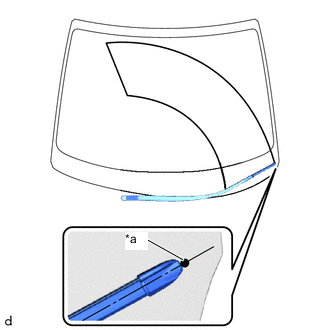
*a Matchmark Temporarily install the windshield wiper arm and blade assembly LH to the position shown in the illustration.
-
Install the nut.
- Torque:
- 26 N*m { 265 kgf*cm, 19 ft.*lbf }
Tech Tips
Hold the wiper arm by hand while tightening the nut.
-
-
INSTALL FRONT WIPER ARM HEAD CAP (for LHD)
-
Engage the claws to install the front wiper arm head cap.
-
-
INSTALL FRONT WIPER ARM HEAD CAP (for RHD)
-
Engage the claws to install the front wiper arm head cap.
Tech Tips
Use the same procedure for the RH side and LH side.
-