FRONT CONSOLE BOX REMOVAL
CAUTION / NOTICE / HINT
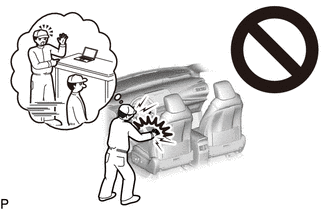
CAUTION:
Some of these service operations affect the SRS airbag system. Read the precautionary notices concerning the SRS airbag system before servicing.
Tech Tips
-
Use the same procedure for RHD and LHD vehicles.
-
The procedure listed below is for LHD vehicles.
PROCEDURE
-
REMOVE FRONT SEAT ASSEMBLY RH (for LHD)
-
REMOVE FRONT SEAT ASSEMBLY LH (for RHD)
-
REMOVE NO. 2 INSTRUMENT PANEL UNDER COVER SUB-ASSEMBLY
-
REMOVE COWL SIDE TRIM BOARD RH (for LHD)
-
REMOVE COWL SIDE TRIM BOARD LH (for RHD)
-
DISCONNECT FRONT DOOR OPENING TRIM WEATHERSTRIP RH (for LHD)
-
DISCONNECT FRONT DOOR OPENING TRIM WEATHERSTRIP LH (for RHD)
-
REMOVE INTEGRATION CONTROL AND PANEL ASSEMBLY
-
REMOVE INSTRUMENT CENTER UPPER CLUSTER FINISH PANEL
-
REMOVE INSTRUMENT CENTER PANEL REGISTER ASSEMBLY
-
REMOVE RADIO RECEIVER ASSEMBLY
-
REMOVE NO. 2 INSTRUMENT PANEL REGISTER ASSEMBLY
-
REMOVE INSTRUMENT SIDE PANEL RH (for LHD)
-
REMOVE INSTRUMENT SIDE PANEL LH (for RHD)
-
REMOVE GLOVE COMPARTMENT DOOR ASSEMBLY
-
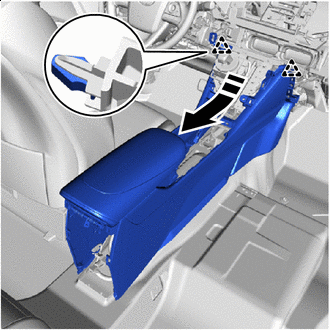
REMOVE FRONT CONSOLE BOX COVER
-
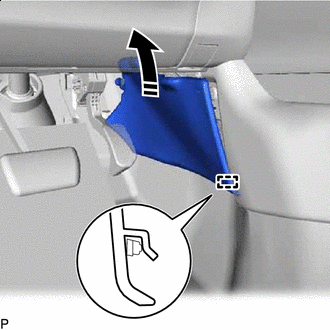
Open the console compartment door sub-assembly.
-


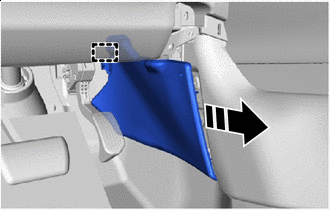
Remove in this Direction (1) 
Remove in this Direction (2) Disengage the clips and guides to remove the front console box cover as shown in the illustration.
-
-
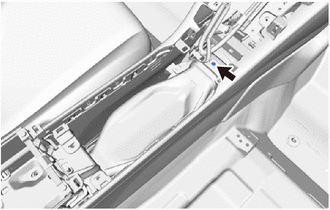
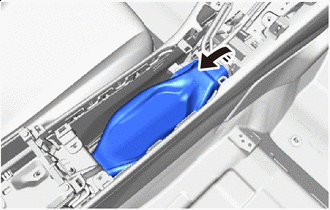
REMOVE CONSOLE COMPARTMENT BOX ASSEMBLY
-
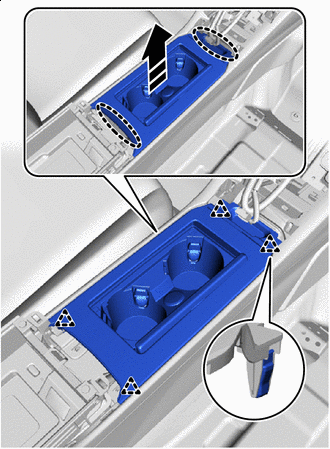

Place Hands Here Remove in this Direction Disengage the clips to remove the console compartment box assembly as shown in the illustration.
-
-
REMOVE STEREO JACK ADAPTER ASSEMBLY
-
REMOVE MOBILE WIRELESS CHARGER CRADLE ASSEMBLY
-
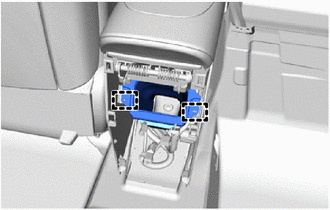
REMOVE NO. 6 CONSOLE BOX RETAINER
-
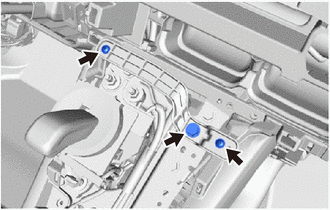
Remove the 2 screws and bolt.
-
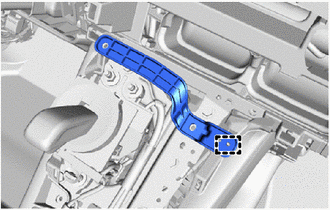
Disengage the guide to remove the No. 6 console box retainer.
-
-
REMOVE FRONT NO. 1 CONSOLE BOX INSERT
-
Remove the clip.
-
Remove the front No. 1 console box insert:
-
Place Hands Here Remove in this Direction Disengage the clip as shown in the illustration.
-
Remove in this Direction Disengage the guide as shown in the illustration.
-
Remove in this Direction Disengage the guide to remove the front No. 1 console box insert as shown in the illustration.
-
-
-
REMOVE FRONT NO. 2 CONSOLE BOX INSERT
Tech Tips
Use the same procedure as for the No. 1 side.
-
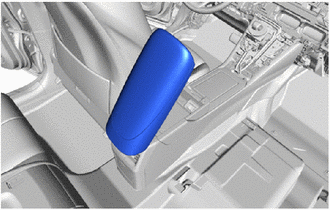
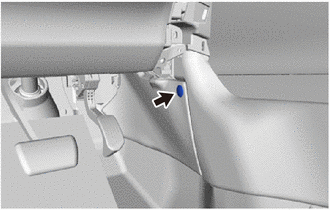
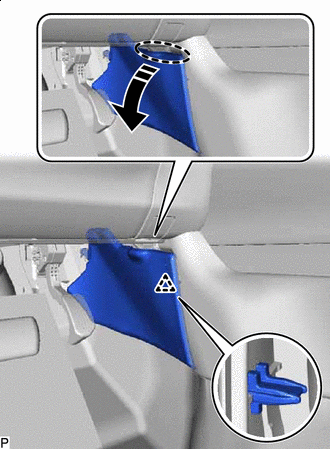
REMOVE NO. 2 CONSOLE BOX DUCT
-
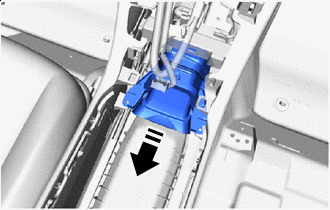
Remove the clip.
-
Remove in this Direction Remove the No. 2 console box duct as shown in the illustration.
-
-
REMOVE NO. 1 CONSOLE BOX DUCT
-
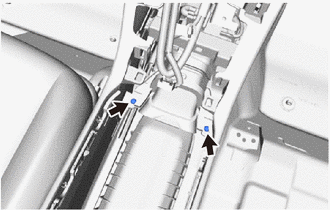
Remove the 2 clips.
-
Remove in this Direction Remove the No. 1 console box duct as shown in the illustration.
-
-
REMOVE CONSOLE REAR END PANEL SUB-ASSEMBLY
-
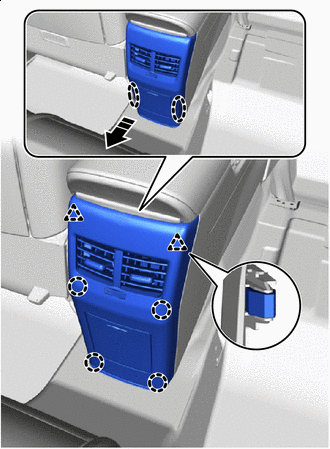
Place Hands Here Remove in this Direction Disengage the clips and claws to remove the console rear end panel sub-assembly as shown in the illustration.
-
-
REMOVE NO. 4 CONSOLE BOX DUCT
-
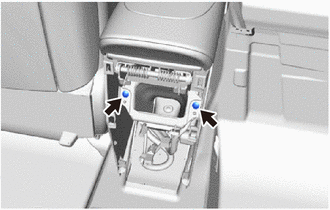
Remove the 2 clips.
-
Disengage the 2 guides to remove the No. 4 console box duct.
-
-
REMOVE REAR CONSOLE BOX SUB-ASSEMBLY
-
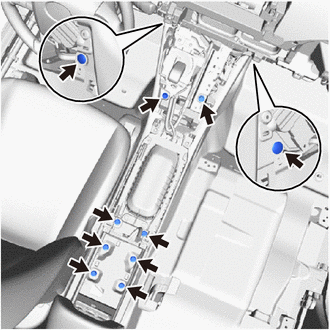
Remove the 2 clips.
-
Remove the 8 bolts.
-
Remove the 3 bolts.
-
Disengage the clamps.
-
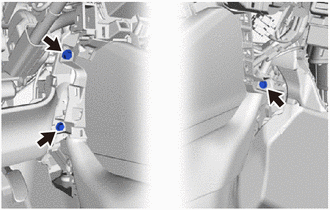
Remove in this Direction Disengage the clips as shown in the illustration.
-
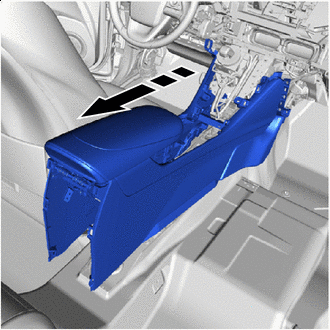
Remove in this Direction Remove the rear console box sub-assembly as shown in the illustration.
-