SOLAR SENSOR REMOVAL
PROCEDURE
-
REMOVE NO. 1 INSTRUMENT PANEL SPEAKER PANEL SUB-ASSEMBLY
-
REMOVE NO. 2 INSTRUMENT PANEL SPEAKER PANEL SUB-ASSEMBLY
Tech Tips
Use the same procedure for the No. 1 instrument panel speaker panel sub-assembly.
-
REMOVE FRONT NO.2 SPEAKER ASSEMBLY
-
REMOVE NO. 1 INSTRUMENT PANEL CUSHION
-
DISCONNECT FRONT DOOR OPENING TRIM WEATHERSTRIP RH
-
DISCONNECT FRONT DOOR OPENING TRIM WEATHERSTRIP LH
Tech Tips
Use the same procedure as for the LH side.
-
REMOVE FRONT PILLAR GARNISH LH
-
REMOVE FRONT PILLAR GARNISH RH
Tech Tips
Use the same procedure as for the LH side.
-
REMOVE LOWER INSTRUMENT PANEL ASSEMBLY
-
REMOVE AUTOMATIC LIGHT CONTROL SENSOR (SOLAR SENSOR)
-
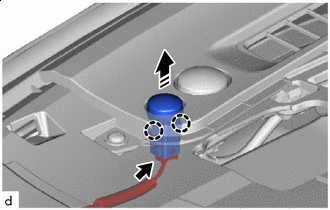

Remove in this Direction Disconnect the connector.
-
As shown in the illustration, engage the claws and install the automatic light control sensor (solar sensor).
-