MAP LIGHT BULB REPLACEMENT
PROCEDURE
-
REMOVE MAP LIGHT ASSEMBLY
-
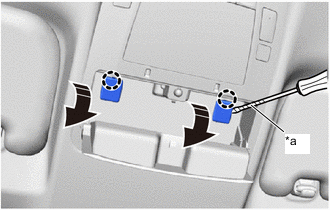
*a Protective Tape 
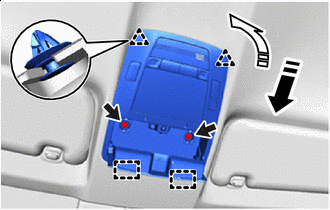
Remove in this Direction Using a screwdriver with its tip wrapped in protective tape, disengage the claws to open the 2 covers as shown in the illustration.
-
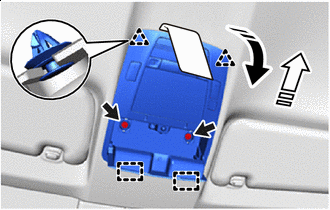
Remove in this Direction (1) 
Remove in this Direction (2) Remove the 2 screws.
-
Using a molding remover D, disengage the clips and guides to separate the map light assembly as shown in the illustration.
-
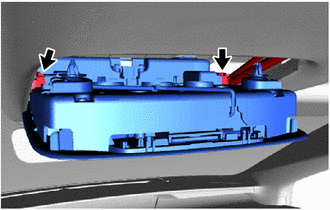
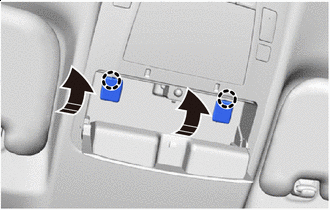
Disconnect the 2 connectors to remove the map light assembly.
-
-
REMOVE MAP LIGHT BULB
-
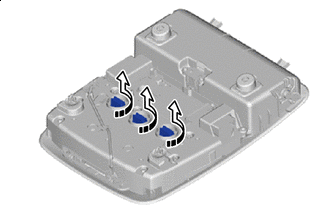
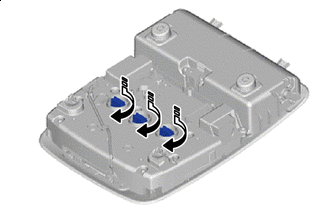
Remove in this Direction Turn the 3 map light sockets with the 3 map light bulbs as shown in the illustration to remove them as a unit.
-
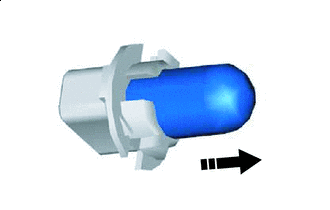
Remove in this Direction Remove the 3 map light bulbs from the 3 map light bulb sockets as shown in the illustration.
-
-
INSTALL MAP LIGHT BULB
-

Install in this Direction Install the 3 map light bulbs to the 3 map light bulb sockets as shown in the illustration.
-
Install in this Direction Turn the 3 map light sockets with the 3 map light bulbs as shown in the illustration to install them as a unit.
-
-
INSTALL MAP LIGHT ASSEMBLY
-
Connect the 2 connectors.
-
Install in this Direction (1) Install in this Direction (2) Engage the guides and clips to install the map light assembly as shown in the illustration.
-
Install the 2 screws.
-
Install in this Direction Engage the claws to close the 2 covers as shown in the illustration.
-