ULTRASONIC SENSOR(for Rear Side) INSTALLATION
PROCEDURE
-
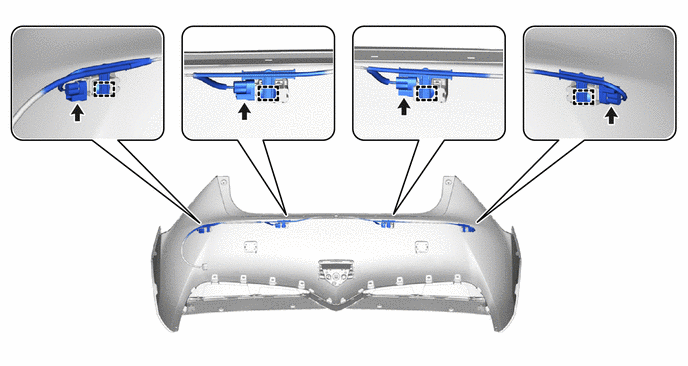
INSTALL ULTRASONIC SENSOR CLIP
-
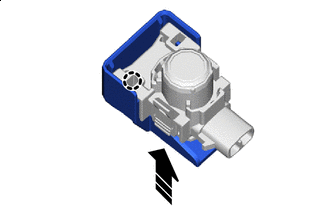

Install in this Direction Engage the claw to install the ultrasonic sensor clip as shown in the illustration.
Tech Tips
Use the same procedure for both sides.
-
-
INSTALL NO. 2 ULTRASONIC SENSOR RETAINER
Tech Tips
Use the same procedure for both sides.
-
Using non-residue solvent, clean the installation surface of the No. 2 ultrasonic sensor retainer.
Note
-
Installing the No. 2 ultrasonic sensor retainer while any of the old double-sided tape remains could result in adhesion failure, so continue cleaning until the old tape is fully removed.
-
Removing the tape with a tool such as a screwdriver will damage the surface and cause adhesion failure, so use a piece of cloth or similar to clean away the old tape.
-
-

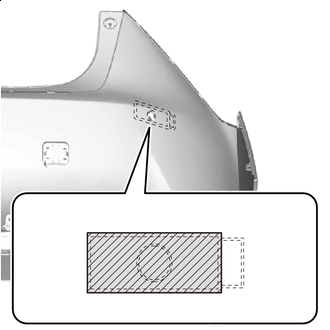
*a Mark-off Line 
Protective Tape Using a piece of protective tape cut into a 16 mm (0.63 in.) square, cover the installation hole of the No. 2 ultrasonic sensor.
Standard Portion Length a 18.7 mm (0.74 in.) Tech Tips
Align the tape with the mark-off line to install it.
-
Area to Apply Primer Apply primer.
-
Using a brush or felt, apply primer to the area within the mark-off line.
Note
-
If the brush or felt is dirty or hardened, replace it with a new one.
-
If the brush or felt is dirty or hardened, replace it with a new one.
-
If primer adheres, it may leave faint stains, so when using a liquid type primer, protect the painted areas with tape.
-
Do not touch the surface with the primer applied until applying the tape.
-
-
-
Allow the primer to dry thoroughly.
Suggested drying time 10 minutes or more (at 23 °C (73 °F)) -
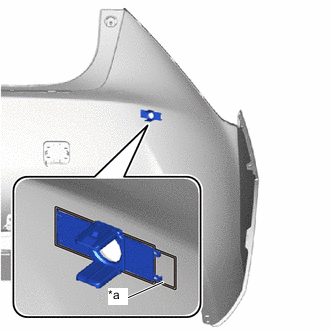
*a Protruding Portion of Mark-off Line Align the No. 2 ultrasonic sensor retainer with the mark-off line, and install it to the rear bumper assembly.
Tech Tips
-
Install the retainer with the connector position aligned with the protruding portion of the mark-off line.
-
The protruding portion of the mark-off line for the other No. 2 ultrasonic sensor retainer is reversed left-to-right.
-
Application pressure: 30 N (3.1 kgf, 6.7 lbf) for 3 seconds
-
-
-
INSTALL NO. 2 ULTRASONIC SENSOR
-
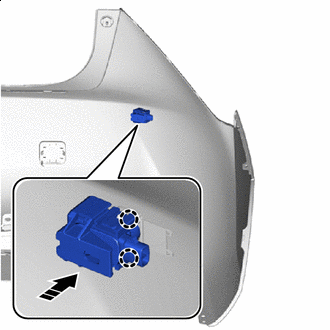
Install in this Direction Engage the claws to install the No. 2 ultrasonic sensor as shown in the illustration.
Tech Tips
Use the same procedure for both sides.
-
Engage the clamps and connect the 4 connectors.
-
-
INSTALL REAR BUMPER ASSEMBLY