PARKING BRAKE PEDAL(for RHD) REMOVAL
PROCEDURE
-
REMOVE LOWER NO. 1 INSTRUMENT PANEL AIRBAG ASSEMBLY
-
REMOVE REAR BLOWER MOTOR
-
REMOVE NO. 2 AIR DUCT SUB-ASSEMBLY
-
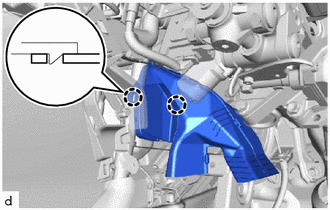
Disengage the 2 claws to remove the No. 2 air duct sub-assembly.
Note
If any of the claws of the No. 2 air duct sub-assembly have been cracked or deformed during removal, make sure to replace the air duct with a new one. Failure to do so may cause the No. 2 air duct sub-assembly to fall off or noise to occur.
-
-
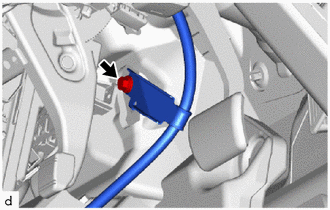
LOOSEN NO. 1 WIRE ADJUSTING NUT
-
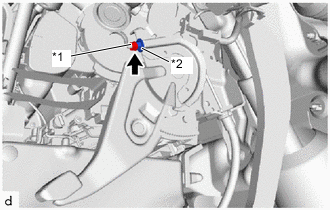
*1 Lock Nut *2 No. 1 Wire Adjusting Nut Completely release the parking brake pedal.
-
Remove the lock nut and loosen the No. 1 wire adjusting nut to completely release the parking brake cable.
-
-
SEPARATE NO. 1 PARKING BRAKE CABLE ASSEMBLY
-
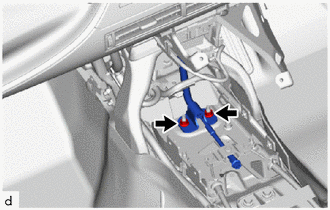
Remove the 2 nuts to separate the No. 1 parking brake cable assembly from the cable support bracket.
-
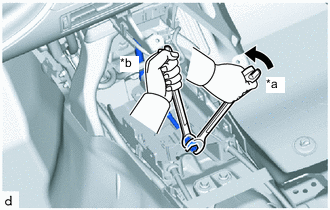
*a Turn *b Hold As shown in the illustration, hold the No. 2 wire adjusting nut with a wrench and loosen the lock nut.
-
Remove the lock nut and No. 2 wire adjusting nut to separate the No. 1 parking brake cable assembly from the parking brake equalizer sub-assembly.
-
Remove the bolt to separate the No. 1 parking brake cable assembly from the body.
-
-
REMOVE PARKING BRAKE CONTROL PEDAL ASSEMBLY
-
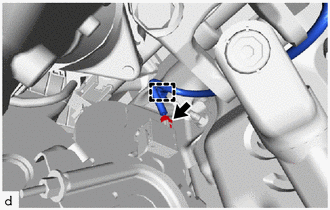
Disconnect the parking brake switch connector.
-
Disengage the clamp.
-
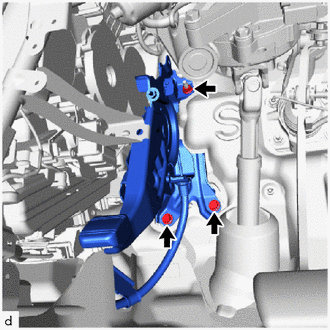
Remove the 2 bolts, nut and parking brake control pedal assembly from the body.
-
-
REMOVE NO. 1 PARKING BRAKE CABLE ASSEMBLY