REAR COIL SPRING REMOVAL
CAUTION / NOTICE / HINT
The necessary procedures (adjustment, calibration, initialization, or registration) that must be performed after parts are removed, installed, or replaced during the rear coil spring removal/installation are shown below.
| Replacement Part or Procedure | Necessary Procedure | Effects/Inoperative when not Performed | Link |
|---|---|---|---|
| Rear height control sensor sub-assembly |
|
Automatic headlight beam level control system | |
| Rear coil spring |
|
VSC malfunctioning |
Tech Tips
-
Use the same procedure for the RH side and LH side.
-
The following procedure is for the LH side.
PROCEDURE
-
REMOVE REAR WHEEL
-
SEPARATE SKID CONTROL SENSOR WIRE
-
Separate the skid control sensor wire from the rear axle hub and bearing assembly.
-

Disengage the 2 grommets and separate the skid control sensor wire from the rear axle beam assembly.
-
Remove the 2 nuts and separate the skid control sensor wire from the rear axle beam assembly.
-
-
SEPARATE REAR HEIGHT CONTROL SENSOR SUB-ASSEMBLY
-

Remove the bolt and rear height control sensor sub-assembly from the rear axle beam assembly.
-
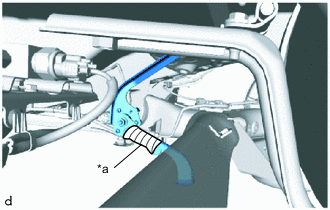
*a Protective Tape Using protective tape, secure the rear height control sensor sub-assembly as shown in the illustration.
-
-
REMOVE REAR WHEEL HOUSE FRONT PLATE
-
DISCONNECT REAR WHEEL HOUSE LINER
-
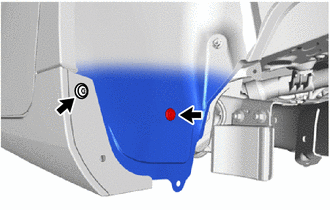
Using a 4 mm hexagon socket wrench, and remove the screw.
-
Remove the clip and separate the rear wheel house liner.
-
-
REMOVE REAR COIL SPRING
-
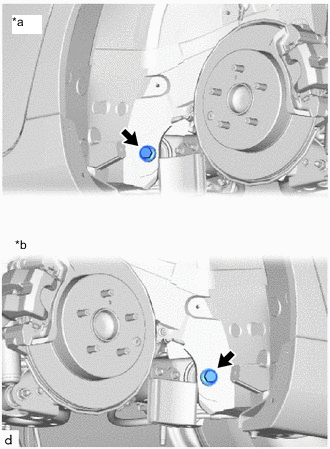
*a for Side *b for RH Side Loosen 2 bolts.
Note
Do not remove the bolts.
-
Support the spring seat of the rear axle beam assembly using 2 jacks and 2 wooden blocks.
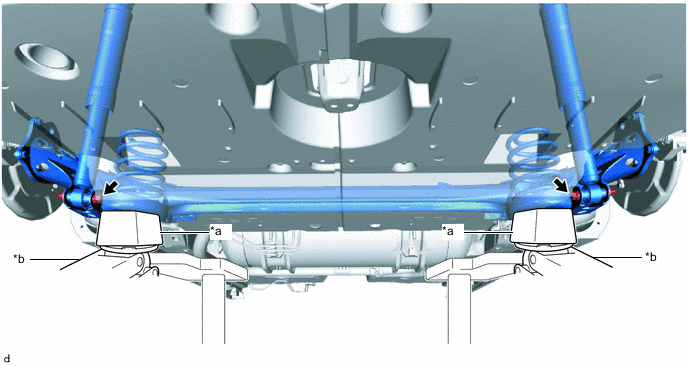
*a Wooden Block *b Jack Note
Do not jack up the rear axle beam assembly too high as the vehicle may fall.
-
Remove the 2 bolts while holding the 2 nuts and separate the rear axle beam assembly from the rear shock absorber assemblies and RH.
Note
Because the nuts have their own stoppers, do not turn the nuts. Loosen the bolts with the nuts secured.
-
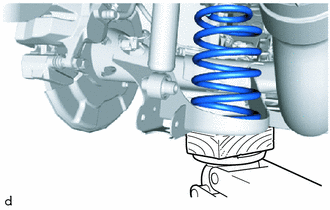
Slowly lower the rear axle beam assembly using 2 jacks and 2 wooden blocks, and remove the rear coil spring.
Note
When moving the rear axle beam assembly beyond full rebound, make sure that the rear axle beam assembly is within 35° of the standard position, and is not out of position for more than 10 minutes.
-
Slowly jack up the rear axle beam assembly using 2 jacks and 2 wooden blocks, and temporarily tighten the rear axle beam assembly to the rear shock absorber assemblies and RH with the 2 bolts and 2 nuts.

*a Wooden Block *b Jack Note
Because the nuts have their own stoppers, do not turn the nuts. Loosen the bolts with the nuts secured.
-
-
REMOVE REAR COIL SPRING UPPER INSULATOR
-
Remove the rear coil spring upper insulator from the rear axle beam assembly.
-
-
REMOVE REAR COIL SPRING LOWER INSULATOR
-
Remove the rear coil spring lower insulator from the rear axle beam assembly.
-