SHIFT CONTROL ACTUATOR REMOVAL

PROCEDURE
-
REMOVE NO. 1 MOTOR UNDER COVER
-
REMOVE REAR MOTOR UNDER COVER LH
-
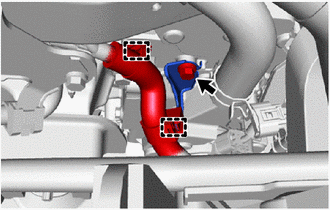
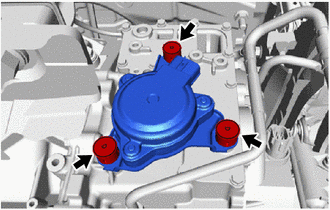
REMOVE EV WATER PUMP WITH MOTOR ASSEMBLY
-
REMOVE WIRE HARNESS CLAMP BRACKET
-
Disengage the 2 clamps to separate the wire harness from the No. 2 automatic transmission case cover and wire harness clamp bracket.
-
Remove the bolt and wire harness clamp bracket from the FCV transaxle with motor assembly.
-
-
REMOVE NO. 2 OIL COOLER TUBE CLAMP
-
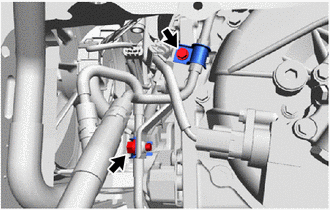
Remove the 2 bolts and 2 No. 2 oil cooler tube clamps from the No. 1 oil cooler tube clamp.
-
-
REMOVE NO. 2 AUTOMATIC TRANSMISSION CASE COVER
-
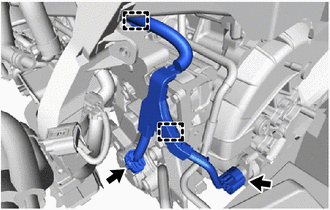
Disconnect the 2 connectors.
-
Disengage the 2 clamps to separate the wire harness from the No. 2 automatic transmission case cover and No. 1 oil cooler tube clamp.
-
Remove the 2 bolts, clip and No. 2 automatic transmission case cover from the FCV transaxle with motor assembly.
-
-
REMOVE NO. 1 OIL COOLER TUBE CLAMP
-
Remove the clip and No. 1 oil cooler tube clamp from the No. 2 automatic transmission case cover.
-
-
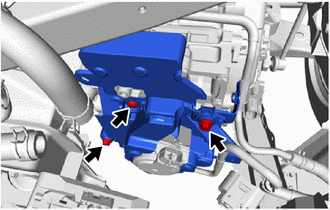
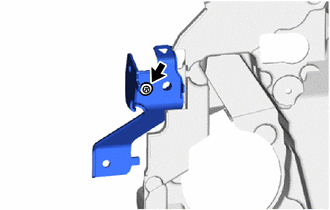
REMOVE SHIFT CONTROL ACTUATOR ASSEMBLY
-
Remove the 3 shift control actuator bolts and shift control actuator assembly from the FCV transaxle with motor assembly.
Note
If dropped or subjected to a severe impact, replace it with a new one.
Tech Tips
-
Please refer to Service Bulletin for details on the removal procedure of the shift control actuator bolt.
-
This actuator is a precision instrument. Do not strike it with a plastic hammer or the like during installation.
-
This actuator detects its own position when the auxiliary battery is reconnected. Thus it does not require initialization.
-
-
-
REMOVE SHIFT CONTROL ACTUATOR SEAL
Tech Tips
Perform this procedure only when replacement of the shift control actuator seal is necessary.
-
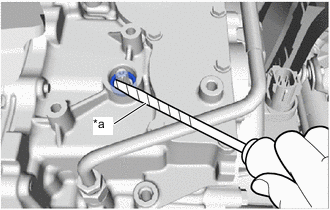
*a Protective Tape Using a screwdriver with its tip wrapped in protective tape, remove the shift control actuator seal from the FCV transaxle with motor assembly.
Note
When removing the shift control actuator seal, be sure not to damage the case or parking lock shaft.
-